Gingerbread Granola on Vanilla Bean Ice Cream

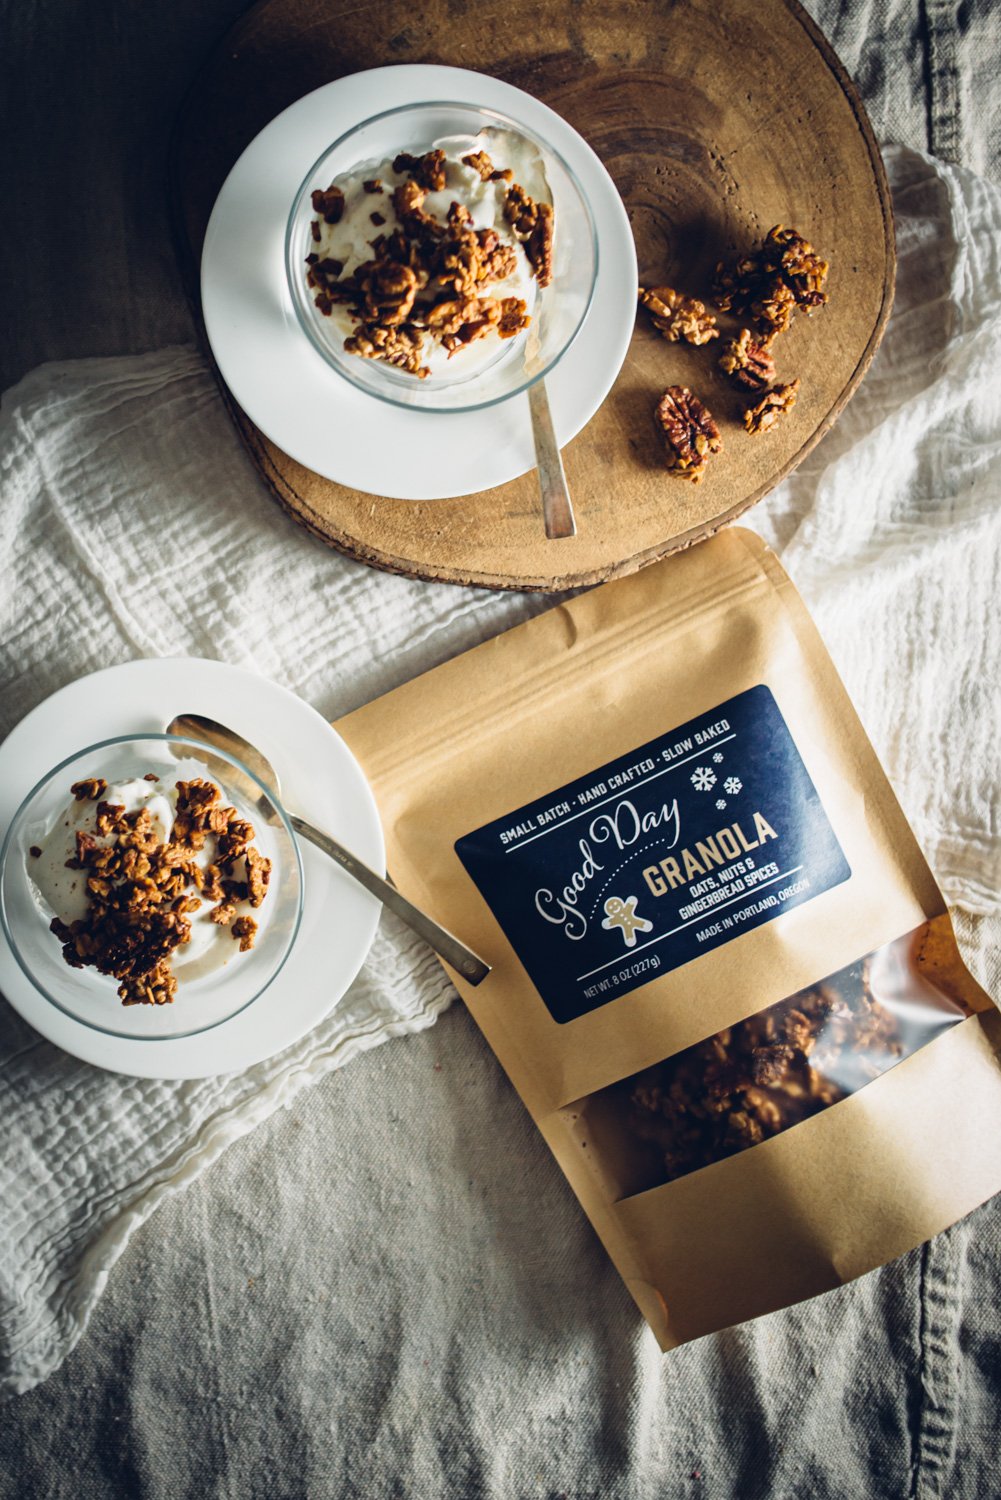
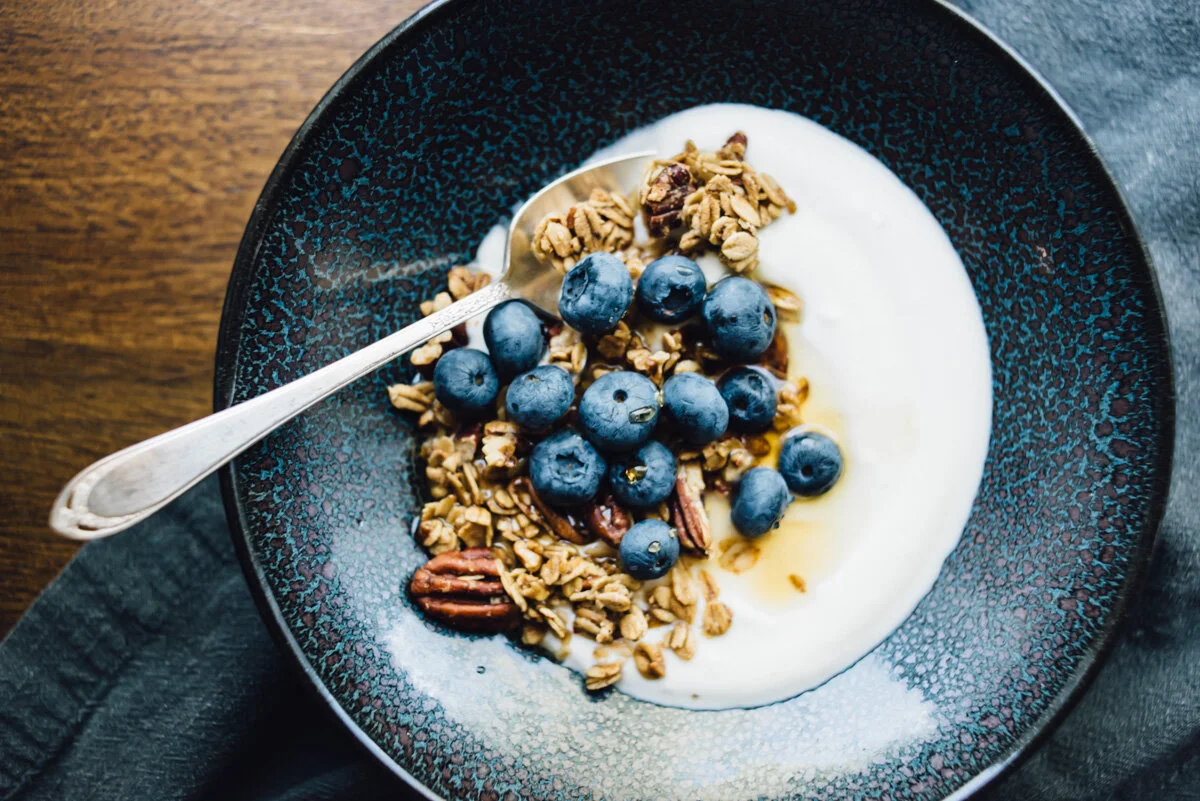
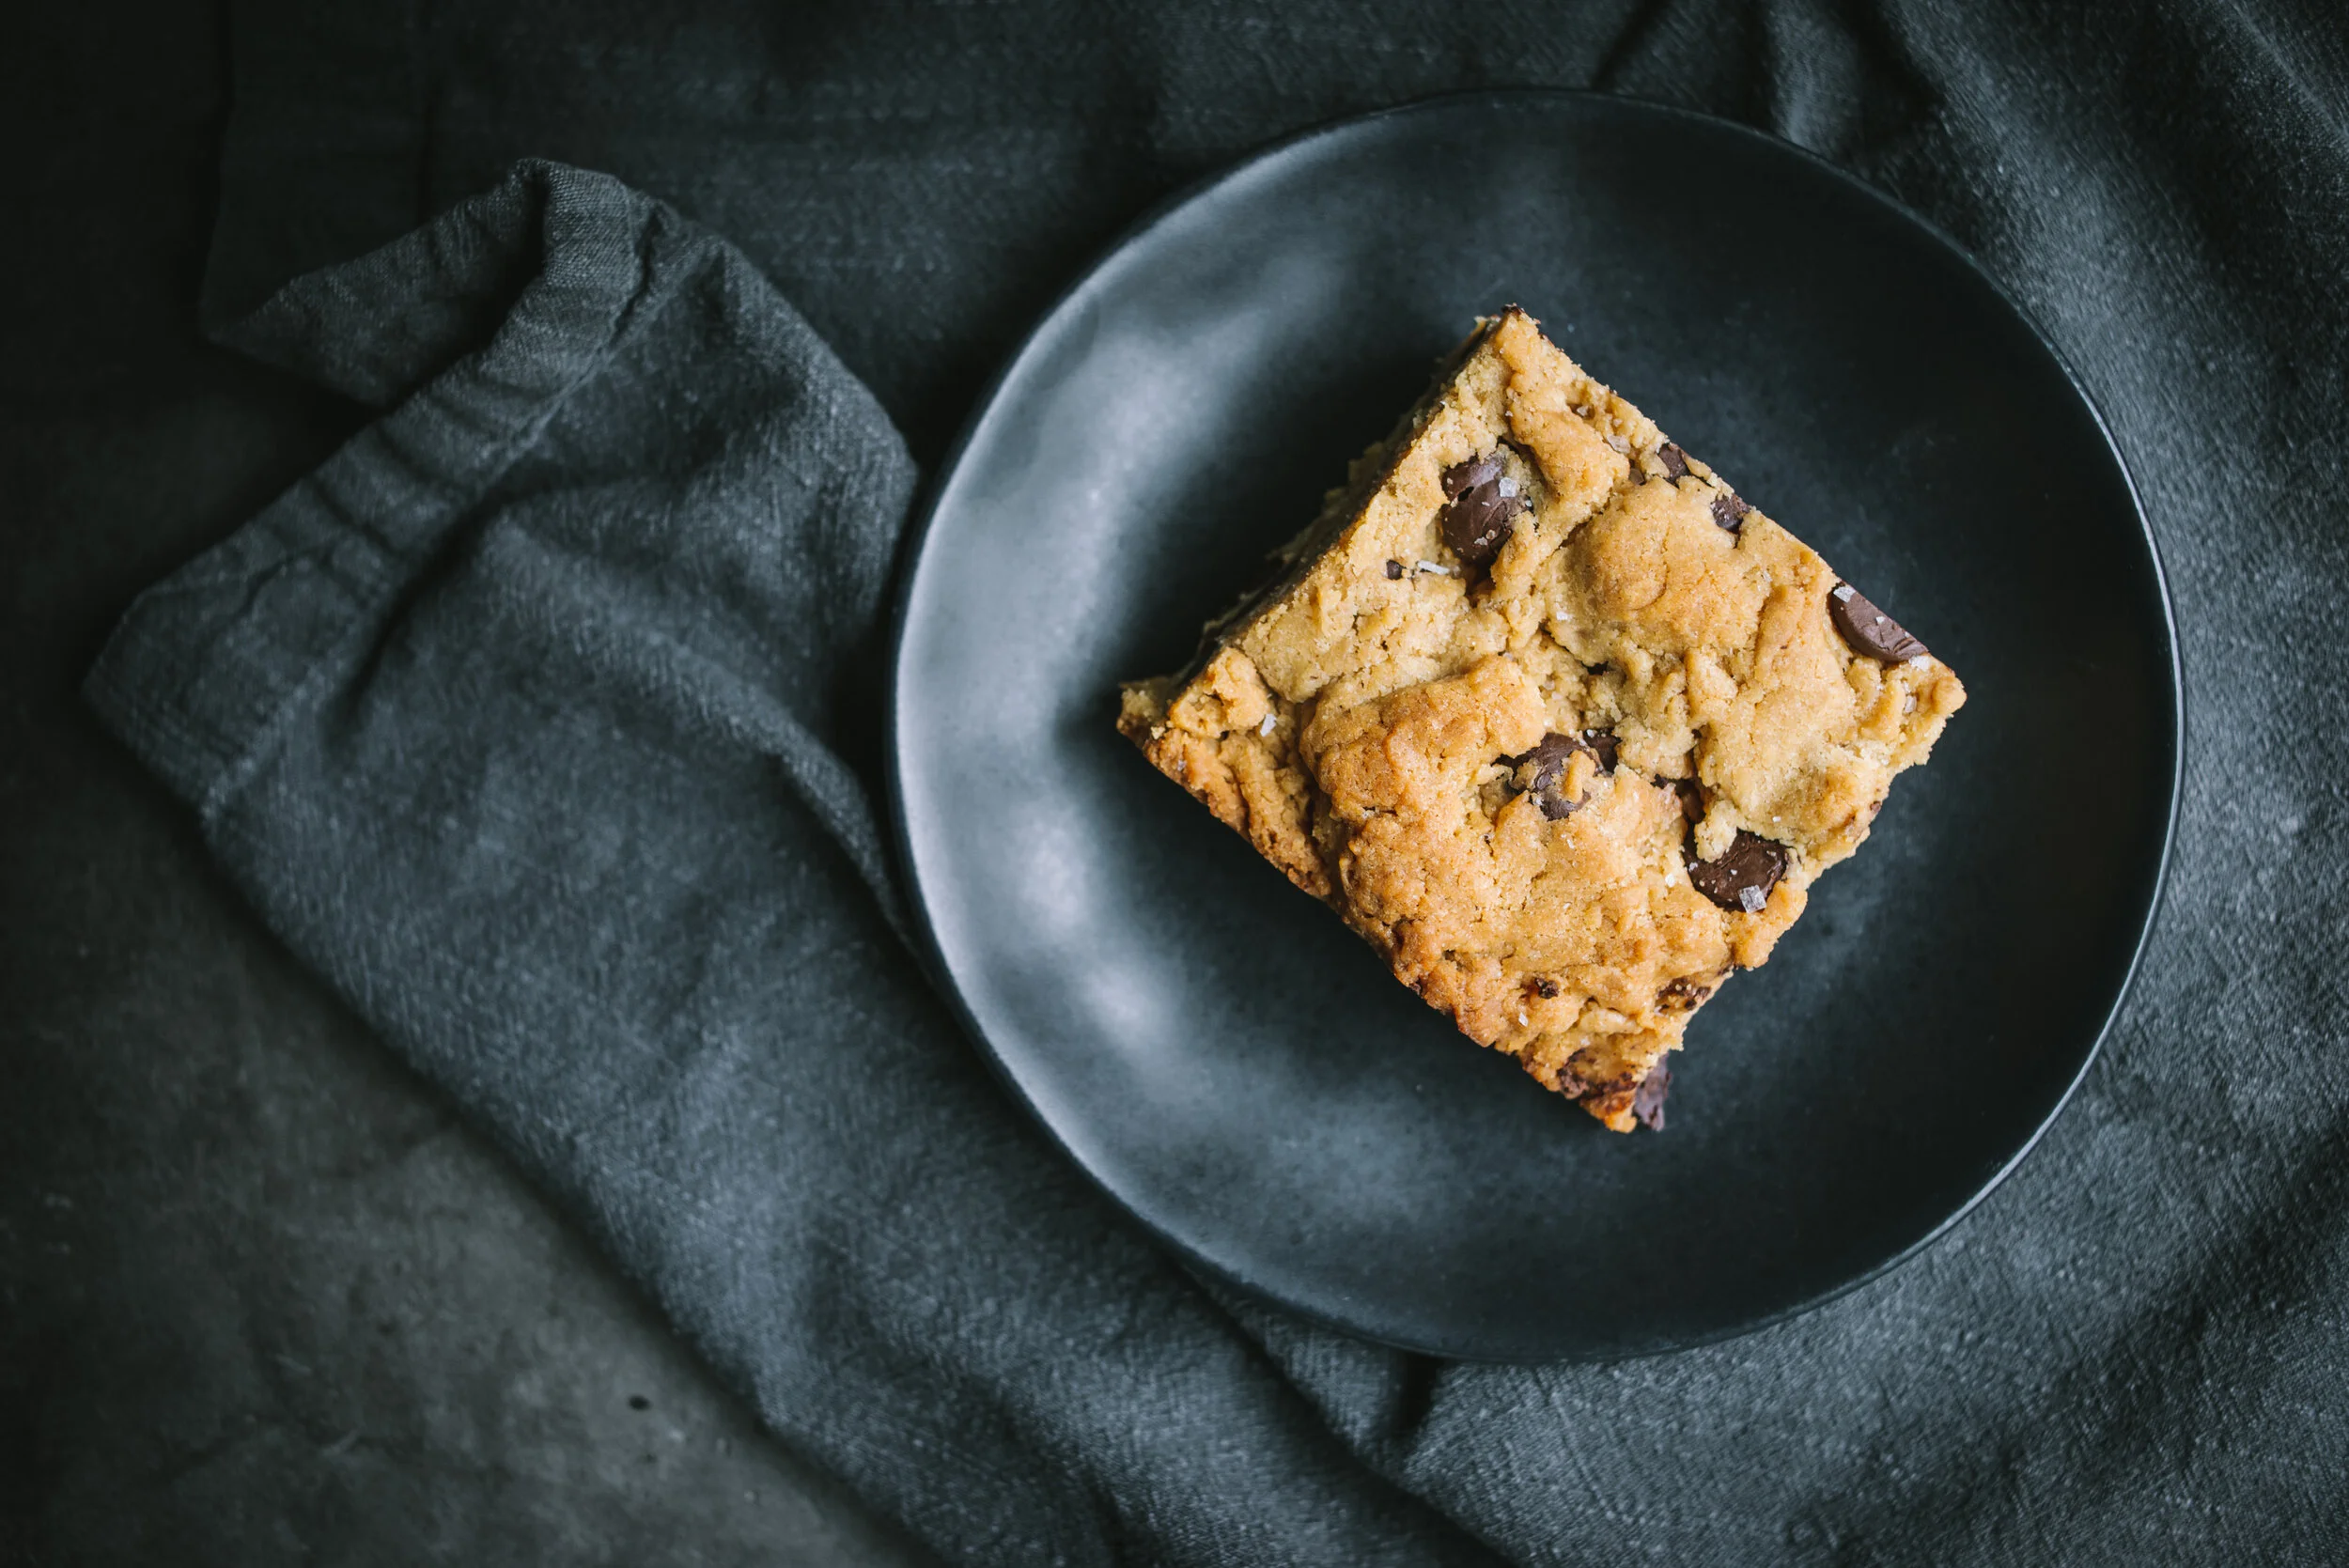
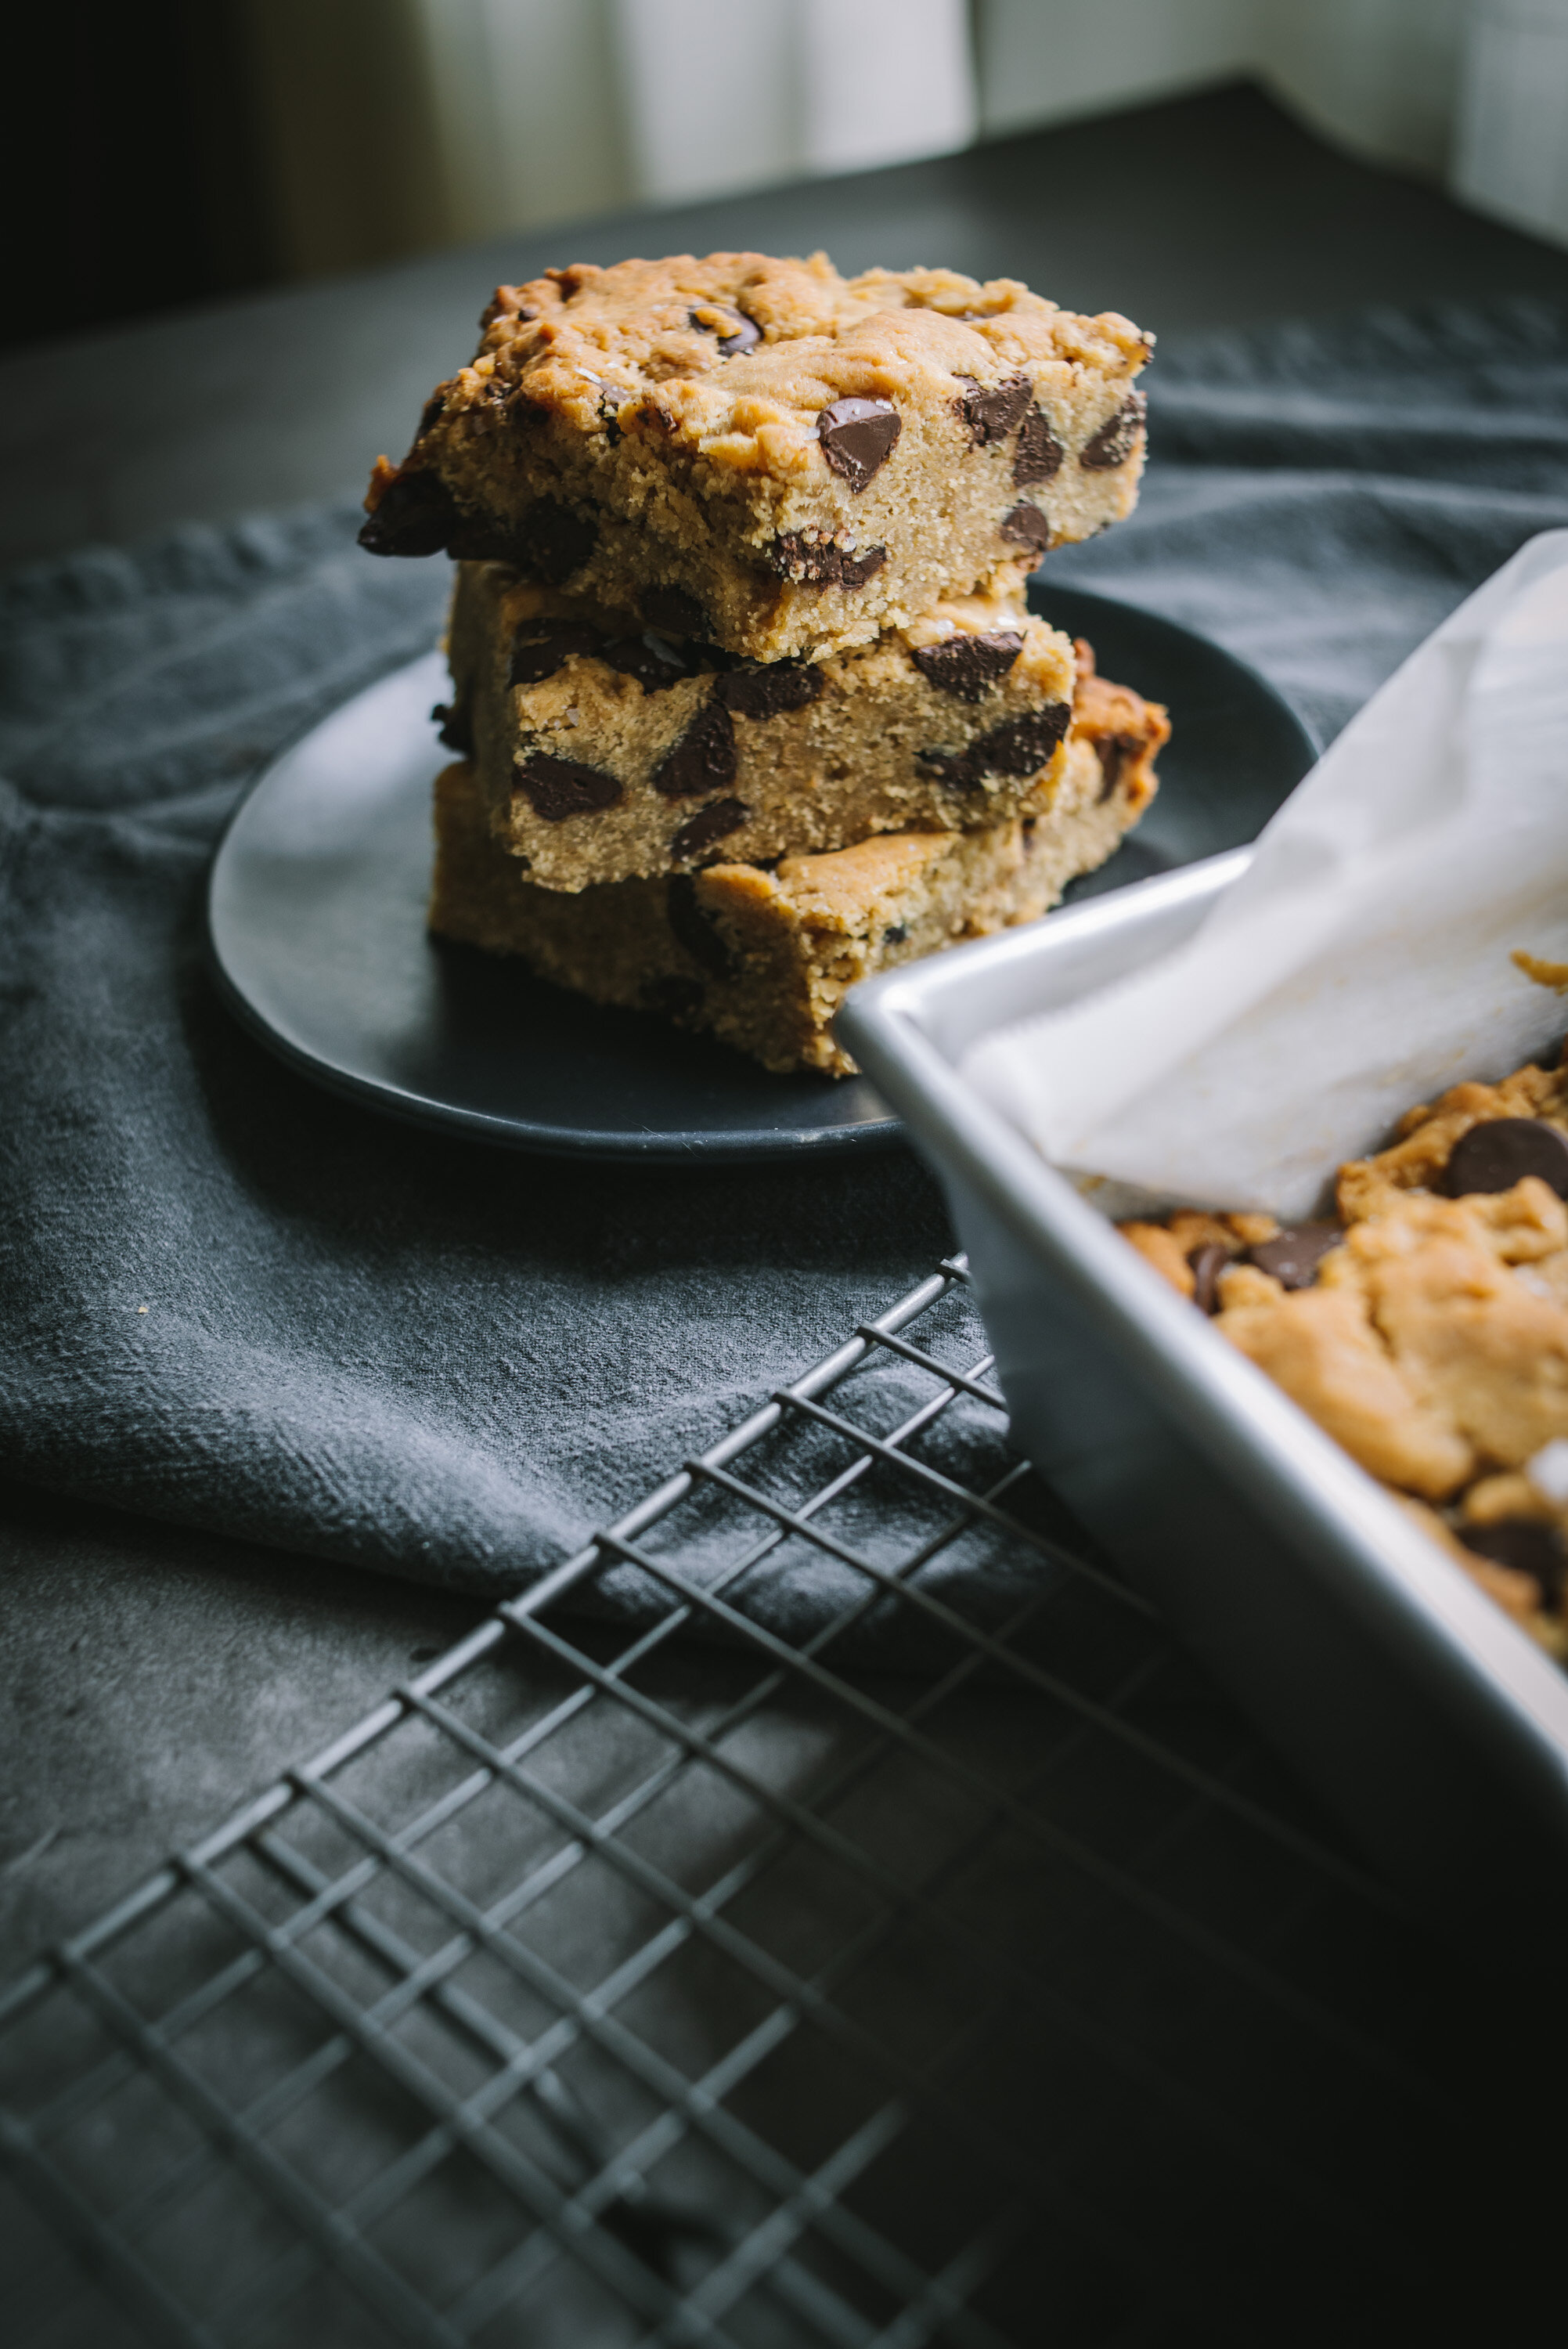
Hello! Wow, it’s been so long since I’ve done a blog post. I’ve been busy working on my granola business! Last spring I started baking the granola in my kitchen under the Cottage Food law, which has a lot of limitations on where and how you can sell your baked goods, can’t sell online, can’t accept credit cards, etc. I had been searching for a commercial kitchen all summer long and wasn’t finding one that was right, but then this fall I found one that’s a perfect fit for me. It’s not too far away, it’s not too expensive and it’s a plant-based kitchen. I’m not vegetarian but I don’t expect to be making anything other than the granola. I got my food processing license from ODA (Oregon Dept of Agriculture) and started baking there in November. There were some challenges at first but got it all worked out and I can bake so much more now at one time. My small batches baked at home really should have been called Micro-Batch Granola! This past fall I started seasonal flavors, September through November was Bourbon, Pecan, Pumpkin Pie Spice granola. Now through the end of February I’m making Gingerbread Granola. It’s so good! I especially like it on vanilla ice cream, but I think it would be good on Salted Caramel as well. This is a quick and easy dessert that tastes amazing.

I tried out a few gingerbread spice recipes before I got to the final flavor. I first tried it with Pfeffernusse cookie spices, I thought it would be really good but the flavors didn’t translate well to the granola. I’m happy with the final product and received a lot of positive feedback from customers.

It’s been quite a year, with challenges at every turn, but I’m loving the whole process and bringing this granola to everyone’s door. I got the website up only 3 weeks ago!

I’m running a promo now through the end of the year with 10% off all orders, promo code is SAVE10, if you’d like to try some tasty granola and support my small business. 

Oh and If you live in NE Portland I can deliver the granola for a $2 fee.

I hope to be vending in some new markets next month, there aren’t a whole lot during the winter months but they’re out there. I’ll post where I’ll be here.

Wishing you a great holiday and thanks for stopping by!

Blueberry Granola Loaf Cake

blueberry_granola_loaf_cake-2.jpg

Hi there. I’m excited to share some news with you! I’ve been making granola on repeat all through the pandemic. It tastes really good so I had an idea a few months back to package and sell it (locally, at least for now). I set up a page here on Pixels + Crumbs with more info on Good Day Granola. I’m looking to be a vendor at some of Portland farmer’s markets over the next few months and I’ll be updating that page as things progress. I was at a Maker’s market last weekend and I managed to sell quite a few bags of granola. I had a lot of fun and I’ve enjoyed the whole process from recipe development, branding and packaging to being a vendor. It was also great to be around people. I’m fully vaccinated at this point and it feels so liberating! I know it’s not 100% guarantee but it gives me peace of mind. Once I can bake in a commercial kitchen I’ll be able to sell online and I’ll be sure to let you know.

So moving on to this Blueberry Granola Loaf Cake. It’s similar to the Blueberry Lemon Yogurt Cake I made way back in the beginning of this blog. Here I used sour cream because I accidentally bought too much and had to use it. But you could use yogurt if that’s what you prefer. And the topping is granola! It works great on top of the cake and makes it a little more breakfasty.

One more thing, my cake took 1 hour and 20 minutes to thoroughly bake! Not sure why it took that long, it may have been the loaf pan I used, it’s cast-iron and really not the best for baking cakes like this, but I think it looks cute for the photos, lol, so I would recommend testing the center of the cake 50-60 minutes and take it from there. It might need to go longer. Enjoy!

blueberry_granola_loaf_cake-1.jpg

Blueberry Granola Loaf Cake 

  • 1 1/2 Cups all-purpose flour

  • 2 teaspoons baking powder

  • 1/2 teaspoon kosher salt

  • 1 cup sour cream

  • 1 cup sugar

  • 3 large eggs

  • 2 teaspoons lemon zest (about 2 lemons)

  • 1/2 teaspoon vanilla extract

  • 1/2 cup canola oil

  • 1 cup blueberries

  • 1 cup granola

Preheat oven to 350°. Grease loaf pan, line the bottom and longer sides with parchment paper and grease the paper with butter.

Whisk the flour, baking powder and salt in a medium bowl.

In a large bowl whisk the yogurt, sugar eggs, lemon zest and vanilla until well combined. 

Mix the flour mixture into the liquid mixture.

Fold in the oil with a rubber spatula until thoroughly mixed then fold in the blueberries.

Pour the batter in the the pan, top with granola and bake for 1 hour, checking at the 50 minute mark until toothpick comes out clean in center.

Remove from oven to baking rack and cool for about 10 minutes leaving it in the pan, remove cake from pan with the parchment handles and let cool another 10 minutes or so until just warm.

Peanut Butter Chocolate Chip Cookies

peanut_butter_chocolate_cookies-1.jpg

Here’s another treat to get you through the winter months. Peanut Butter Chocolate Chip Cookies! We had a big snow fall last week, 8-10 inches of snow (with a layer of ice sandwiched in-between) which is a big deal around here. The city practically shut down. Businesses closed. They don’t plow most streets because it’s… sort of rare, but not that rare! And they don’t use salt on the roads because it’s bad for the roads and the environment and will end up costing more money in the end with repair work. So you have to drive with chains on your tires or plan to walk to places, hunker down and light a fire. And maybe make some cookies if you have power. And we did! I couldn’t believe it. Huge snow/ice storm and we didn’t lose power. 

I was almost going to make the Peanut butter and Chocolate Blondies again, but they are so rich. Amazing as they are I really just wanted something a tad lighter. And these are just that. A little less butter, and a little less peanut butter. And also cookies, so rather than baked all at once in one pan, you can do as I did and bake small batches at a time. The dough stays fine in the fridge for a week and you can have fresh baked cookies in just a matter of minutes. Bake 6-12 cookies at a time. Whatever you want. Easy. You can freeze the dough as well if you want to take a break from cookie baking/eating. Since it’s just the two of us I find it makes more sense to do these small batch desserts. Some things freeze well post-baked and taste good defrosted, like cakes, but cookies? I think fresh baked is best.

The original recipe was named “Chewy” Peanut Butter Chocolate Chip Cookies, which mine were not, maybe because I used honey rather than corn syrup? I’m not sure. The only thing I changed here was that I used honey instead of Corn Syrup. But I don’t have corn syrup and didn’t have any plans to use it so I replaced it with honey. No complaints! These cookies were awesome! I would definitely make them again. Enjoy! And stay warm!

peanut_butter_chocolate_cookies-2.jpg
peanut_butter_chocolate_cookies-3.jpg
peanut_butter_chocolate_cookies-4.jpg
peanut_butter_chocolate_cookies-5.jpg
peanut_butter_chocolate_cookies-6.jpg

Peanut Butter Chocolate Chip Cookies

  • 1/2 cup butter, softened 

  • 1/2 cup peanut butter 

  • 1 cup packed brown sugar 

  • 1/2 cup white sugar 

  • 2 eggs 

  • 2 tablespoons honey

  • 2 tablespoons water 

  • 2 teaspoons vanilla extract 

  • 2 1/2 cups all-purpose flour 

  • 1 teaspoon baking soda 

  • 1/2 teaspoon salt 

  • 2 cups chopped semisweet chocolate 10 oz bag

Preheat oven to 375F° (190C°). Line a baking sheet with parchment paper.

In a large bowl cream together the butter, peanut butter, brown sugar, and white sugar until smooth. Beat in the eggs one at a time, then stir in the honey, water, and vanilla. In a separate bowl whisk together the flour, baking soda, and salt. Then stir the flour mixture into the peanut butter mixture. Fold in chocolate chunks. Drop by 1/4 cupfuls 3 inches apart onto the parchment-lined baking sheet.

Bake for 12 to 15 minutes in preheated oven, or until edges are golden. Allow cookies to cool for a few minutes on the cookie sheet before removing to wire racks to cool completely. Makes about 36 cookies.

Cranberry Orange Pecan Loaf Cake

cranberry_orange_pecan_loaf_cake-1.jpg

Cranberry Orange Pecan Loaf Cake. I had some fresh cranberries leftover from Thanksgiving and wanted to make some type of cake with them, I made a Cranberry Cobbler years ago but wanted something different, so here we are. This is such a great cake! I adapted the recipe from Sally’s Baking Addiction and made a few changes. For one, I melted the butter for the streusel, a lot of recipes say to use cold butter and crumble it into the flour and sugar, but sometimes I end up with flour that’s not quite mixed in with the butter after it’s done, I find it’s easier and more reliable to just add the sugar, spice and flour to melted butter. Also instead of buttermilk I used a mixture of greek yogurt and milk, and I added some Pecans to the recipe.

My baking time was a lot different than the 45 minutes to an hour suggested in the original recipe, it may have been due to the pan I used, a cast iron loaf pan, but in any case the total bake time for me was 1 hour and 20 minutes! It didn’t seem quite done after an hour so I took the temperature and let it go longer until it reached 200°. That worked! It’s a great cake, enjoy!

Oh and be careful out there friends, Covid-19 cases are going through the roof! We’re so close to getting a vaccine, it’s not that much longer, do your best to stay safe for you, your family, your neighbors, friends, we’re all in this together! 

cranberry_orange_pecan_loaf_cake-2.jpg
cranberry_orange_pecan_loaf_cake-3.jpg
cranberry_orange_pecan_loaf_cake-4.jpg
cranberry_orange_pecan_loaf_cake-5.jpg
cranberry_orange_pecan_loaf_cake-6.jpg
cranberry_orange_pecan_loaf_cake-7.jpg
cranberry_orange_pecan_loaf_cake-8.jpg

Cranberry Orange Pecan Loaf Cake

Streusel

  • 1/4 cup all-purpose flour

  • 2 Tablespoons granulated sugar

  • 1/2 teaspoon ground cinnamon

  • 3 Tablespoons salted butter, melted

Cake

  • 2 cups all-purpose flour

  • 1 teaspoon baking soda

  • 1/2 teaspoon salt

  • 1 large egg

  • 1/2 cup dark brown sugar

  • 1/2 cup granulated sugar

  • 2/3 cup milk

  • 1/3 cup greek yogurt

  • 1/3 cup vegetable oil 

  • 1 teaspoon pure vanilla extract

  • 2 teaspoons orange zest (about 1 orange zested)

  • 1 cup fresh cranberries (more for topping)

  • 1/2 cup crushed pecans (more for topping)


Glaze

  • 1/2 cup powdered sugar

  • 1 Tablespoon orange juice

Preheat oven to 350°F. Grease a 9×5 inch loaf pan with butter, line with parchment paper and butter that as well.

Make the streusel: Whisk the flour, sugar, and cinnamon together in a medium bowl. Add the melted butter and stir with a fork until combined. Set aside.

Make the cake: Whisk the flour, baking soda, and salt together in a large bowl. 

In a medium bowl, whisk the egg, brown sugar, and granulated sugar together until combined. Whisk in the milk, yogurt, oil, vanilla, and orange zest. 

Pour the wet ingredients into the dry ingredients, then fold with a rubber spatula to completely combine. Fold in the cranberries and Pecans.

Pour the batter into prepared loaf pan. Scatter the streusel on top, add a few cranberries and crushed pecans. Cover the baking dish with foil and bake for 35 minutes. Then remove foil and bake for an additional 25-45 minutes. Cake is done when cake tester or toothpick comes out clean (or at 200° temp, I started using a thermometer because sometimes it comes out clean and it’s not bake all the way through!)

Cool bread completely in the pan set on a wire rack. Then remove using your “parchment handles” onto serving plate or board.

The glaze! In a small bowl, whisk the powdered sugar and orange juice together. Drizzle over cooled bread.

Slice and serve. Cover and store leftover bread at room temperature for 1 day or in the refrigerator for up to 1 week.

Adapted from Sally’s Baking Addiction

Oatmeal Raisin Molasses Cookies

oatmeal_Raisin_molasses_cookies-1.jpg

First. Election. If you’re voting by mail and haven’t yet, please drop your ballot in a ballot box or at your local election ballot drop-off location, more info here! So you are sure your vote will be counted! Late ballots by mail might not be counted if they’re received late and your vote really does matter!

So cookies. I’ve been meaning to try out this recipe for a while. We had some incredibly good cookies from Costco recently, their oatmeal raisin cookies were amazing. I could taste the molasses. So I ventured onto this recipe. It’s really good! But it’s definitely heavier on molasses than the ones I had from Costco. Still, this recipe makes a great cookie, it’s chewy and falls somewhere between oatmeal raisin and gingerbread. I love molasses and wonder why I don’t bake with it more? I made a few adjustments with butter and sugar but I think you will like it.

And so, you know, we have this election coming up (which is a big freakin’ deal!) but I feel remarkably calm about it. I really think that Biden is going to win. I do. Obviously I could be totally wrong, but… everything is telling me that he is going to win. Trump will blame everyone and everything possible, because of course nothing is ever his fault according to him. But man, I want that moment next week where the American people can say to Trump: “You’re Fired!”

I want that so bad.

I didn’t expect Joe Biden to be the one that could make this happen. But the people have spoken and here we are, which I’m totally ok with. And also, Kamala Harris! Here we have a woman (also POC) running as vice-president and it’s like not even a big deal! How awesome is that?! :) I’m old enough to have voted for Geraldine Ferraro in 1984 and it’s kind of incredible that there has not been one woman on the Presidential ticket since then, with the exception of Hillary in 2016, but really, why not?

Let’s hope I’m right.

Good Vibes going into this. And good cookies to get us through. We can do this. #votebiden

oatmeal_Raisin_molasses_cookies-2.jpg
oatmeal_Raisin_molasses_cookies-3.jpg
oatmeal_Raisin_molasses_cookies-4.jpg
oatmeal_Raisin_molasses_cookies-5.jpg
oatmeal_Raisin_molasses_cookies-6.jpg

Oatmeal Raisin Molasses Cookies

  • 1 1/2 cups raisins

  • 1/2 cup unsalted butter

  • 3/4 cup sugar

  • 3/4 cup brown sugar

  • 2 large eggs, room temp

  • 1/2 cup molasses

  • 2 cups rolled oats

  • 1-3/4 cups all-purpose flour

  • 1 teaspoon baking soda

  • 1 teaspoon salt

  • 1 (heaping) teaspoon cinnamon

Plump the raisins, place raisins in a bowl, cover with boiling water and let stand for 5 minutes. Then drain and set aside.

In a large bowl (or stand mixer) beat together the butter and sugars until light and fluffy. Add eggs one at a time, beating well after each. Beat in molasses. In a separate bowl whisk together the oats, flour, baking soda, salt and cinnamon. Gradually add the oat mixture to the butter mixture with a wooden spoon and mix well. Stir in raisins.

Place a tablespoon of cookie dough 2 inches apart onto parchment lined baking sheet. Bake at 350° for 12-14 minutes (mine were done in 14 minutes). Remove from oven and let cool a few minutes, then transfer to cooling rack. This recipe makes a lot of cookies! 5 dozen at this size cookie. I make a couple batches then refrigerate the rest of the dough. You can also freeze the dough so you can make the cookies at your own pace. 

Recipe adapted from Taste of Home

Homemade Greek Yogurt

homemade_greek_yogurt-1.jpg

I’ve been wanting to get this Homemade Greek Yogurt up on the blog for a while now as I’ve been making it on repeat for the past few months, along with this granola and focaccia, all three are so good, and so much better than store bought. They’re all made with basic ingredients that you would have on hand. This yogurt is very easy to make with an Instant Pot, it just takes time. Your hands-on time is maybe 30 minutes total, but beginning to end it takes about 12 hours.

As for milk, I’ve been buying organic whole milk. I get organic because it lasts much longer in the refrigerator. The days of running out to the store for a half-gallon of milk are over for now, so I always try to have an extra tucked in the back of the refrigerator. 

The first time you make this you’ll have to keep an eye on the cool down part until you know how fast your yogurt is cooling. I use an ice bath and it takes 15 minutes. If you don’t use an ice bath it can take an hour or longer to cool down, and you will have to keep checking the temperature over and over again. So for me it’s easier to do an ice bath and set a timer and be done with it.

I generally start this in the evening so that it can incubate overnight. It’s nice to wake up in the morning and have something done! I do that with the Focaccia as well, I let it rise overnight and bake it in the morning.

The only thing that makes “Greek yogurt” different from regular yogurt is that it’s strained (notes in recipe). It’s richer and creamier. It takes a little more time, but it’s worth it. 

homemade_greek_yogurt-2.jpg
homemade_greek_yogurt-3.jpg
homemade_greek_yogurt-4.jpg
homemade_greek_yogurt-5.jpg

Homemade Greek Yogurt

  • 1/2 gallon of whole milk (8 cups)

  • 2 tablespoons yogurt 

Essential Equipment

Boil

Pour the milk into the Instant Pot, cover the pot (the float valve position won’t matter) and set to yogurt, then press adjust (boil should appear in the digital display), it will take about 20-25 minutes to finish. When it’s done remove the pot and turn off the Instant pot. 

Cool down

You want to cool it down to 115°F. An ice bath helps speed up the process, without an ice bath it may take an hour or so, but what I do is put the instant pot in a 9x13 glass pyrex baking pan, load it up with ice, and it cools down in about 15 minutes. You’re aiming for a temp between 110°-115°.

Once it reaches that temp remove it from the ice bath immediately and place it on a towel, drying the bottom of the pot. 

Skim

Skim off the top skin and discard it.

Add Yogurt

Whisk in 2 tablespoons yogurt into the milk so it’s well combined.

9 hour incubation

Place the pot back into the Instant Pot, place your cover on and set to Yogurt. This defaults to 8 hours, I’ve found better results after 9 hours but it can be done in as little as 8 hours. Use the + button to increase the time (you can even go longer if you want, up to 12 hours).

Ready to strain

When the timer goes off, remove the pot. At this point you can refrigerate it and eat it as regular yogurt. But I highly recommend taking the next step and straining it, The texture is so much better!

Set out a large bowl or pot with a strainer over it (set it so there is space between the bottoms and it can strain properly), then put a large piece of cheese cloth over the strainer. Scoop out the yogurt into the cheesecloth. Fold the ends of the cheesecloth over the yogurt to cover. Place in the refrigerator for an hour or two. The longer you strain the thicker the yogurt will be. I really like the texture after an hour or a bit longer. I’ve let it strain for two hours and it was almost too thick, but you might like it that way! I would experiment with different strain times to see what you like best. Once it’s strained scoop out the yogurt into a container, whisk it until smooth and refrigerate, it will last a good 2+ weeks in the refrigerator. You can discard the whey (the liquid strained out) or you can keep in the refrigerator and use this to make more yogurt. I haven’t tried that but I read that it works just as well.

Peanut Butter and Chocolate Blondies

peanutbutter_chocolate_blondies-1.jpg

Peanut Butter and Chocolate Blondies. These are so good! I made them about a week ago and they’re all gone now. Jeff and I finished the last one today. The serving size I show here can be a bit much (or not!), so I ended up cutting the nine squares in half for 18 pieces total. It’s a nice snack size. I had been craving peanut butter and chocolate for like two weeks and I finally made this recipe. The original recipe was more of a thin bar, baked in a 9”x13” pan for 20 minutes, but I wanted something at least an inch thick so I baked them in a 9”x9” pan for about 40-45 minutes and they came out great. What I like about this recipe is that there is an extra layer of peanut butter inside, not a lot but enough to make it really good! 

I hope you are all getting along well, we’re fine here and I’ve been working on the garden a bit more, I’ve started some herbs and vegetables from seed, which I might blog about if it all works out, I’m learning all the time over here. But so far so good. It has been a bitch trying to buy seeds online, either no stock or way overpriced on Amazon, but my local nursery was well stocked with curbside pickup, and my neighbor gave me some seeds for Parsley, Dill and Cilantro. I used to buy starters for herbs, but some tend to bolt sooner than you want, so it’s better to just grow by seed and stagger the planting (seeding) so you always have a fresh harvest. 

This recipe is pretty easy and straight forward, like I said I used a smaller baking pan for a longer oven time and was really happy with the results. But you could try the 9”x13” dish for 20 minutes.

If you love chocolate and peanut butter you will love this! I do!

peanutbutter_chocolate_blondies-2.jpg
peanutbutter_chocolate_blondies-3.jpg
peanutbutter_chocolate_blondies-4.jpg
peanutbutter_chocolate_blondies-5.jpg

Peanut Butter and Chocolate Blondies

  • 1 1/2 sticks (3/4 cup) salted butter

  • 3/4 cup creamy peanut butter, divided into 1/2 cup and 1/4 cup

  • 1 cup light brown sugar

  • 1/2 cup granulated sugar

  • 2 eggs

  • 1 tablespoon vanilla extract

  • 2 cups all-purpose flour

  • 1 teaspoon baking powder

  • 1 cup semi-sweet chocolate chips

  • flaky sea salt

Preheat the oven to 350 degrees F. Grease a 9x9 inch baking dish lined with parchment paper.

In a medium sized pot melt together the butter and 1/2 cup peanut butter over a medium heat on the stove, stirring frequently until melted. Stir in the brown sugar, sugar, and vanilla, transfer to a large bowl and then whisk in the eggs gradually to temper them so that they don’t cook. Stir in the flour and baking powder until well combined. Transfer the bowl to the freezer and chill 5 minutes or the refrigerator for 15 minutes, until the dough is no longer warm to the touch. Stir in the chocolate chips. 
Spread 1/2 the dough out in the prepared dish. Dollop and swirl the remaining 1/4 cup peanut butter over the dough. Add the remaining dough overtop, don't worry if it doesn’t fully cover the peanut butter. Transfer to oven and bake for 40-45 minutes, until set in the center. Remove from the oven and sprinkle with sea salt. Let cool and then cut into bars. Store for up to 5 days in an airtight container.

Adapted from Half Baked Harvest

Raspberry Pistachio Oat Scones

raspberry_pistacio_oat_scones-1.jpg

I haven’t made scones in a long long time. There are a couple recipes here in the archives but I haven’t made them like this before. Last week I saw Teresa posted this recipe on Instagram and it sounded really good. Plus I still have raspberries in the freezer from last summer’s harvest! I had to rinse and defrost them so they basically mushed into the batter, but not a big deal as they really tasted great. Two things I like about this recipe. 1. there is no added sugar other than maple syrup, and 2. I really like the texture of the oats in the scones. This recipe was also different in that you have sort of a shaggy loose dough, so you form it in a circle on your baking sheet, then pre-cut the slices (but not separating them), bake, then slice them apart afterward. The recipe was super easy and like I said I think it tastes great, these are not the dried out scones of yesteryear. You know what I mean? Like the ones Larry David prefers? Have you been watching the most recent Curb Your Enthusiasm? I’m trying to find a link to the scone scene, but all I can find is this part where he wants to open a spite store next door to Mocha Joe’s after being banned from there, and he thinks he knows what is the BEST scone to serve at his new spite cafe. Anyway it’s pretty funny because his scones are dry as the Sahara and nobody likes them. I promise these are not dry scones. Also, there’s an optional glaze I’ve included below in the recipe, I didn’t use it and kinda like this barely-sweet scone. However if you’re wanting something sweeter be sure to top them with the glaze. Enjoy!

raspberry_pistacio_oat_scones-3.jpg
raspberry_pistacio_oat_scones-2.jpg
raspberry_pistacio_oat_scones-4.jpg

Raspberry Pistachio Oat Scones

  • 1 cup all-purpose flour

  • 1 cup oats

  • 1 tablespoon baking powder

  • 1/2 teaspoon salt

  • 4 tablespoons butter, softened almost melted

  • 1/4 cup pure maple syrup

  • 1 tablespoon vanilla extract

  • 1 large egg

  • 1/4 cup whole milk greek yogurt

  • 1 cup raspberries

  • 1/2 cup chopped pistachios

Preheat oven to 400°F. Line a baking sheet with parchment paper and set aside. 

In a large bowl whisk together flour, oats, baking powder and salt in a bowl. Set aside.

In a separate bowl whisk together the butter, maple syrup, vanilla extract, egg, and whole milk yogurt.

Add the wet ingredients to dry ingredients and stir to combine with a wooden spoon. Gently fold in raspberries and pistachios. They will get a bit smushed. (mine did a lot!)

Place batter on top and round it into a disk shape. Batter will be sticky. Cut into 6-8 pieces (depending on the size of scone you want, I did 6) so when they come out of the oven you can run the knife through again to fully separate. 

Bake for 20-25 minutes, rotating the sheet half-way through to ensure even cooking. When done, they should be slightly firm. Finish cutting and enjoy! (They can keep on the counter, covered, for one day, but I recommend refrigerating any more than that because of the fresh fruit)

Glaze (optional)

  • 1 cup powdered sugar

  • 4-5 tablespoons milk

  • 1/2 teaspoon vanilla extract

Whisk together all the ingredients until smooth and drizzle over cooled scones.

Adapted from @aloveafare

Crispy Thin Chocolate Chip Cookies

crispy_thin_chocolate_chip_cookies-1.jpg

Crispy Thin Chocolate Chip Cookies. I’ll tell you right now, this recipe is a keeper! I’ve been eager to make these cookies ever since I saw David Lebovitz’s blog post recently. I’ve made chocolate chip cookies before, you might remember my 2-ways post back a few years ago with that giant cast-iron pan cookie! And while those are good, these are much much better. These are absolutely delicious. They’re similar to Tate’s Chocolate Chip Cookies. What makes them thinner and crisper? I compared the two recipes and while they’re quite similar in ingredients, this one here has less flour, less egg and the addition of water. Water? Maybe that’s the secret ingredient! 

In any case I made a couple changes, using dark brown sugar rather than light brown sugar, I think it works fine. And I chopped up 7 ounces of 72% Cacao dark chocolate bars rather than using chocolate chips, it’s up to you but I like the big chocolate pieces in the cookie. David has the dough balls scooped out around a 1/4 cup each, I think that might be too much, I used a heaping tablespoon of cookie dough, rounded it out into a ball and they were pretty large, you can see from my photo below that even spacing them out a lot they still ran into each other. You basically want a 1”-1 1/4” ball. I got out my big-ass baking sheet on the next round so they had plenty of room to spread. The following batches I went for more of a 1” size ball. And all of them were done more close to 15 minutes. Not only will the time depend on the size of the cookie, but if the cookie dough is left out of the fridge longer they might be done a minute or two sooner. So keep an eye on them towards the end.

It’s January which marks the 7th anniversary of this blog! I can’t believe I’m still doing this, lol. I’ve learned a lot and have become much more comfortable cooking and baking and of course photographing the whole business. Much thanks to those that stop by to see what I’m up to, I appreciate your comments and such. I know blogging is not so much a thing these days but personally appreciate everyone out there that’s sticking to it and sharing recipes, how-tos and all that. The internet has become so toxic over the years, sometimes it’s nice to just chill out and read about cookies. I have quite a few recipes I want to share with you over the next few weeks, some of my favorites that have been on repeat. I think you’ll enjoy them. Speaking of enjoy, please please make these cookies, you won’t be disappointed.  David’s recipe is adapted from Joanne Chang’s Pastry Love: A Baker’s Journal of Favorite Recipes.

crispy_thin_chocolate_chip_cookies-2.jpg
crispy_thin_chocolate_chip_cookies-3.jpg
crispy_thin_chocolate_chip_cookies-4.jpg
crispy_thin_chocolate_chip_cookies-5.jpg
crispy_thin_chocolate_chip_cookies-6.jpg
crispy_thin_chocolate_chip_cookies-7.jpg
crispy_thin_chocolate_chip_cookies-8.jpg
crispy_thin_chocolate_chip_cookies-9.jpg
crispy_thin_chocolate_chip_cookies-10.jpg

Crispy Thin Chocolate Chip Cookies

  • 8 ounces (225g) (2 sticks) unsalted butter, at room temperature

  • 1 cup (200g) superfine sugar (or put regular sugar in blender for a few seconds)

  • 1/2 cup (100g) firmly-packed dark brown sugar

  • 1 large egg, at room temperature

  • 3 tablespoons (45g) water

  • 2 teaspoons vanilla extract

  • 1 3/4 cups (245g) flour

  • 1 1/4 teaspoon flaky sea salt or kosher salt (if using Morton's kosher salt, use 3/4 teaspoon or 1 teaspoon for more profound saltiness)

  • 1 teaspoon baking soda

  • 1 1/2 cups (280g, 7-10 ounces) bittersweet or semisweet chocolate (chopped or chips)

In a stand mixer fitted with the paddle attachment beat the butter and sugars on medium speed until light and creamy, about 5 minutes. Or use a hand mixer, doing this by hand will wear you out and take much much longer.

Stop the mixer and scrape down the sides with a rubber spatula, add in the egg, water, and vanilla and mix until well combined.

In a medium bowl mix together the flour, salt, and baking soda. Add the chopped chocolate and toss in the flour mixture. With the mixer on low speed, stir in the flour and chocolate chunk mixture until thoroughly combined. Cover the bowl (or transfer to a container and cover) refrigerate the dough at least 3 to 4 hours, or overnight.

To bake the cookies, preheat the oven to 350ºF (180ºC). Line two large baking sheet with parchment paper. Arrange the dough, formed in 1-inch to 1 1/4-inch balls on the baking sheet, spaced at least 3-inches (8cm) apart. (They will spread, so expect to get 5 or 6 on a standard baking sheet.) Press the cookies down slightly with your hand and bake until the cookies have spread and just until there are no light patches across the center, rotating the baking sheet(s) midway during baking so they bake evenly. They'll take about 13-15 minutes, check the cookies a few minutes before the timer goes off and see if they need longer. The time will depend on the size of the cooker, larger will take a bit longer but only a minute or two more.

Remove the cookies from the oven and let cool for 5 minutes. Transfer the cookies to a wire rack and cool completely.

Storage: The dough can be refrigerated up to four days, or frozen for up to three months. The cookies will keep in an airtight container for up to three days but are best the day they are baked.

Adapted from David Lebovitz who adapted it from Joanne Chang

CBD Coconut Bites

CBD_coconut_haze_snack-1.jpg

CBD Coconut Bites. Depending on where you live you might be seeing more CBD food and drinks around these days, which can be very expensive! But you can make your own for a fraction of the price. I’ve been making these for a while now, I was trying to get the right amount so that you could just have one piece, but I think two is better for the calming effects. A while back I worked with a hemp farm in Southern Oregon and posted the recipe for making your own CBD coconut oil which is pretty easy. Once you have that done these come together in no time. Recently I made them using a regular size muffin pan and they came out more like a peanut butter cup size and produced six pieces. The mini muffin pan will give you a dozen. They’re delicious, and pretty healthy too, made with CBD coconut oil, honey, chocolate, oats, nuts, good stuff. I’m looking forward to more CBD recipe development in the year ahead! Recipe below, enjoy!

CBD_coconut_haze_snack-2.jpg
CBD_coconut_haze_snack-3.jpg
CBD_coconut_haze_snack-4.jpg
CBD_coconut_haze_snack-6.jpg
CBD_coconut_haze_snack-7.jpg
CBD_coconut_haze_snack-8.jpg
CBD_coconut_haze_snack-9.jpg
CBD_coconut_haze_snack-10.jpg
CBD_coconut_haze_snack-11.jpg
CBD_coconut_haze_snack-12.jpg

CBD Coconut Bites

  • 1/3 cup (1.5 oz) Dark Chocolate, chopped in small bits

  • 1/3 cup  (1.5 oz) dry roasted hazelnuts

  • 1/4 cup Cocoa powder

  • 1/8 teaspoon kosher salt

  • 1/4 cup toasted oats

  • 1/3 cup CBD coconut oil

  • 3 tablespoons honey

  • 1/4 cup toasted coconut

In a non-stick skillet toast the oats until golden and set aside, then toast coconut for a minute or two until golden brown, set aside to cool.

Line a mini muffin pan with paper liners for 12 pieces, or regular size muffin pan for 6 pieces.

In a food processor place the nuts, cocoa and salt. Pulse a few times until the nuts are roughly chopped.

Place the CBD Coconut oil and honey in a medium pot and bring to a boil. Remove from heat and stir in the chopped chocolate until mostly melted, then stir in the nut mixture and toasted oats. 

Fill each cupcake tin with the mixture and top with toasted coconut flakes. Refrigerate for at least 1 hour or place in the freezer for 30 minutes. Store in refrigerator or cool place.