New Year’s Cherry Bourbon Cocktail

new_years_cherry_bourbon_cocktail-1.jpg

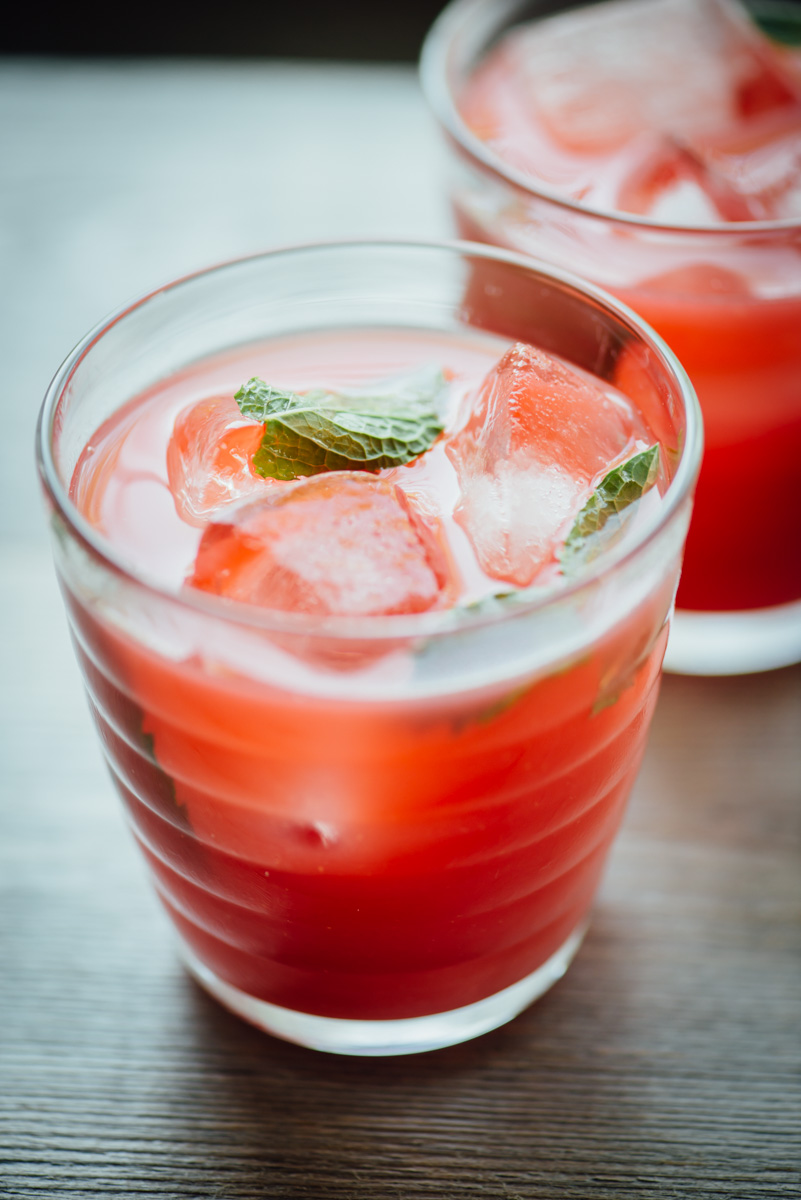
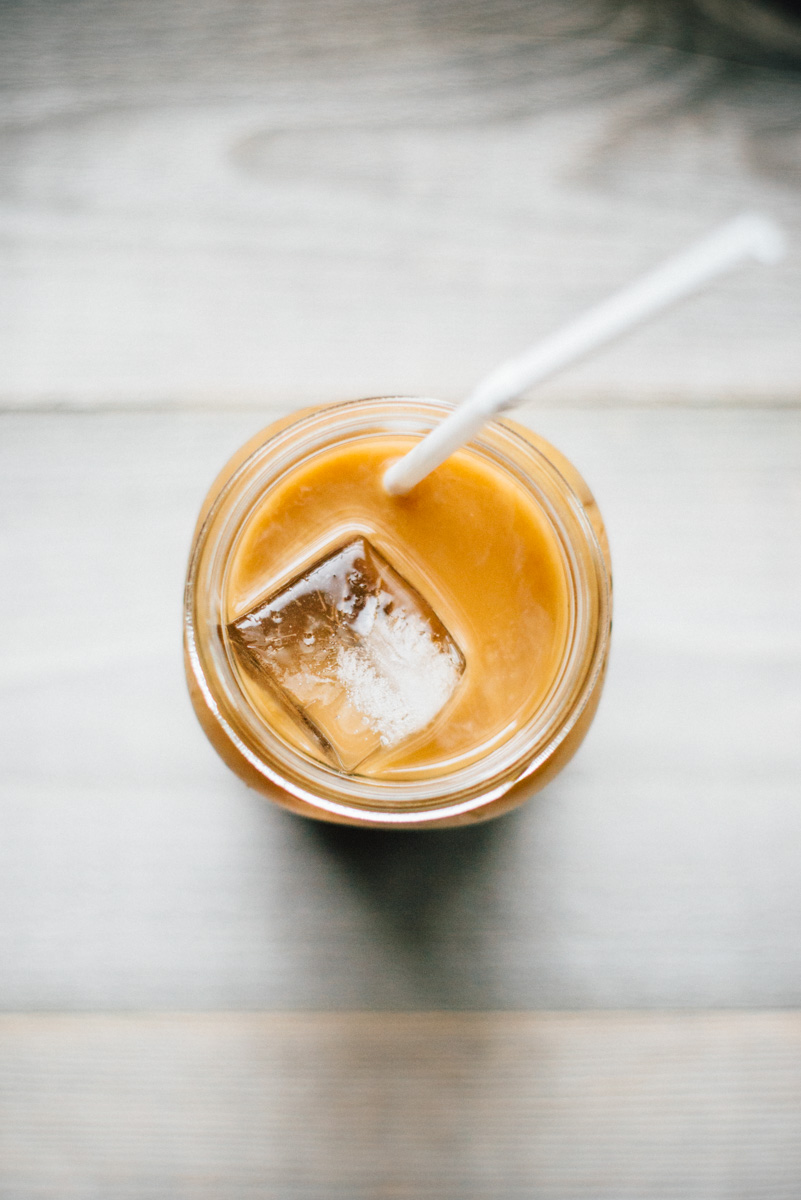
I was poking around our bookcase the other day and came across the book Imbibe! which I’ve never read, and still haven’t. But it did get me googling the author’s name David Wondrich, which brought me to Imbibe Magazine’s website (what a great site!) There are so many cocktail recipes it’s hard to pick one. I chose “The Dewberry Hotel’s Panic Button” definitely not for it’s name (although it's not hard to imagine a cocktail being named as such in 2017) but that it contained bourbon and two liqueurs that I’ve been wanting to try out for a long time. Amaro Averna, an Italian digestif, and Heering Cherry liqueur. I made the drink exact to the recipe, but it didn’t look like the drink in the article, however it tastes really good. Jeff thought it was sweet, but I didn’t find it too sweet, lots of earthy flavors with a taste of cherry that’s not overwhelming. I recommend using a large ice cube since they melt much slower than traditional ice cubes, here I used Tovolo Sphere ice molds, we have similar size large cube trays but these seemed to work nice for this style glass, plus they look like snow balls. Oh and just about the best maraschino cherries I’ve ever tasted are Bada Bing Cherries. Wishing you all well for the new year! Goodbye 2017, you were a really weird year. Cheers to 2018!

new_years_cherry_bourbon_cocktail-3.jpg
new_years_cherry_bourbon_cocktail-4.jpg
new_years_cherry_bourbon_cocktail-2.jpg
new_years_cherry_bourbon_cocktail-5.jpg
new_years_cherry_bourbon_cocktail-6.jpg

New Year’s Cherry Bourbon Cocktail

  • 1 1/2 ounce Bourbon
  • 3/4 ounce Amaro Averna
  • 1/2 ounce Campari
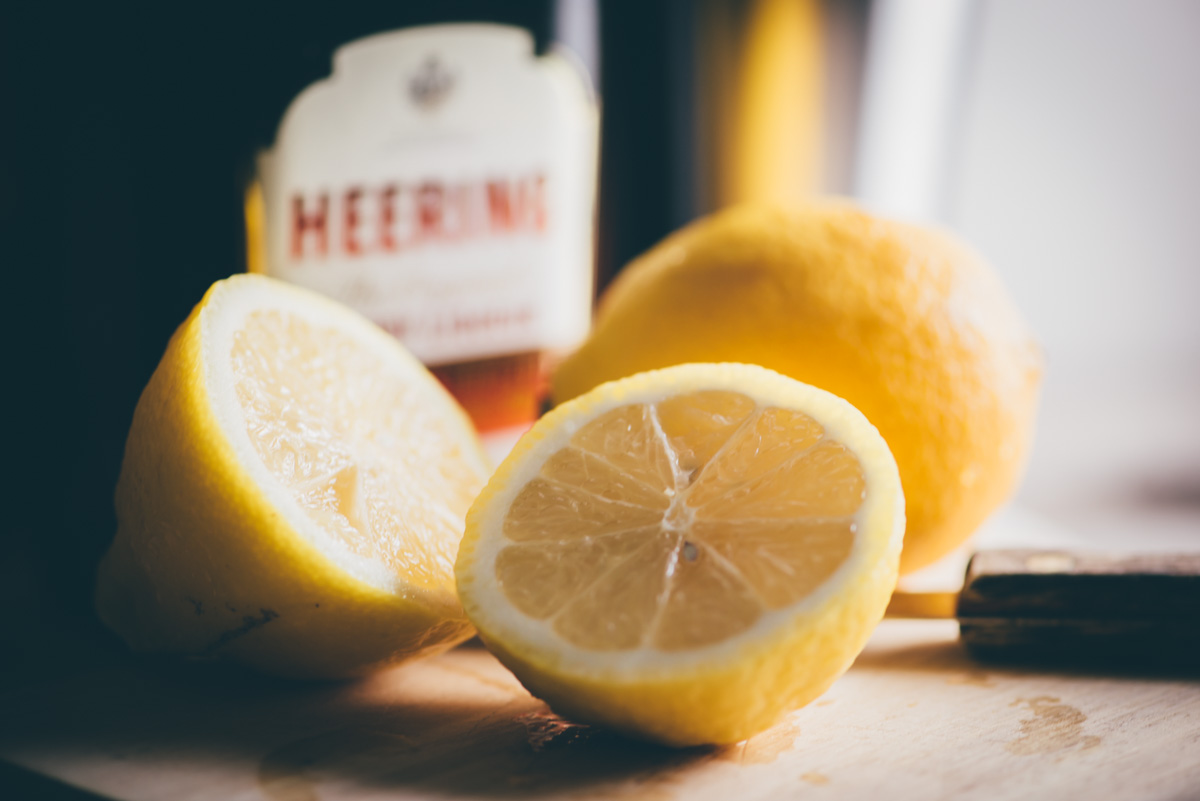
  • 1/2 ounce Heering cherry liqueur
  • 1/4 ounce fresh lemon juice
  • Large ice cubes or spheres
  • Maraschino cherries

Shake all the ingredients with ice to chill, then strain into a glass holding a single large ball or cube of ice. Garnish with cherry.

Recipe adapted from Imbibe Magazine

new_years_cherry_bourbon_cocktail-7.jpg
new_years_cherry_bourbon_cocktail-8.jpg

Apple Pie

apple_pie-1.jpg

As simple as it can be to make Apple Pie, I still found myself searching for a recipe last week. You might remember I’ve made a French Apple Pie, but it’s actually been a very long time since I’ve made a traditional Apple Pie. So here it is! And the pie crust here is really my favorite, it’s easy to roll out and work with, when baked it keeps it form nicely without falling apart and at the same time doesn’t taste like cardboard. The apples? For this pie I used King David apples that we picked up at an apple festival last month. I’m never sure which apples are which these days with so many varieties, is it good for baking? eating? This was a good choice, they didn’t mush up and had a really nice texture, some bite to it, with a spicy flavor. So thumbs up on the King David Apples. 

We had a lovely Thanksgiving for two this year. I made a turkey roulade - a turkey breast rolled with dried cherry and sausage stuffing. It was the third time I’ve made this and it works out really great for a small feast. It’s deserving of a blog post so I’ll just have to make it again. I’m sure Jeff won’t mind.

apple_pie-2.jpg
apple_pie-3.jpg
apple_pie-4.jpg
apple_pie-5.jpg
apple_pie-6.jpg

Apple Pie

  • 6-8 apples (peeled, cored and sliced)
  • Lemon juice, 1/2 lemon squeezed
  • 1/2 teaspoon cinnamon 
  • 1/2 teaspoon nutmeg
  • 1/4 teaspoon cardamom
  • 1/4 clove
  • pinch of salt
  • 1/4 cup sugar
  • 1/4 cup brown sugar
  • 1/4 cup flour
  • 2 tablespoons butter
  • 1 egg for egg wash 
  • 1 tablespoon or so Muscovado sugar (or large granulated sugar)

Pie Dough

  • 2 1/2 cups all-purpose flour
  • 2 tablespoons sugar
  • 1 teaspoon salt
  • 2 sticks (16 tablespoons) cold unsalted butter, cut into 1/2-inch cubes
  • 6 to 8 tablespoons ice water

To make the dough in a food processor, pulse together the flour, sugar and salt until combined, about 5 pulses. Add the butter and process until the mixture resembles coarse meal, about 5-7 pulses (you don’t want to over work the dough too much or it will become tough.) Remove from processor and place dough in large bowl, add 6 tablespoons of the ice water, combine with wood spoon. The dough should hold together when squeezed with your fingers but should not be sticky. If it’s crumbly, add more water 1 tablespoon at a time. Turn the dough out onto a work surface, divide in half (I make one half slightly larger for the bottom crust) and shape each into a disk. Wrap separately with plastic wrap and refrigerate for at least 2 hours or overnight.


Filling and Assembly

Preheat oven to 375°F. 

In small bowl combine flour, sugars, salt and spices. In large bowl place sliced apples, squeeze lemon juice, then add flour mixture and toss until well combined. Set aside.

Roll out your bottom crust about 2-3” larger than diameter of pie dish, place in pie dish and trim around the edges. Add the apple mixture. Roll your top crust to fit, cut out any desired designs, place on top of pie, trim any excess and pinch the edges together with thumb and forefinger. Roll out any additional dough and use pie cutter to top with leaf or apple design. Adding a leaf pattern around the edges looks pretty. Whisk the egg in a small bowl and brush over top of pie, sprinkle some granulated sugar.

Bake for 45-50 minutes until brown. Allow to cool a bit before serving. It will slice better if you refrigerate and then bring to room temp. 

apple_pie-7.jpg

Also, I’m sorry to see these pie cutters are no longer available, I’m sure there are more out there but this was a nice selection of designs. 

Sous Vide Egg Bites

sous_vide_egg_bites-1.jpg

“Oh no! Not another kitchen gadget!” That was my response when Jeff suggested we get a Sous Vide. But the more I read about it the more I wanted it. The Egg Bites were fun and easy to make, but where the Sous Vide really excels is for cooking chicken breasts. Because of the precise temperature control the meat will cook remarkably consistent. And it’s also good for cooking steak followed by a quick sear. When I was researching what to make with the Sous Vide I came across this recipe for Egg Bites, apparently made popular by Starbucks. This recipe is for 6 servings, so you can make ahead, refrigerate and reheat them. It looks a bit like a science-lab, and with food sealed you can’t smell anything cooking so it tends to not feel like cooking at all. But the results are impressive and it’s been a good addition to our kitchen. One note on the jars, you want to make sure they are loosely secured so a little air can release (or they will explode!), when you tighten the lid, loosen it then tighten lightly with two fingers. If the jars float and will not stay on the bottom you will have to fix the lids, once they are sealed properly you will see some air bubbles rising and they will stay on the bottom of your container. The final result is a perfectly creamy cooked egg dish, similar to baked eggs, but not one part of it is overcooked. 

Oh and I just came across this article about Sous Vide which is pretty silly about men trying to impress women with their mad cooking skills, more interesting comments on David Lebovitz Facebook post here, it’s not for everyone or for every type of cooking, but it really is amazing for certain things like meat. And Egg Bites too!

sous_vide_egg_bites-2.jpg
sous_vide_egg_bites-3.jpg
sous_vide_egg_bites-4.jpg
sous_vide_egg_bites-5.jpg
sous_vide_egg_bites-6.jpg

Sous Vide Egg Bites

  • 6 eggs
  • 1/4 cup cream
  • 1/2 cup shredded cheese
  • 2 strips of bacon cooked, chopped
  • 1/4 cup Oven-dried tomatoes
  • Fresh basil (or any herb you like)
  • 6 four-ounce mason jars

Preheat water to 172°F

Butter mason jars and set aside. In a blender mix eggs and cream until combined. Use any variation of ingredients you like, I made three using cheese, oven dried tomatoes, basil, and three with Gruyere and bacon.

Place bacon, herbs, cheese in bottom of jars, pour egg mixture in each jar, top with a bit more cheese, loosely secure lids on jars, submerge in water (if the jars float the lids are on too tight, adjust and they should remain on bottom of container releasing air bubbles), cook for 90 minutes, remove from jars and serve or place in refrigerator for up to 1 week. 

Adapted from Anova

sous_vide_egg_bites-7.jpg

Montana Hiking Bar

montana_hiking_bar_gnp2.jpg

A couple of weeks ago we went to visit Glacier National Park in Montana and it was really spectacular. The day we were heading out to Many Glaciers on the east side of the park, we stopped by this bakery in East Glacier for a bite to eat. if you’re in that area it’s worth a visit. They had a hiking bar that was so good it inspired me to make my own. They also had some braided pastry with spinach and sun dried tomatoes that was absolutely delicious. 

We drove along the Going-to-the-Sun Road where you will find many trail heads to stop and explore. It’s an absolutely beautiful ride. I thought it might be a little scary driving the road since it’s narrow with huge drop offs on the side of the mountain, but most of the way they have barriers, and where there isn’t (gasp) just look at the road or the scenery. I have some fear of heights but luckily it didn’t freak me out.

Going-to-the-Sun Road

Going-to-the-Sun Road

glacier_national_park_2.jpg

Many Glacier Swiftcurrent Lake. This is definitely a destination and it's worth planning to spend some time here since it’s far away from other areas in the park, and you’re almost in Canada!

Swiftcurrent Lake at Many Glacier

Swiftcurrent Lake at Many Glacier

Saint Mary Lake. I didn’t know until after we were back, but this is where the opening scene of The Shining is filmed, and that scene ends with the Timberline lodge at Mount Hood here in Oregon.

Saint Mary Lake

Saint Mary Lake

Trail to Virginia Falls and Saint Mary Falls, the forest burned due to a fire in 2015, and it wasn’t what I was expecting, the trail description was “Soon the trail enters the canopy of a dense conifer forest…” I hadn’t realized how much of the park burns every year, almost always due to lightning. But it was quite striking and beautiful with the black trees and colorful new growth.

glacier_national_park_5_1.jpg
glacier_national_park_5.jpg
Virginia Falls

Virginia Falls

glacier_national_park_7.jpg
glacier_national_park_8.jpg

Avalanche Lake. This is a beautiful hike with creeks along the way through the forest, it starts at Trail of the Cedars and brings you to Avalanche Lake where you can take a rest and enjoy the views. The trail is considered moderate, it’s about 2 miles climbing up but it’s not too steep and fun on the way back down. There were bears spotted not too far from where we were, and while it was tempting to go further and see them, we took the advice of going in the opposite direction of where the bears are.

Avalanche Lake

Avalanche Lake

glacier_national_park_trail_9_1-1.jpg
glacier_national_park_9_2.jpg
glacier_national_park_10.jpg

Hidden Lake Nature Trail from Logan Pass. It was our last day in the park and we had to be back in Whitefish early evening to get something to eat before catching the train back to Portland. When we arrived at Logan Pass parking lot it was packed, apparently you have to get there around 8am for easy parking, otherwise, like us, you will be circling that lot forever. But Jeff chatted with a ranger and he said we could park 3 miles east down the road and catch the shuttle back. So that’s what we did. We were lucky to find a parking spot on the side of the road near the shuttle stop. And so we waited, and waited, and waited (The shuttle coming from the east side can take up to a 1 hour wait, but on the west side it’s more like 20-30 minutes.) Time was ticking and we were wondering if we would have any kind of time for this hike, because you have to factor in getting back again. A couple days prior a ranger had told us if you’re ever in need of a ride in the park just hitchhike. So we joked about doing it and a woman there said she would do it if she didn’t have her kids with her. So we stuck our thumbs out on Going-to-the-Sun Road, many cars passed, but one stopped. It was this sweet older couple from Missouri that have been traveling all over the west including Alaska. We offered them money but they wouldn’t take it, at one point she mentioned Rice Krispies treats that were in the back seat! They were very cute and very nice people. We get to the trail head and discovered it’s a boardwalk almost the entire length until you reach Hidden Lake Overlook. I would say this was our least favorite trail. It was like climbing up stairs for 2 miles. You would think it would make it easier but I much prefer a natural path. I had read that this is THE place to see mountain goats, but we didn’t see any at all, I think you have to go early in the morning or early evening to see wildlife.

Hidden Lake Nature Trail

Hidden Lake Nature Trail

Hidden Lake Overlook

Hidden Lake Overlook

In addition to the trails there is much to see just along side of the road, we were there for 5 days and I feel like I would have wanted at least 10 days to explore. When you go to the park I definitely recommend bringing some food and leaving it in the car, or if you carry it with you it should be sealed up so that hungry bears don’t start following you. Lake McDonald Lodge has a restaurant but it’s not always open, and when it is open it's packed. I got most info on hikes at Hiking in Glacier, and it’s always good to check in on Glacier National Park’s website for any closures or delays. You can view the parks webcams here which is pretty cool. 

Below is a recipe for the hiking bars, you can make all different kinds but the basics are always the same with dried fruit, nuts, a syrup, a nut butter and oats. I didn’t want to have to buy 10 bags of different nuts and dried fruit, so I went to Trader Joe’s and bought a back of mixed nuts and a bag of dried fruit (dried cherry, strawberry and blueberry is good!) They have a great selection there. 

montana_hiking_bar-1.jpg

Montana Hiking Bar

  • 1 cup dried fruit
  • 1/4 cup maple syrup or honey
  • 1/4 cup peanut butter or almond butter
  • 1 cup roasted salted nuts
  • 1 1/2 cups rolled oats or quick cooking steel cut oats
  • 7 oz dark chocolate
  • optional additions: chocolate chips, dried fruit, nuts, banana chips, vanilla, etc.

Spread the oats on a cookie sheet and toast the oats for 15 minutes in 350°F oven, then allow to cool.

Place oats, dried fruit and nuts in a large mixing bowl and set aside.

Warm honey and peanut butter in a small saucepan over low heat. Stir and pour over oat mixture and stir until combined.

Line a 8”x8” baking pan with parchment paper, then spread the mixture in the pan, pressing down firmly until flattened. Melt the chocolate in a double boiler or microwave, then pour it evenly over the mixture, shake the pan to even out the chocolate.

Cover the pan and refrigerate 20-30 minutes until firm. Remove bars from pan and cut into 9 squares. Store in an airtight container for up to a few days. Store in freezer for longer duration.

Bacon Making 101

A few weeks ago Jeff and I took a Bacon Making 101 class at Old Salt Marketplace, it’s a restaurant in our neighborhood that also serves as a butcher shop and deli. We go there for brunch quite often so we were already familiar with their delicious “Ben’s Bacon”. When I saw a class listed for bacon making by Ben himself, we signed up right away! It was a really fun class and bacon is not that hard to make, it just takes time. There was a lot of discussion on food safety, for example you will see that most people smoke their bacon to an internal temperature of 150-155°F, but Ben smokes his bacon slow to a 145°F temp. The reason people go a bit higher is that your thermometer might be off a bit so 150°F acts as a safeguard, but an accurate 145°F temp is fine with no risks. We were each given a full size pork belly which weighs around 10 lbs or so. Ben helped out with trimming the fat off each one. That looks a bit challenging and you will need a really long sharp knife. Then we cut our slabs in half so that they were easier to work with. Ben prepped the spice mix and the cure mix in large containers. I don’t think I’ve ever seen that much brown sugar and salt (enough for 12 pork bellies!). Each of us working with our own large bins, covered the slabs in the spice mix, followed by the sugar and salt cure mix. Then we placed our half slabs in large ziplock bags with the cure mixture to be taken home and that was it. We sampled some of the bacon they make at the restaurant and chatted about best ways to cook bacon (I prefer the oven method).

Pork bellies with the spice rub

Pork bellies with the spice rub

We carried home our 20 pounds of pork belly and put it in the refrigerator where it had to cure for at least 7 days. It can go up to 3 weeks in the fridge before smoking it. The curing process will create a lot of liquid, so even though they are in ziplock bags you might want to put them in a plastic tub or use additional bags so that it doesn’t accidentally leak in the fridge. During this curing time you flip the bellies over to redistribute the liquid.

After a week or so you remove the pork bellies from the fridge and rinse them well, then pat them dry and put them individually on a drying rack. We used a cooling rack over a sheet pan which worked really well and actually fit in the refrigerator. Note: two pork bellies will take up a lot of refrigerator space! Then you let them sit uncovered in the fridge for 24 hours to dry out. Before you smoke them you can rub them with pepper, herbs, maple syrup or molasses. We tried four different flavors: Black pepper, maple syrup, black pepper and thyme, molasses. Our favorite was maple syrup, but that is also the one that smoked properly and didn’t cook. Which brings me to the smoking process.

After they dried for 24 hours we rubbed molasses on one and black pepper + thyme on another

After they dried for 24 hours we rubbed molasses on one and black pepper + thyme on another

The biggest challenge was getting our smoker to hold a low temperature. The smoker is brand new to us so we learned a whole lot about smoking meat. We’ve been wanting to get a charcoal smoker grill and the bacon class sort of forced us to do it sooner rather than later. Ben said you can smoke over a fire pit or even in your fireplace, but it would be challenging to keep the temp low and not cook the bacon. We ended up getting the Vision Kamado grill. Our first go with one slab ended up cooked, then our second one, which was early evening at that point, came out perfect!

The next day we felt confident in what we were doing, so we put the remaining two slabs on when we had a steady 225°F temp, checked the internal temp in a little over an hour and, gasp!, they were cooked already, we didn’t know how this happened, the internal temp registered at around 170-180°F. What we do know is that our grill was in direct sunlight, and even though people will say weather doesn’t affect the ceramic grill, it most certainly does. So I would recommend smoking on a cooler day, or wait until evening. The following days brought us a heat wave, and wouldn’t you know, that grill that had cooled down was registering 150°+ with nothing burning. So it would be very difficult to keep a low temp under those conditions. 

Even though we ended up cooking the bacon in the smoker we sliced it up and tested it out and it tastes delicious. Some parts are a bit tougher than it should be, I guess due to the smoking issues, but overall we’re really happy with it. And I will totally do this again once we finish up the bacon we have. Which by the way yielded about 12 lbs of bacon total, from the two slabs. So if you get one slab of pork belly it should yield around 6 lbs. of bacon. That’s a lot of bacon! But you just slice it, then wrap it up in portion sizes and freeze it. Below is the recipe for “Ben’s Bacon”, and there are plenty of websites that are devoted to smoking meats with a Kamado grill, but really everyone is going to have a different experience depending on the weather, how much charcoal you’re using, what kind of smoker you use, but it’s really fun and it all tastes good, even when it’s not perfect. Makes for some great BLTs pictured below with our homemade bacon!

Bacon Making 101

Ingredients

1 Pork Belly

Spice Rub:

  • 1 part cayenne pepper
  • 1 park chile flake
  • 2 parts paprika

Bacon cure for one belly:

  • 3 lbs brown sugar
  • 2 cups kosher salt

Equipment

  • Ziplock bag (large enough for half a pork belly)
  • Kitchen scale
  • Mixing bowls
  • Racking pan (cookie cooling rack will work)
  • Smoker or smokehouse

The process

Skin and trim the fat to desired fat content. Cut the belly in half so that it’s easier to work with and store. Place the two pieces in a large container. Mix the spice blend together and rub liberally to all sides of the belly. Mix the salt and brown sugar together until completely blended. Generously apply the cure rub to all sides. Place each piece in large ziplock storage and refrigerate, you may want to put these inside another plastic bag or container to prevent leakage, the curing will create a lot of liquid over time. After 3 days flip them, then turn every couple days or so to redistribute liquid. After 7 days remove from refrigerator and rinse well and pat dry. Place them on a drying rack (cookie cooling rack on top of sheet pan works well) and place in the refrigerator uncovered for 24 hours. When ready to smoke the bellies, cover them with your choice of ground black pepper, maple syrup, molasses or whatever spices you might like to try. 

Start your smoker slowly, add applewood chips to coals. 

Smoke the bacon at around 170°F to an internal temperature of 145°F, which would take about 5 hours. Or smoke them at 200-225°F for about 2 1/2-3 hours. Most people smoke until internal temperature reaches 155°F to be on the safe side (if thermometer was off) but it is safe to eat at 145°F.

Remove the bacon and allow to cool. Place in refrigerator for several hours before slicing as this makes it easier to cut. Slice the bacon in desired thickness. Then freeze the slices in portion sizes. Wrap portions in plastic wrap and then put them all in freezer bags.

Watermelon Cocktail

I love summer and I love the heat, but it has been a bit crazy these past few days here in Portland with temps reaching 105°. This Watermelon Cocktail is perfect for these warm evenings, it’s so refreshing and one of the nice things about this cocktail is that you don’t need to add simple syrup because of the sweetness of the watermelon. One thing I want to mention is that the flavors (watermelon, lime and mint) seemed to get better as it rested, it might be a good idea to add the lime juice and mint to the watermelon juice before refrigerating it. I made it right in the glass but I could see this being made ahead of time so all you would have to do is add the vodka. I chose vodka because that’s what we had on hand, but I think this would work great with rum as well. Enjoy and stay cool folks!

Watermelon Cocktail

  • 4 oz Watermelon Juice
  • 1 shot of vodka
  • Juice of 1 lime
  • a few mint leaves
  • Makes one cocktail

Cut up the watermelon into chunks and place in blender a few chunks at a time and blend high speed until liquified, then continue to add the rest until you’re done. Pour Watermelon juice into a container and refrigerate.

Tear the mint leaves a bit and Muddle them in a rocks glass with the lime juice. Add the vodka and watermelon juice and stir well, add ice and enjoy.

Olive Tapenade

I heard a song the other day in the car, it was so cute, if a song can be cute, that I had to pull over and Shazam it. The song was We’re Going to Be Friends by The White Stripes, a band I’ve never heard of, but it’s what I’m listening to now while I’m trying to write about olives. We had a few neighbors over for a wine and cheese get together recently, we had some olives and a neighbor brought more, and so here I am making my first olive tapenade. It turned out really delicious. So much flavor! I excluded capers and anchovies from the original recipe because, yuck. I think what really makes the flavors work here are the Oven-Dried Tomatoes that I made last year, they held up remarkably well in the freezer. I would recommend adding those to this Tapenade. We make them every summer when the tomato plants are overflowing with tomatoes.

Olive Tapenade

  • 1 cup black olives, pitted
  • 1 cup green olives, pitted
  • 1/3 cup Dried Tomatoes with Herbs
  • 1 garlic clove
  • 1/2 tablespoon chopped fresh basil leaves
  • 1/2 tablespoon chopped fresh thyme leaves
  • 1/2 tablespoon chopped fresh flat-leaf parsley leaves
  • 1/4 tablespoon chopped fresh oregano leaves
  • 1/4 cup extra-virgin olive oil

In a food processor, combine all the ingredients except the olive oil. Using the pulse button, process until coarsely chopped and well blended. Continue to process, slowly adding the olive oil. Refrigerate in a covered container. Use as needed. Tapenade will keep up to 1 week, refrigerated, in a covered container.

Adapted from Epicurious - Wolfgang Puck

10 Summer Favorites

It’s summer! I love summer even when it’s scorching hot. I’ve put together ten of my favorite-make-again summer recipes. Below is a mix of salads, desserts and keepin’ kewl iced drinks. Picking berries, shucking corn, drinking bourbon iced tea - oh yeah!

Berry + Cherry Galette

Berry Clafoutis

Margarita Ice Pops

A Summer Salad!

Watermelon with Feta + Basil

Cherry Tomato Galette

Quick Dill Pickles

Cold Brew Iced Coffee

Cucumber Infused Vodka

Bourbon Iced Tea with Mint

Green Bean Salad with Mustard Seeds and Tarragon

Green on green on green. We’ve been eating more vegetarian meals for dinner lately. Sometimes with fish, others just vegetables and quinoa or rice. It’s been a while since I’ve looked through Ottolenghi’s Plenty, and it wasn’t hard to find something new right away. The book is front to back vegetarian dishes with amazing flavors. This recipe caught my eye because of the tarragon, I have so much tarragon growing in the garden and I don’t use it as often as I like. It works great in this salad as lemon and tarragon are a perfect match. 

I skipped the nigella seeds because it sounded like one of those expensive exotic spices I might only use once. But who knows it might taste really good, people cannot even agree on what the flavor actually is. We had this last night over a bed of quinoa and a drizzle of sriracha, I skipped the red chile so this added some heat. I’ve tweaked a few things here but overall this is a great salad.

green_bean_salad-2.jpg
green_bean_salad-3.jpg

Green Bean Salad with Mustard Seeds and Tarragon

  • 1 1/4 cups green beans, trimmed
  • 2 1/4 cups snow peas, trimmed
  • 1 3/4 cups green peas, (fresh or frozen)
  • 2 teaspoon coriander seeds, roughly crushed with mortar and pestle (or 3/4 teaspoon ground)
  • 1 teaspoon mustard seeds
  • 3 tablespoons olive oil
  • 1 teaspoon nigella seeds (huh?)
  • 1/2 small red onion, finely chopped
  • 1/3 cup sherry vinegar
  • 1 mild fresh red chile, seeded and finely diced
  • 1 garlic clove crushed
  • Grated zest of 1 lemon
  • 1/2 lemon, juiced
  • 2 tablespoons chopped tarragon
  • salt and pepper to taste
  • 1 cup baby chard leaves or pea shoots

In a small bowl place the finely chopped red onion and add the sherry vinegar (enough to cover onions) and allow to sit for 30 minutes or so. When ready drain the onions.

Fill a medium pot with water and bring to a boil. Prepare a large bowl with water and ice. Blanch the green beans for 4 minutes, then remove and place in ice bath. Drain and dry. Then blanch the snow peas for 1 minute, place in ice bath then drain and dry. Blanch the peas for 20 seconds, refresh, drain and dry. Place all the beans and peas in a large bowl.

Put the coriander seeds, mustard seeds and oil in a small saucepan and heat up. When the seeds begin to pop (after a few minutes) pour the mixture over the vegetables. Toss together and add nigella seeds, red onion, chile, garlic, lemon juice, lemon zest and tarragon. Mix well and season with salt to taste. Before serving fold in the chard leaves, or top with pea shoots, or both! 

Adapted from Plenty

Toro Bravo’s Radicchio Salad

This is really an outstanding salad considering it only has a few ingredients, but those few have a lot of flavor that all work great together. We went to Toro Bravo for Jeff’s birthday a couple weeks ago and ordered a few dishes and this was one of them. Everything we ate was amazing, they really know flavor there. If you are ever visiting Portland I would put this place at the top of your list for dining.

The weather has really improved here with more sunshine than rain, finally! This past winter was rough with 6-7 months of near constant rain and/or snow. But that’s behind us now and we’re finally getting to all the yard clean up and it feels good. I’m just so happy to feel sun on my skin that I don’t even mind the boring task of sweeping dirt. Well that’s all for now, hope you have a chance to try out this salad. Enjoy!

Toro Bravo’s Radicchio Salad

  • 2 to 3 heads radicchio
  • 1/4 cup good-quality balsamic vinegar
  • 1/4 cup good-quality sherry vinegar
  • 1 red onion, chopped
  • 1 tablespoon honey
  • 3/4 cup olive oil
  • 1 + 1/2 cups Manchego, grated and divided

In a large bowl, add the balsamic vinegar, sherry vinegar, and chopped red onion (I used 1/2 of a large red onion). Let it sit for 1 hour and then strain out the onions. (you can keep the pickled onions for another dish if you like)

Remove core from the radicchio and chop into 1-inch pieces. Place the chopped radicchio in a large bowl, fill with cold water and some ice cubes. Let it sit for 15 minutes to remove some of its bitterness, strain and then spin in a salad spinner until dry. 

Add the honey and olive oil to the strained vinegars and whisk well, I use this stick blender which works great. Depending on the size of your radicchio you may not need all the dressing.

Toss the radicchio with the dressing until evenly coated. Add 1 cup of finely grated Manchego, salt, and toss again.

To serve, top the salad in a serving bowl with the remaining 1/2 cup grated Manchego. Serves 4-8.

Adapted from Food52’s Toro Bravo recipe