Cherry Crumble pie

cherry_pie_crumble_topping-1.jpg

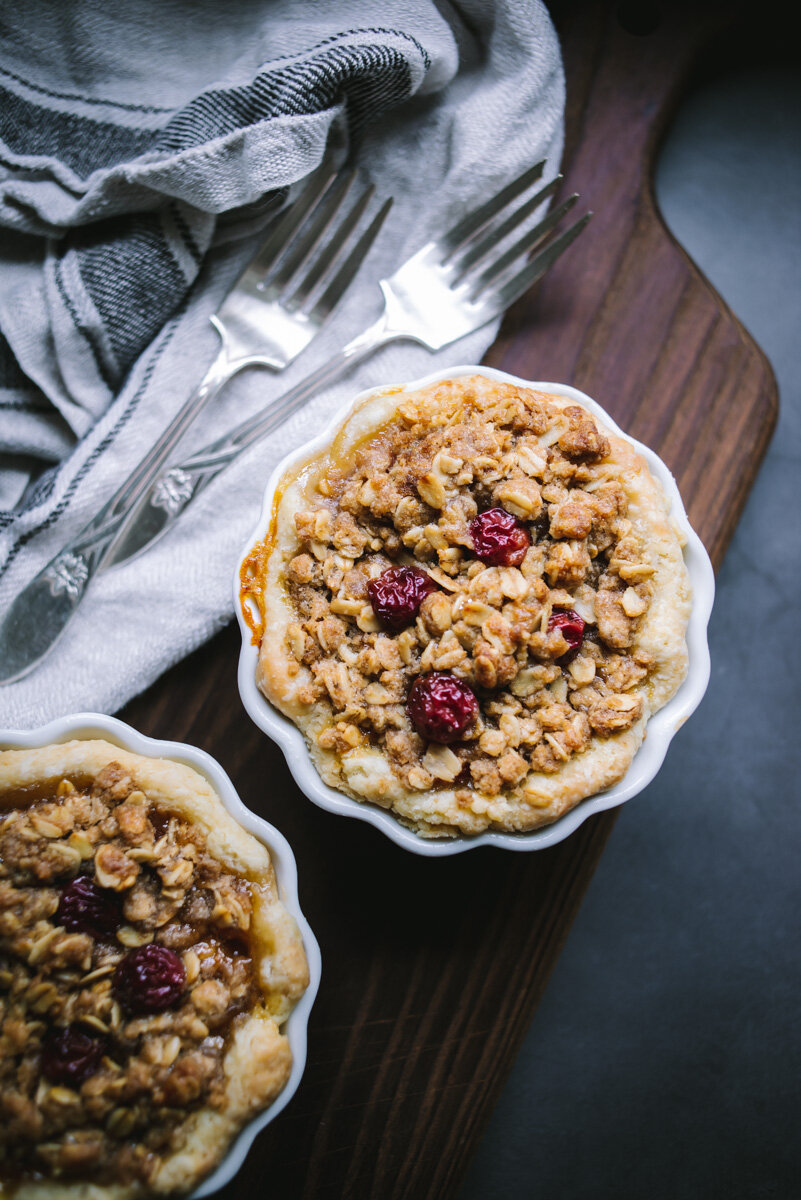
We had such a nice surprise a few weeks back. We have a cherry tree in our front yard that has been here ever since we bought the house several years ago, but it never really produced much fruit. Maybe a few at the very top for the squirrels to eat. But this year was a different story. Tons of cherries and within reach! So Jeff and I spent an afternoon picking cherries in our front yard. We ended up with about five pounds of cherries! We pitted and froze about half, and the other half I made into a pie which came out incredibly good! The recipe below is for a full-size pie that I made a few weeks ago, but you can make four mini-pies instead which is what I did this week. One thing I noted below in the recipe is to bake the pie in the lower third of the oven. Rather than pre-bake your pie shell to avoid “soggy bottom” you can refrigerate the rolled out pie dough in the pie pan prior to baking, add your filling and bake on the lower rack and it will brown the bottom. That is if your oven heats from the bottom up. I had read about this somewhere and tried it and it worked really well! Recipe below, enjoy!

cherry_tree-1.jpg
cherry_pie_crumble_topping-2.jpg
cherry_pie_crumble_topping-3.jpg
cherry_pie_crumble_topping-4.jpg
cherry_pie_crumble_topping-5.jpg

Cherry Crumble pie

Crumble:

  • 2/3 cup rolled oats

  • 1/2 cup all-purpose flour

  • 1/2 cup brown sugar

  • 1/4 teaspoon ground cinnamon

  • 1/4 teaspoon Cardamom 

  • 1/2 teaspoon kosher salt

  • 6 tablespoons unsalted butter, melted and cooled

Sour cherry filling:

  • 3/4 cup sugar

  • 3 tablespoons cornstarch

  • 1/4 teaspoon kosher salt

  • 2 1/4 pounds fresh sour cherries, pitted, or 2 pounds frozen sour cherries, partially thawed

  • 1 Pie Dough, recipe here

Prepare your pie crust in advance so it’s well chilled. Roll out your pie dough, place in pie dish, cover with plastic wrap and refrigerate for at least 1 hour. 

Preheat oven to 375°. 

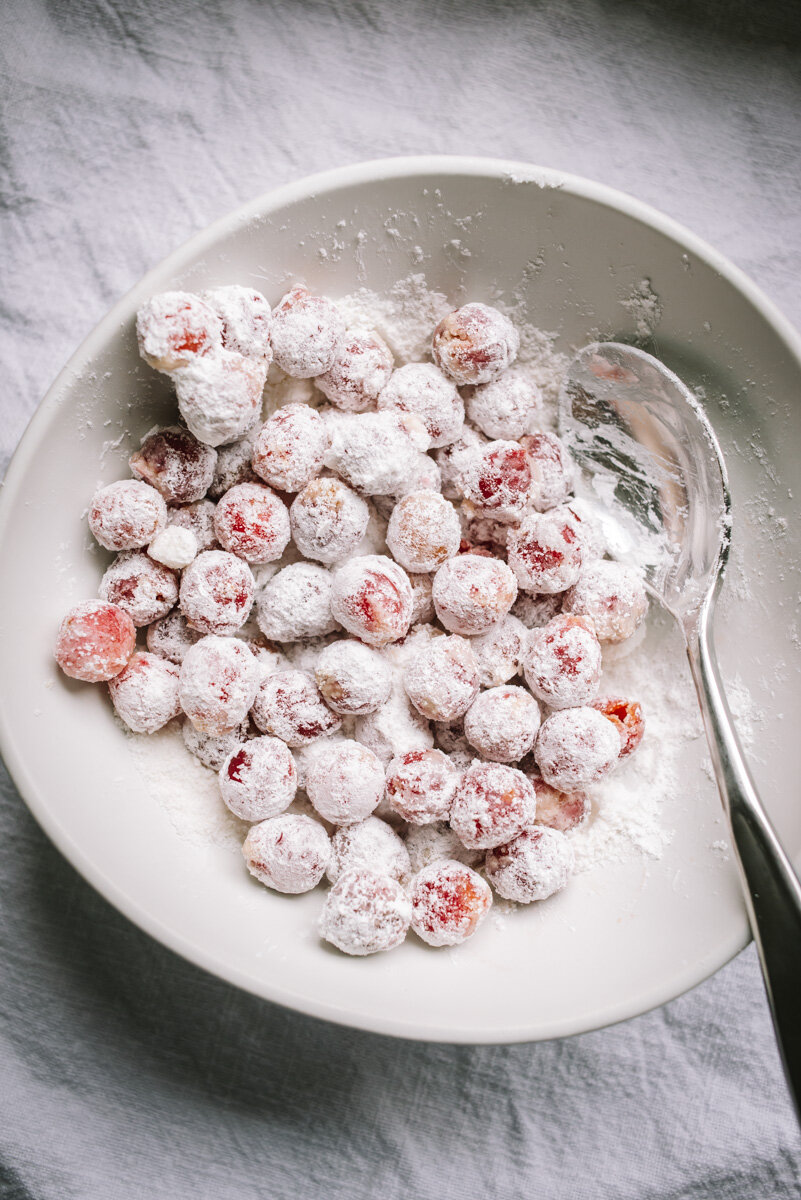
Prepare the cherry filling by mixing sugar, cornstarch and salt together in a medium bowl, then toss in the cherries until well coated.

In another medium bowl whisk together the oats, flour, brown sugar, spices and salt. Pour the cooled melted butter over the flour mixture and stir to combine well (sometimes it’s easier to do this with your hands).

When the pie crust is good and chilled, pour in the cherry filling mixture, then top with the crumble mixture. Place the pie on a baking sheet and bake for 50-60 minutes on the bottom third of your oven (this helps the bottom crust to cook better). About 45 minutes for the mini-pies. Remove from oven and cool before serving.

Recipe adapted from Smitten Kitchen
Stone Fruit Galette

stone_fruit_galette-1-2.jpg

Stone Fruit Galette. This came out so good I wanted to share it with you here on the blog. With summer fruit in its prime right now there is no better time to make this. You can use any combination of fruit, but I highly recommend doing a mix of peaches, nectarines, plums, cherries and apricots. And I also recommend this pie crust that I made a couple months ago, it’s so flaky and soft, it’s more like a pastry and works so perfect with this fruit. The difference is cake flour!

On the home front here, our vegetable garden is just getting started with some green tomatoes here and there, squash and peppers are still too small to pick, but the raspberry bush has been a real bounty, I’ve been picking and flash freezing almost daily, they taste so good on their own but I’d like to make something, maybe a jam or a tart. If this doesn’t get eaten within a day (how is that possible? ha ha) you’ll need to refrigerate the galette. I hope you are having a great summer, or winter depending on where you are in the world (hello Australia!). Enjoy!

stone_fruit_galette-2.jpg
stone_fruit_galette-3.jpg
stone_fruit_galette-4.jpg
stone_fruit_galette-5.jpg
stone_fruit_galette-7.jpg
stone_fruit_galette-6.jpg

Stone Fruit Galette

  • 3 cups stone fruit (peaches, nectarines, plums, cherries, apricots) sliced

  • 1/3 cup sugar

  • 4 tablespoons cornstarch

  • 1/4 teaspoon cardamom

  • 1/2 teaspoon cinnamon 

  • 1 pie crust (recipe here)

Preheat oven to 400°F. Cut the fruit to about 1” pieces, save a few slices aside to arrange on the top. Place the cut fruit in a bowl along with the sugar, cornstarch and spices. Set aside. Roll out your dough to a 13” round.  Place the dough on a parchment lined baking sheet or in a cast-iron skillet. Spoon the filling onto the dough, leaving a 2-inch border around the edge. Fold the edges up and over the filling, forming loose pleats. Top with remaining fruit slices and cherry halves. Bake until the filling is bubbling and the pastry is golden brown, about 30-40 minutes. 

Strawberry Rhubarb Galette

strawberry_rhubarb_galette-1.jpg

Strawberries! I love this time of year, not only is it warm and sunny, but my little strawberry patch in the back yard starts producing berries. I didn’t have enough for a whole galette so what could be better than to add rhubarb? I haven’t had rhubarb in so long I forgot how much I like it. When we were kids my sister and I used to eat it raw with sugar. But I think it’s better in this Strawberry Rhubarb Galette. Oh, and when I was making the pie dough I ran out of flour, I had some cake flour on hand and used about one cup hoping it would turn out ok, I’ve never heard of cake flour in a pie dough, in any case not only did it turn out ok I think I like it better! The crust is very flaky and a bit softer than I’ve made before, a little closer to a pastry dough. So there’s that little magic to add if you like. Until next time, enjoy!

strawberry_rhubarb_galette-2.jpg
strawberry_rhubarb_galette-3.jpg
strawberry_rhubarb_galette-4.jpg
strawberry_rhubarb_galette-5.jpg
strawberry_rhubarb_galette-6.jpg
strawberry_rhubarb_galette-7.jpg
strawberry_rhubarb_galette-8.jpg
strawberry_rhubarb_galette-9.jpg
strawberry_rhubarb_galette-10.jpg

Strawberry Rhubarb Galette

  • 2 cups of Strawberries (cut in half or whole if they’re small)

  • 2 cups peeled and chopped rhubarb, about 1/2” pieces

  • Lemon juice, about a half a lemon

  • 1/4 cup sugar

  • 3 tablespoons flour

  • 13” pie dough, recipe below

Preheat an oven to 425°F. Line a baking sheet with parchment paper. 

Place the dough on a lightly floured surface and roll out into a 13-inch round. Transfer to the baking sheet lined with parchment paper. 

In a bowl, mix together the fruit, lemon juice, sugar and flour. Spoon the filling onto the dough, leaving a 2-inch border uncovered around the edge. Fold the edge up and over the filling, forming loose pleats. Bake until the filling is bubbling and the pastry is golden brown, about 25-30 minutes. 

Remove from oven and let cool slightly. Cut into wedges and serve. Makes one 9-inch galette

Pie Dough

  • 2-1/2 cups all-purpose flour (you can swap out 1 cup of flour for cake flour for a softer crust)

  • 2 tablespoons sugar

  • 1/2 teaspoon salt

  • 2 sticks of butter (1 cup), cut into 1/2-inch pieces and chilled

  • 7-8 tablespoons ice water

In a large bowl, mix together the flour, sugar, and salt. Cut in the chilled butter using a stand mixer, a food processor, or a pastry blender until the butter is evenly distributed but still in large, visible pieces. Add the ice water to the flour and butter and mix by hand or with a wooden spoon so you don’t overwork the dough. The dough will be shaggy, place on floured workspace and work it together quickly until if forms a ball. Divide into two disks, wrap each with plastic wrap and refrigerate for at least 1 hour or overnight. Remove the dough from the refrigerator about 30 minutes before you want to use it. 


Pear Galette with Blue Cheese, Hazelnut and Thyme

Pear_bluecheese_hazelnut_galette-2.jpg

This Pear Galette with Blue Cheese, Hazelnut and Thyme came out incredible, I created the recipe on the fly and it worked perfectly. So I kept notes on what I did so that I could share it with you here. I think you will enjoy it. As you know (or may not know) I’ve been doing some videos lately, I wanted to do a stop motion video and thought it might be fun to make a galette since there’s a lot of assembly involved. Well mostly assembly as there is very little to do other than chop and slice a few things, and if you already have pie dough on hand it’s even easier. Which I recommend, pie dough freezes great, this is what I had leftover from the holidays. 

The stop motion video was fun to make, although it does take quite a while to create. The video below contains 56 photos, by the time I got to arranging the pears, Jeff helped out by hitting the shutter so that I didn’t have to clean my hands each time, which is what I did while rolling out the dough and I was getting flour all over my laptop (I worked with my camera tethered to my computer), so that was really helpful (thank you Jeff!), I would recommend getting some assistance if you plan on doing a stop motion video like this, where there’s mess involved. I’m curious to know if you enjoy the videos and if there are any recipes that you would like to see in video format in addition to photos? You can leave comments here or Instagram or wherever you like. Recipe below! Enjoy!

Pear_bluecheese_hazelnut_galette-1.jpg
Pear_bluecheese_hazelnut_galette-4.jpg
Pear_bluecheese_hazelnut_galette-3.jpg

Pear Galette with Blue Cheese, Hazelnut and Thyme

  • 1 pear, halved and sliced 1/4” thick

  • 1/4 cup blue cheese, crumbled

  • 1 teaspoon fresh thyme leaves

  • 1/4 cup roasted hazelnuts, roughly chopped

  • 1 teaspoon brown sugar

  • 1 pie dough (recipe below)

  • 1 egg beaten (for egg wash)

Heat oven 400°

Roll out your pie dough to roughly a 10-inch round. Sprinkle the brown sugar on the dough leaving a 1-2 inch border. Add cheese, nuts and thyme (leaving a few ingredients aside for the top), then add sliced pears in a circular pattern, fold the edges in a circular pattern, top the center with the remaining cheese, nuts and thyme for color and texture.  Brush the egg wash on the dough. Place on parchment lined baking sheet and Bake at 400° for 25-30 minutes until golden. Remove from oven and serve warm or room temp. 

Pie dough (this makes 2 pie crusts, you will have extra for next time, yay!)

  • 2 1/2 cups all-purpose flour

  • 2 tablespoons sugar

  • 1 teaspoon salt

  • 2 sticks (16 tablespoons) cold unsalted butter, cut into 1/2-inch cubes

  • 6 to 8 tablespoons ice water

To make the dough in a food processor, pulse together the flour, sugar and salt until combined, about 5 pulses. Add the butter and process until the mixture resembles coarse meal, about 5-10 pulses. Remove from processor and place dough in large bowl, add 6 tablespoons of the ice water, combine with wood spoon. The dough should hold together when squeezed with your fingers but should not be sticky. If it is crumbly, add more water 1 teaspoon at a time. Turn the dough out onto a work surface, divide in half and shape each into a disk. Wrap separately with plastic wrap and refrigerate for at least 2 hours or up to overnight. You can freeze the extra pie dough for MONTHS, it holds up very well.


Apple Pie

apple_pie-1.jpg

As simple as it can be to make Apple Pie, I still found myself searching for a recipe last week. You might remember I’ve made a French Apple Pie, but it’s actually been a very long time since I’ve made a traditional Apple Pie. So here it is! And the pie crust here is really my favorite, it’s easy to roll out and work with, when baked it keeps it form nicely without falling apart and at the same time doesn’t taste like cardboard. The apples? For this pie I used King David apples that we picked up at an apple festival last month. I’m never sure which apples are which these days with so many varieties, is it good for baking? eating? This was a good choice, they didn’t mush up and had a really nice texture, some bite to it, with a spicy flavor. So thumbs up on the King David Apples. 

We had a lovely Thanksgiving for two this year. I made a turkey roulade - a turkey breast rolled with dried cherry and sausage stuffing. It was the third time I’ve made this and it works out really great for a small feast. It’s deserving of a blog post so I’ll just have to make it again. I’m sure Jeff won’t mind.

apple_pie-2.jpg
apple_pie-3.jpg
apple_pie-4.jpg
apple_pie-5.jpg
apple_pie-6.jpg

Apple Pie

  • 6-8 apples (peeled, cored and sliced)
  • Lemon juice, 1/2 lemon squeezed
  • 1/2 teaspoon cinnamon 
  • 1/2 teaspoon nutmeg
  • 1/4 teaspoon cardamom
  • 1/4 clove
  • pinch of salt
  • 1/4 cup sugar
  • 1/4 cup brown sugar
  • 1/4 cup flour
  • 2 tablespoons butter
  • 1 egg for egg wash 
  • 1 tablespoon or so Muscovado sugar (or large granulated sugar)

Pie Dough

  • 2 1/2 cups all-purpose flour
  • 2 tablespoons sugar
  • 1 teaspoon salt
  • 2 sticks (16 tablespoons) cold unsalted butter, cut into 1/2-inch cubes
  • 6 to 8 tablespoons ice water

To make the dough in a food processor, pulse together the flour, sugar and salt until combined, about 5 pulses. Add the butter and process until the mixture resembles coarse meal, about 5-7 pulses (you don’t want to over work the dough too much or it will become tough.) Remove from processor and place dough in large bowl, add 6 tablespoons of the ice water, combine with wood spoon. The dough should hold together when squeezed with your fingers but should not be sticky. If it’s crumbly, add more water 1 tablespoon at a time. Turn the dough out onto a work surface, divide in half (I make one half slightly larger for the bottom crust) and shape each into a disk. Wrap separately with plastic wrap and refrigerate for at least 2 hours or overnight.


Filling and Assembly

Preheat oven to 375°F. 

In small bowl combine flour, sugars, salt and spices. In large bowl place sliced apples, squeeze lemon juice, then add flour mixture and toss until well combined. Set aside.

Roll out your bottom crust about 2-3” larger than diameter of pie dish, place in pie dish and trim around the edges. Add the apple mixture. Roll your top crust to fit, cut out any desired designs, place on top of pie, trim any excess and pinch the edges together with thumb and forefinger. Roll out any additional dough and use pie cutter to top with leaf or apple design. Adding a leaf pattern around the edges looks pretty. Whisk the egg in a small bowl and brush over top of pie, sprinkle some granulated sugar.

Bake for 45-50 minutes until brown. Allow to cool a bit before serving. It will slice better if you refrigerate and then bring to room temp. 

apple_pie-7.jpg

Also, I’m sorry to see these pie cutters are no longer available, I’m sure there are more out there but this was a nice selection of designs.