Green Harissa

green_harissa-1.jpg

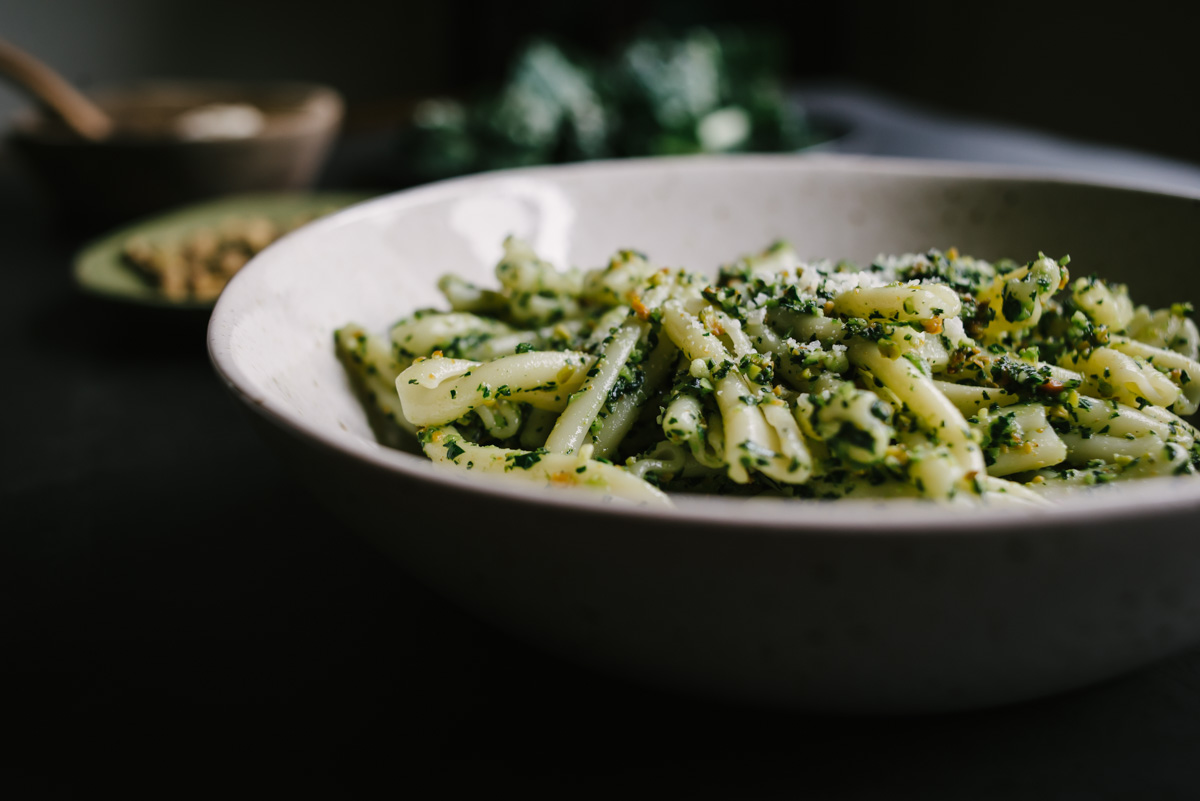
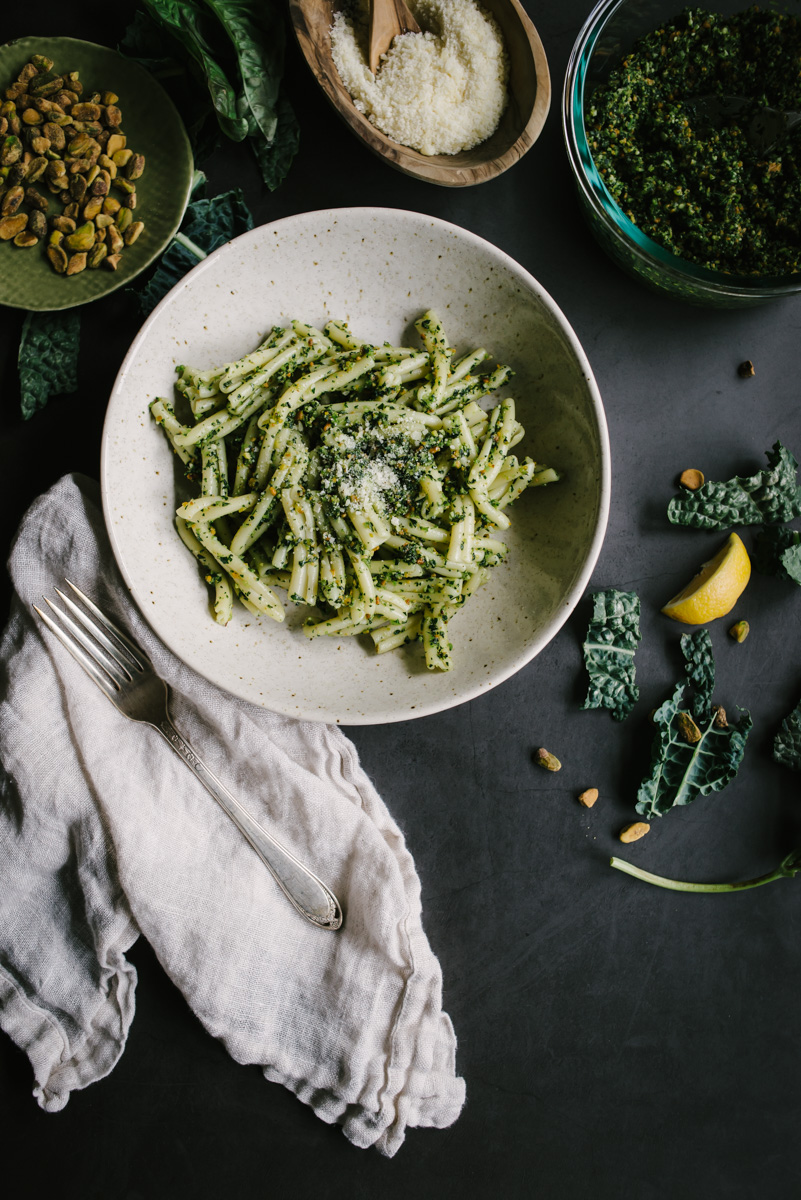
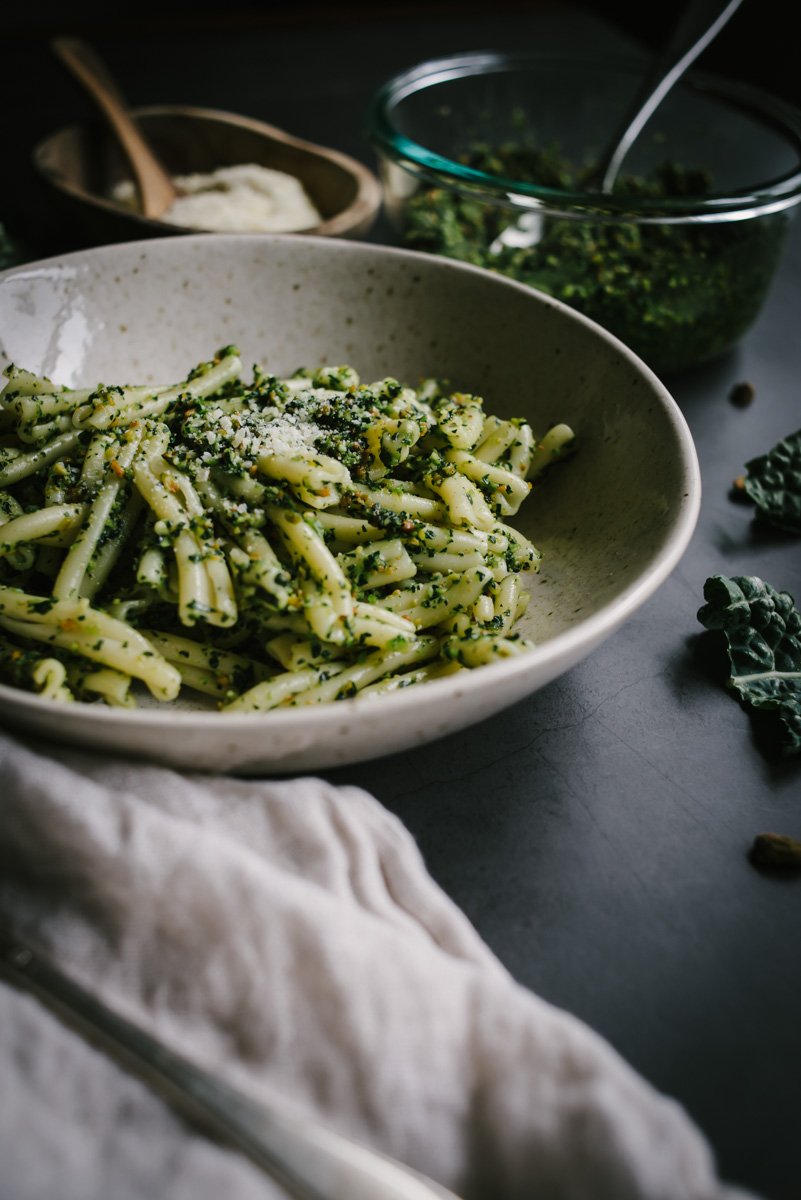
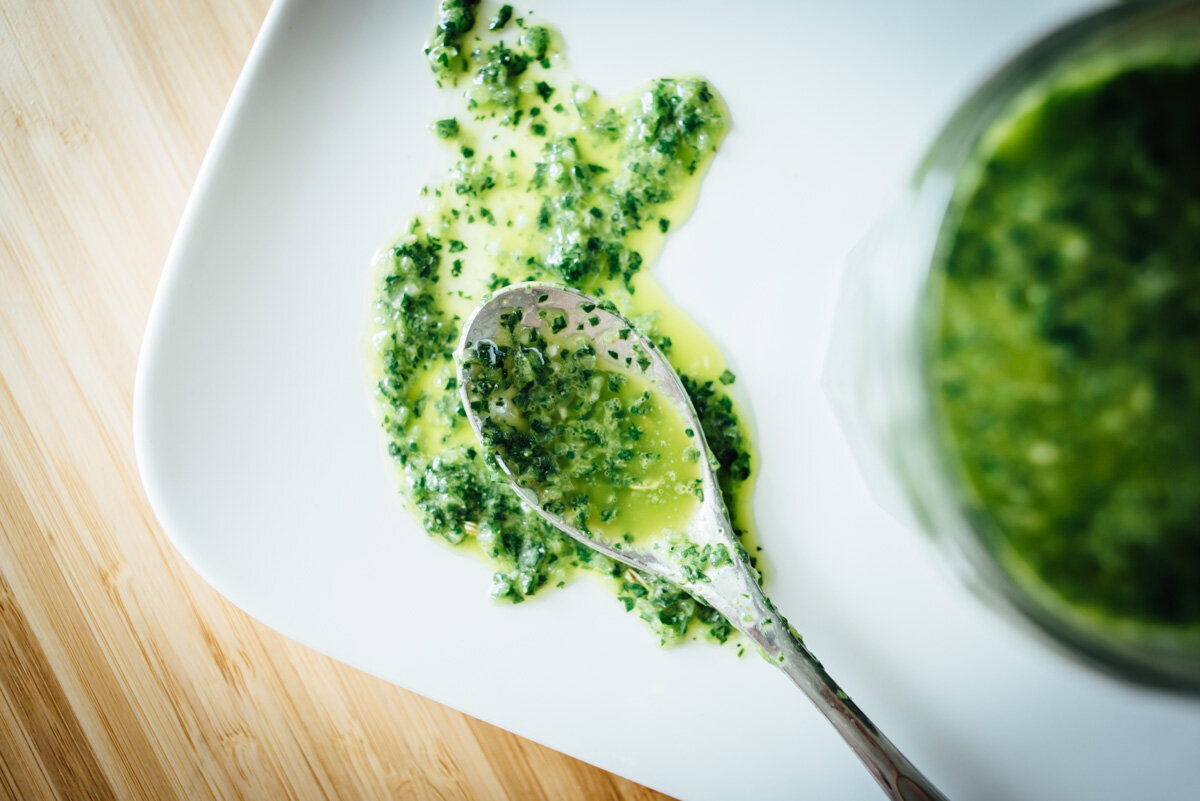
Green Harissa. I love this sauce. I’ve been making it quite a bit lately because it goes with everything! We put it on fish, chicken, potatoes, rice, roasted vegetables, you name it, it works. The recipe is from Sprouted Kitchen Cooking Club, Sarah has a lot of great sauces but this one not only works with so many dishes, it lasts up to two weeks in the fridge. So it’s a good-to-have-on-hand sauce. If you don’t have mint you can just add more cilantro, the herbs you can mix up a bit but stay heavy on the cilantro.

Things are good here, I’m working on my ‘Granola Project” which I hope to be sharing with you in the next couple weeks or so. I’m pretty excited about it and having fun with it. The garden beds are prepped with compost and at this point I’m just waiting for the temps to get high enough to plant. I started some tomatoes and vegetables from seed this year. I’m worried I started too late! It’s been almost 5 weeks and they still look so young. I hope they’re not duds. Worse case I’ll have to buy starters but I think some of them are going to pull through. This is all new to me and I haven’t blogged about it because I don’t know what I’m doing (yet). Ha ha. Maybe next year I can offer some tips. But the berry bushes are blooming in the yard so everything is looking good there.

I get my second (Moderna) vaccine in a couple weeks. The first one was fine, no side effects at all, just a sore arm for a few days. I’m so looking forward to eating at a restaurant outside! I know people have done this pre-vaccine, but I just haven’t felt comfortable with that. This past year, as soon as things are looking good, Covid cases are low, places open up more and then cases rise, and I’m like, fuck! I missed that small window where Covid-19 wasn’t spreading like crazy. But maybe I didn’t get it because I didn’t go out then. Who knows. It’s all a crapshoot. All I know is when restaurants start opening their doors for indoor dining, everything goes bad. Dining outside is the best option at this point. And I can’t wait! Until then, enjoy this sauce on anything and everything.

green_harissa-2.jpg
green_harissa-3.jpg
green_harissa-4.jpg
green_harissa-5.jpg
green_harissa-6.jpg

Green Harissa

  • 1 clove of garlic - peeled

  • 1 jalapeño - stemmed and seeded, chopped rough

  • 1 cup of cilantro

  • 1/2 cup of mint (you can add more cilantro instead)

  • 1/2 cup of parsley

  • 1 lemon - juiced

  • 1 Tablespoon white vinegar

  • 1/2 teaspoon of cumin

  • 1/2 teaspoon of coriander

  • 1/2 teaspoon of fennel seeds

  • 1/2 teaspoon of kosher salt

  • 1/2 cup of extra virgin olive oil

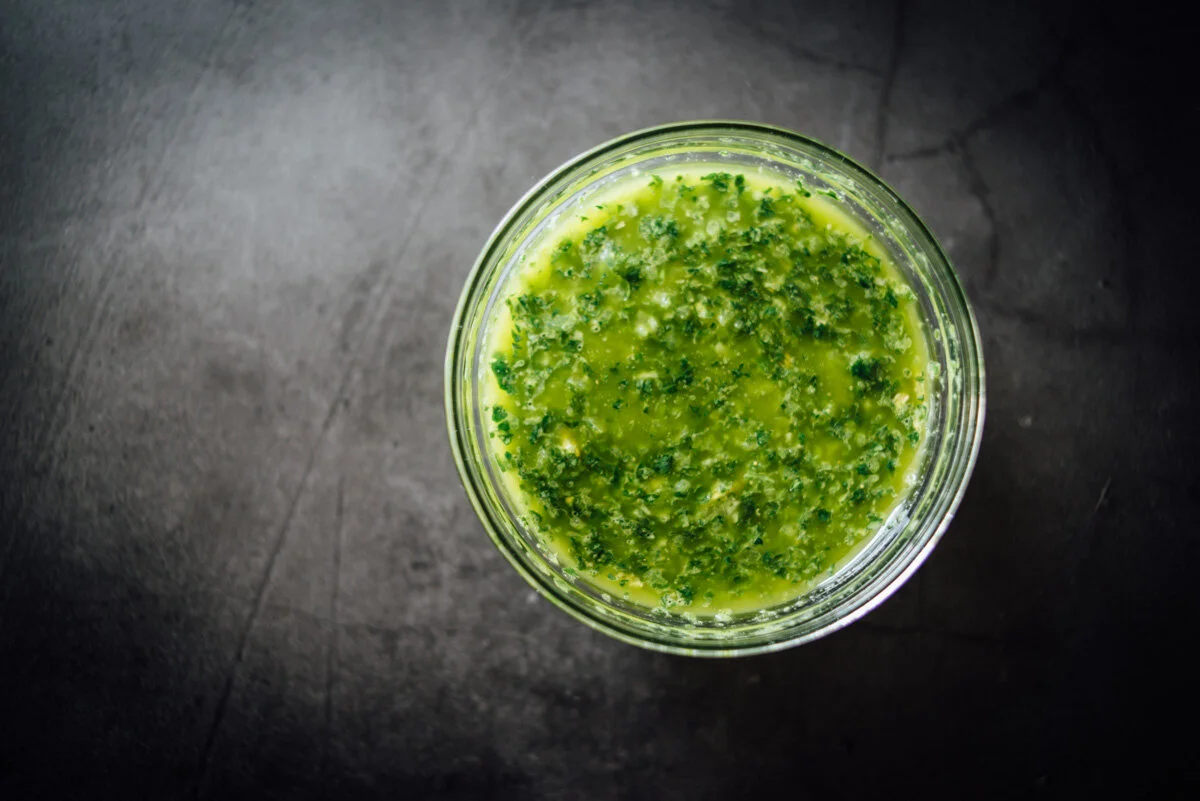
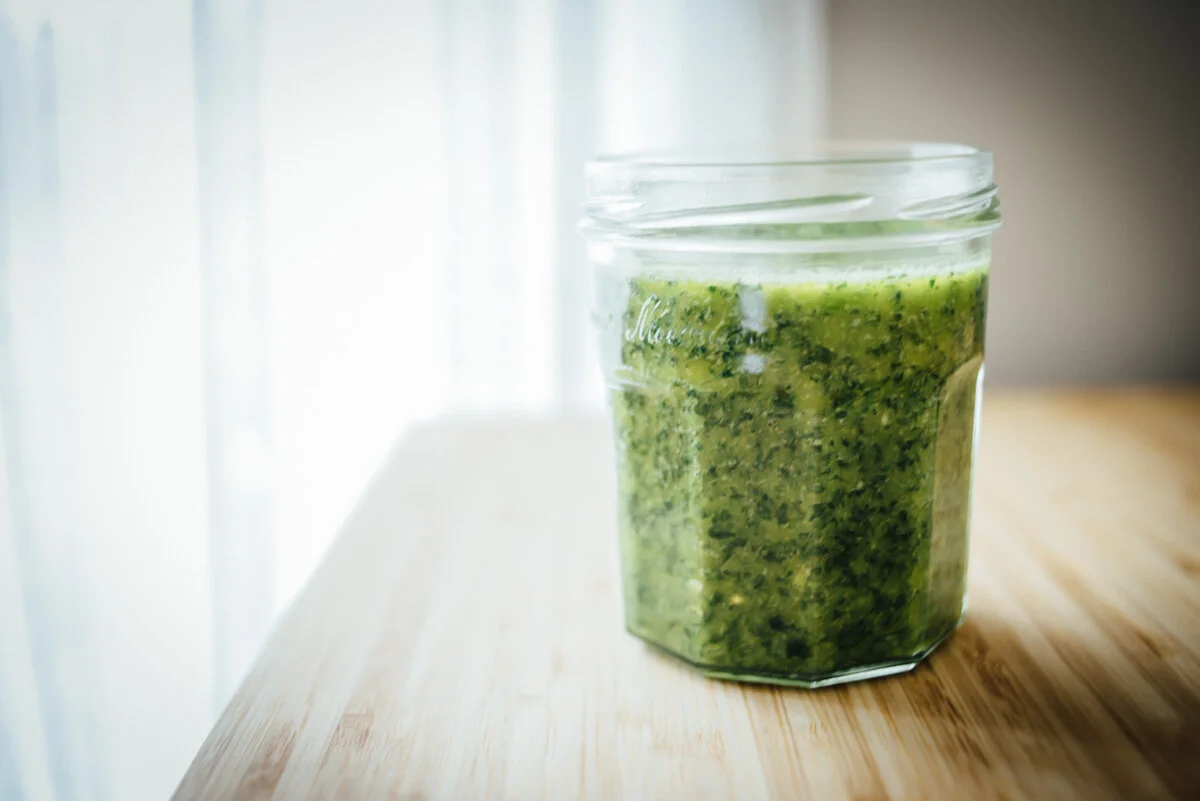
Put everything in a food processor, with herbs on top, and blend for 10 seconds then pause, scrape down the sides if needed and process another 10 seconds until it’s almost blended with bits of herbs still left intact. Keep refrigerated in sealed container up to two weeks. Allow to come to room temp before serving.

Cornbread

corn_bread-1.jpg

How is everyone doing? We’re ok here, adapting to the stay at home rule. Granted, Jeff and I have been working from home for some time now so this wasn’t any kind of huge transition, but staying away from grocery stores, restaurants and people has proved to be more challenging than I expected. Last week we could not get deliveries through Amazon PrimeNow for several days, rather than the same-day 2-hour window we’ve relied on. And all delivery services had massive delays. I was down to two eggs by the weekend and figured I would have to go to the grocery store. But I was able to find a local grocer that uses Instacart for delivery service and got a delivery on Saturday night! I was so happy. It really is the little things in life, like food! I’m trying to reserve my trips out to the store for only things I can’t get online or get delivered (hello Bourbon!). The less contact we have now the faster we can get through this Pandemic, and hopefully return to something somewhat normal. But I think that will be a long time from now. We’ll be toting around hand sanitizer until we’re like “Corona who? what?” Well, that day will never come because nobody in the whole world will forget this.

So, Cornbread! This recipe is adapted from Sprouted Kitchen Cooking Club. I’ve made Cornbread maybe a few times and it’s generally, ok. Nothing to blog about. But I’m really happy with how this came out. Not sure if it’s the type of cornmeal I used or what, I get very confused about cornmeal, there are so many different kinds, fine, medium, course, corn grits, corn polenta, grits/polenta, Masa Harina, it’s almost endless. I had Course Grind Cornmeal on hand so I used that. I was worried the texture would be too sandy, but it came out great, I really love it.

I made a couple adjustments to the original recipe, I didn’t have a can of green chiles and I forgot to add the cheese! I’ll keep those in the recipe as optional. I added some defrosted frozen corn which I highly recommend. Also Sarah’s recipe is for Cornbread Muffins, I’ve adjusted the recipe for a 10” cast-iron skillet, but you could make muffins instead, it will be about 10 minutes less bake time.

I made this for a Black-eyed Peas and Collard Greens dish we had the other day and I’ll be posting that recipe soon, it tasted so good! Take care friends.

corn_bread-2.jpg
corn_bread-4.jpg

Cornbread

  • 1 1/4 cup buttermilk or to make it: mix in 1 tbsp white vinegar to 1 1/4 cup milk

  • 2 eggs

  • 1/3 cup avocado oil or other neutral oil

  • 3 Tbsp. butter or ghee, melted

  • 1/2 tsp. sea salt

  • 1/3 cup cane sugar

  • 1 cup cornmeal (course grind)

  • 1 cup all-purpose flour

  • 2 tsp. baking powder

  • 1 tsp. baking soda

  • 1 cup frozen corn, defrosted to room temp

  • 1 4 oz. can mild green chiles, drained well (optional)

  • 3/4 cup grated cheddar cheese (optional)

  • A grind of fresh ground pepper

Preheat the oven to 375’ and grease a 10” cast-iron skillet or equivalent baking dish. 

In a large mixing bowl, whisk the buttermilk and eggs together really well. Add the oil, melted butter, salt and sugar and whisk until combined. In a separate medium bowl, whisk together the cornmeal, flour, baking powder and baking soda. Add the flour mixture to the wet ingredients, stir to just combine. Add the corn and some fresh ground pepper. (if using add the drained chiles, cheese and stir one more time). 

Pour into the cast-iron pan, top with a bit of sugar or honey if you like. Bake for 30 minutes or until done in the center (muffins will take 20-25 minutes). Remove and allow cool. 

Roasted Tomato Soup + Parmesan Croutons

roasted_tomato_soup-1.jpg

Roasted Tomato Soup + Parmesan Croutons. And here comes fall. The weather is in that optimum state between summer and fall. Warm enough for the tomatoes to continue growing but cool enough at night for soup. We have so many tomatoes this year that I’m on roast-tomatoes-repeat-roast-tomatoes-repeat cycle, a few days ago I left a bowl of tomatoes on the counter one day too long, and I was sad to have to toss a few in the compost bin. I’m the kind of person that is just heart broken when good food has to get tossed, so I’m just cooking and refrigerating and freezing whatever I can. It’s too good to waste. This soup worked out great for my waste management worries. It packs in a few pounds of tomatoes into OMG so freakin’ delicious soup. I have confirmation from Jeff that it’s kick-ass. I looked over a couple different recipes so this is sort of a hybrid between Half Baked Harvest and Sprouted Kitchen Cooking Club . Half Baked Harvest roasted the tomatoes in the same dutch oven as you make your soup, so this is basically a one pan cooking deal, which I love, but didn’t add stock. So without boring you with every detail I added a bit from each recipe and made it my own. Not too garlicky and not too creamy, and I gotta say this is just an absolutely delicious tomato soup. The parmesan croutons are also outstanding, it makes up for the lack of grilled cheese sandwich, which you won’t miss once you bite into the cheesy crouton. I will most likely be back with more tomato recipes, and, surprisingly, cucumber. I gave the Kirby cucumbers a little plant  food last week, along with the tomatoes, and wow did it like that! Blossoms all over the place and now about 20 cucumbers starting, lol, so yeah, I got that to work with as well. Also the soup bowl you see here is another from Carthage.co, the Dadasi Soup Bowl, I love the organic shape of these dishes.

Enjoy! 

roasted_tomato_soup-2.jpg
roasted_tomato_soup-3.jpg

Roasted Tomato Soup + Parmesan Croutons

  • 3-4 lbs Heirloom Tomatoes, quartered

  • 1 small onion, quartered

  • 1 small red bell pepper, quartered

  • 2 cloves of garlic, smashed

  • 2 tablespoons fresh thyme, chopped

  • 3 tablespoons olive oil

  • 3 cups chicken stock

  • 1/2 cup milk

  • 1 tablespoon tomato paste

  • Salt and pepper to taste

Preheat oven to 400°. Add the tomatoes, onion, pepper, garlic and thyme to large dutch oven (or oven-safe pot). Add the olive oil, a little salt and pepper and mix until well combined. Place in oven uncovered and roast for about 30-40 minutes, until the tomatoes start to char a bit. 

Remove from oven and ladle the tomato mixture into a blender, blend until pureed.

Return the tomatoes to the dutch oven then whisk in the chicken stock, tomato paste and milk. Bring the soup to a simmer and add salt and pepper to taste, continue to simmer for 10-15 minutes. Ladle into bowls and top with croutons (recipe below) and some fresh herbs, sprinkle a little parmesan cheese if you like.


Parmesan Croutons

  • 2-3 cups bread cubes, baguette or similar

  • 1/4 cup olive oil

  • 1/8 cup parmesan cheese

  • A couple sprigs of fresh thyme or oregano

Heat oven to 350°. Cut bread into rough 1” cubes and place in large bowl. Stir in the olive oil, parmesan cheese, fresh chopped herbs, and a pinch of salt and a few grinds of fresh pepper.

Spread a single layer on a parchment lined baking sheet, bake for 20-25 minutes until golden brown, tossing midway. Remove from oven and set aside to cool. Store in refrigerator if you have leftover.

Grilled Corn and Pepper Salad

grilled_corn_pepper_salad-1.jpg

Grilled Corn and Pepper Salad. I hadn’t planned on posting this but damn, it came out so good I decided to take a few photos and do a blog post. I made this based on what I had on hand and what needed to be eaten pronto! And we’ve had a mini heatwave these past couple days so I wanted to cook as little as possible. I put the corn and peppers on the grill early in the day before it was unbearably hot. I can’t complain though, this summer has been remarkably mild. So salad. There is so much flavor going on in each bite it’s just a complete joy. Make sure to chop the vegetables small, close to the size of corn kernels but they don’t have to be that small. Recipe below, enjoy!

grilled_corn_pepper_salad-2.jpg
grilled_corn_pepper_salad-3.jpg
grilled_corn_pepper_salad-5.jpg

Grilled Corn and Pepper Salad

  • 2 ears of corn, charred

  • 2 bell peppers, charred

  • 1 red chili pepper, chopped small

  • 1 small cucumber (about 1/2 cup chopped small)

  • 1/4 cup fresh chopped basil

  • 1/4 cup feta cheese

  • 3-4 tablespoons Dijon vinaigrette 

Husk the corn and place it in boiling water for 5 minutes. Remove corn and place on a large dish with the 2 bell peppers. Brush the corn and peppers with avocado oil (or any high heat oil), and sprinkle with salt. Place them on a preheated grill (400°-500°F) for about 15-20 minutes, turning them every once in a while so they char on all sides. Remove vegetables from the grill and place the peppers in a bowl topped with plastic wrap for 15 minutes or so. When the peppers are cool enough to handle, remove the skin, core and seeds, then chop into small pieces. 

Cut the kernels off the corn cob by sliding a knife down the side. When the corn and peppers are completely cooled add them to a large bowl. Add the chili pepper, cucumber, and basil and mix to combine. Add the feta and Dijon dressing along with salt and pepper to taste.

Panzanella

panzanella-1.jpg

Hello tomatoes! Wow it’s been such a cool summer that it has taken a bit longer for them to ripen in the garden, but last week all four plants decided it was time. The yellow Taxi tomatoes along with the Sungold cherry tomatoes were the first on the scene, followed by Black Krim, and lastly the Brandywine. I’ve been wanting to make this Panzanella for a while, and since I had made a loaf of No-Knead bread a couple days prior it worked out great. Most recipes say to put the bread cubes in the oven, but I opted for the skillet which went pretty quick and ya know, fried bread? So good. You could serve this as a side dish or appetizer, or it makes a great vegetarian meal when you want something light. 

And speaking of serving, I received sample dishes from Carthage.co Stoneware which you see here and they are just beautiful! The large white plate is the Dadasi Dinner plate in chalk and the dark bowl is the Zaghwan Soup Bowl in Old Silver. I think they both look great but especially love the Zaghwan bowl with these bright colored tomatoes. And the prices are quite reasonable for high-end ceramic dishes. You can read more about these hand-crafted ceramics here. They have a nice weight to them and they’re a pleasure to photograph. I’ll be back with more tomato and/or zucchini dishes this month. Until then I recommend this Panzanella, enjoy!

panzanella-2.jpg
panzanella-3.jpg
panzanella-4.jpg
panzanella-5.jpg
panzanella-6.jpg
panzanella-7.jpg
panzanella-8.jpg
panzanella-9.jpg
panzanella-11.jpg
panzanella-10.jpg
panzanella-13.jpg
panzanella-12.jpg

Panzanella

  • 3 cups baguette or rustic bread, preferably stale, cut into 1-inch cubes

  • 6 tablespoons extra-virgin olive oil, more to taste

  • 3/4 teaspoon kosher sea salt, more to taste

  • 2 pounds very ripe tomatoes, preferably a mix of varieties and colors

  • 6 ounces small fresh mozzarella balls (or shredded chunks of fresh mozzarella)

  • 1/2 cup torn basil leaves

  • Salt and pepper to taste

  • 1/2 teaspoon Dijon mustard

  • 2 tablespoons Champagne vinegar (or white balsamic vinegar)

  • 1/4 cup Olive Oil

  • Salt and Pepper

In a large bowl mix together the bread cubes with olive oil and salt. Add a bit of olive oil to a  large cast iron skillet and heat on medium, when warm place the cubes in a single layer, tossing as needed until crisp on all sides. When done place the bread cubes on a plate and allow to cool a bit. 

To make the dressing, in a small bowl whisk together the Dijon and vinegar, then whisk in the olive oil.

Cut the tomatoes into chunks and then add them to a large bowl, add the mozzarella, bread cubes and the basil leaves (but leave a few to top the dish), add some salt and pepper and stir gently. Let sit for at least 30 minutes. Top with remaining basil leaves. Serve at room temp.

Zucchini + Herb Ricotta Tarts

zucchini_ricotta_tart-1.jpg

Zucchini and Herb Ricotta Tarts. I’m looking for all ways to eat zucchini lately. This is the first time we’ve grown zucchini and wow! it grows quickly, seems every 3 days or so there are a couple more to pick. It’s easy enough just to grill but I want to try some new ways to prepare it. I pickled some last week and they came out great. I’d like to get that recipe in a post soon, but you might start calling me The Zucchini Lady, ha ha. This tart dough is different than other doughs I’ve made, you make it with melted butter which is the opposite of 99% pie doughs out there as they use cold butter, but I thought I’d give it a try because with this dough you don’t have to roll it out, you simply press it in the pan. It was much easier and faster to make. You just mix it in a bowl by hand in one minute. Done. I was surprised by how much I liked it! Really nice texture, almost like a cookie type texture. I would make this again no doubt, but for savory tarts I would cut back on the sugar and add more salt, other than that it’s a winner. This Zucchini + Herb Ricotta Tart is super delicious, we had it with a side of Radicchio salad, it’s good for a lunch or light dinner. Oh and pan size, you can make one 9” tart or make a few smaller ones, I used a 6” tart pan and two 4” tart pans, the math doesn’t quite work out on that but it worked for me! ¯\_(ツ)_/¯ Enjoy :)

zucchini_ricotta_tart-2.jpg
zucchini_ricotta_tart-3.jpg
zucchini_ricotta_tart-4.jpg
zucchini_ricotta_tart-5.jpg
zucchini_ricotta_tart-6.jpg

Zucchini + Herb Ricotta Tarts

  • 1/2-1 whole zucchini sliced 1/8” thick

  • 1 cup ricotta

  • 1/4 cup shredded mozzarella

  • 1 teaspoon fresh thyme

  • 1 teaspoon fresh oregano 

  • Olive oil

  • Salt & Pepper

  • Tart dough (recipe below)

In a bowl combine the cheeses and fresh herbs with some salt and pepper. Spread a layer of the cheese mixture into the prepared tart pans, then arrange the zucchini slices on top. Drizzle with some olive oil to cover all the vegetable. Lightly salt. Bake at 400°F for 25-35 minutes until just browned.

Tart Dough

  • 1 stick (1/2 cup) melted butter

  • 3 tablespoons sugar (or 1 1/2 tablespoons for less sweet)

  • 1/4 teaspoon salt

  • 1 1/4 cups flour

Preheat oven to 350°F. In a large bowl combine butter, sugar and salt, then add flour and mix with wood spoon until just combined. 

Distribute the dough on the bottom of your tart pan(s) and press the dough evenly over bottom and sides. You can use a floured cup to press it if necessary (i just used my fingers). Cover the tart shell with plastic wrap and refrigerate for 30 minutes to 1 hour. Once chilled, with a fork prick the shell all over and bake for 10 minutes. Remove from oven to cool. Then add filling and bake as directed.

Tart dough adapted from Chowhound

Zucchini Nut Bread

zucchini_nut_bread-8.jpg

Zucchini Nut Bread. I didn’t expect to make this so soon. Our zucchini plant is growing so quickly now and producing more than we anticipated. We’ve picked 4 zucchini in the past week and more are on the way. This is the first time we’ve grown it so I didn’t know what to expect. Last year I planted a yellow squash and that didn’t work out, all male blossoms and no squash. But we did some changes to our soil this year and it’s made a big difference. I’m not sure if I posted about this but we removed all our old soil in the garden beds (which was potting soil) and replaced it with a proper soil/compost mix and everything is growing great! The weather has been unusually mild so far this July, seriously rain in Portland in July? Almost unheard of. So it’s been more like a longer spring season. Which is ok with me, and the grass, but I think those tomatoes would appreciate a bit more heat. The weather forecast for this week is in the 70s!? Yep. Weird. 

The recipe is adapted from Sally’s Baking addiction and it’s good! It has lots of cinnamon which I love. I almost wish it had more zucchini in it. I’ll add more next time because I’m certain there will be a next time with all this zucchini, and I’ll update on this post. The original recipe added chocolate chips, but I didn’t really want that for this bread (cake!) so I added what nuts I had on hand, about 1/4 cup pistachios and 1/4 cup crushed hazelnuts. This Zucchini Bread is light in texture, and I kinda wish it were a bit more dense, I’ll experiment some more and let you know how it works out. 

It’s super delicious, easy to make and I’m sure you will enjoy this recipe.

zucchini_nut_bread-1.jpg
zucchini_nut_bread-2.jpg
zucchini_nut_bread-3.jpg
zucchini_nut_bread-4.jpg
zucchini_nut_bread-5.jpg
zucchini_nut_bread-6.jpg
zucchini_nut_bread-7.jpg
zucchini_nut_bread-9.jpg
zucchini_nut_bread-10.jpg

Zucchini Nut Bread

  • 1 and 1/2 cups all-purpose flour

  • 1/2 teaspoon baking powder

  • 1/2 teaspoon baking soda

  • 1/2 teaspoon salt

  • 2 teaspoons ground cinnamon

  • 1/4 teaspoon ground nutmeg

  • 1 cup chopped nuts 

  • 1/2 cup canola or vegetable oil

  • 1/2 cup packed light or dark brown sugar

  • 1/2 cup granulated sugar

  • 1 large egg, at room temperature

  • 2 teaspoons pure vanilla extract

  • 1 cup grated zucchini (about 1 medium)

Preheat the oven to 350°F (177°C). Grease a 9×5” loaf pan lined with parchment paper with butter.

In a large bowl whisk the flour, baking powder, baking soda, salt, cinnamon and nutmeg together then stir in the nuts. Set aside. In a medium bowl, whisk the oil, brown sugar, granulated sugar, egg, vanilla, and zucchini together until combined. Pour the wet ingredients into the dry ingredients. Gently combine with a wooden spoon; do not over mix. Spread the batter into prepared loaf pan. Bake for 45 – 55 minutes. The bread is done when a toothpick inserted in the center comes out clean. Remove the bread from the oven and set on a wire rack. Allow to cool completely before slicing.

Cover and store leftover bread at room temperature for up to 5 days (I’m not sure I would leave it out this long, and I’m not sure it wouldn’t get eaten in 5 days!)

Adapted from Sally’s Baking Addiction


Kale Pistachio Pesto

kale_pistachio_pesto-1.jpg

I made this pesto a few weeks ago with hazelnuts, and wow it was so good. But I’ve been seeing folks make it with pistachios and since I had some leftover from the pistachio cake I made last week I thought I’d give this a try. Honestly I love it with either nut. What’s nice about this kind of pesto is that you can change the nuts or the greens, add basil or not, add parsley or cilantro, there’s a lot of room to get creative and it just tastes so good. It’s really perfect for a vegetarian dish, or you could add bits of roast chicken if you wanted more protein. I joined Sprouted Kitchen Cooking Club a while back where Sara has made some variations on this pesto, and David Lebovitz posted a Kale Pistachio Pesto on Instagram that got me going on this. Most recipes say to pulse all the ingredients except the olive oil, then slowly add olive oil, but I just put everything in the food processor and it comes out fine, you might need to add a little olive oil after it’s finished if you want a different consistency. I just put it in a bowl, drizzle a bit of olive oil and give a stir. Lacinato Kale (or Tuscan or Dino, so many names for the same thing!) is such a great vegetable. It will store fairly long in the fridge, you can add it to soups, you can make salads, here’s a whole bunch of Kale recipes, and now pesto! I think it’s delicious, let me know what you think. Enjoy!

kale_pistachio_pesto-2.jpg
kale_pistachio_pesto-3.jpg
kale_pistachio_pesto-4.jpg
kale_pistachio_pesto-5.jpg
kale_pistachio_pesto-6.jpg
kale_pistachio_pesto-7.jpg
kale_pistachio_pesto-8.jpg

Kale Pistachio Pesto

  • Tuscan kale, about 5 ounces chopped

  • A bit of basil or fresh herbs, but not needed

  • 2 garlic cloves

  • 1/4 cup roasted unsalted pistachio nuts

  • 1/2 cup olive oil

  • 1/3 grated parmesan cheese

  • Juice of half a lemon

Place all ingredients in a food processor and pulse several times until it’s a granular textured consistency. Place in container and add a little more olive oil if needed. Toss with pasta and add a dollop on top with some grated parmesan.

Endive Salad with Blue Cheese + Dijon Vinaigrette

Endive Salad with Blue Cheese + Dijon Vinaigrette

This recipe is so easy it seems hardly worth a blog post, but deserves it still. It goes way back for me. When I was in college in New York City (a million years ago!) I waited tables at a french restaurant called Les Tournebroches.

Read More