Blueberry Granola Loaf Cake

blueberry_granola_loaf_cake-2.jpg

Hi there. I’m excited to share some news with you! I’ve been making granola on repeat all through the pandemic. It tastes really good so I had an idea a few months back to package and sell it (locally, at least for now). I set up a page here on Pixels + Crumbs with more info on Good Day Granola. I’m looking to be a vendor at some of Portland farmer’s markets over the next few months and I’ll be updating that page as things progress. I was at a Maker’s market last weekend and I managed to sell quite a few bags of granola. I had a lot of fun and I’ve enjoyed the whole process from recipe development, branding and packaging to being a vendor. It was also great to be around people. I’m fully vaccinated at this point and it feels so liberating! I know it’s not 100% guarantee but it gives me peace of mind. Once I can bake in a commercial kitchen I’ll be able to sell online and I’ll be sure to let you know.

So moving on to this Blueberry Granola Loaf Cake. It’s similar to the Blueberry Lemon Yogurt Cake I made way back in the beginning of this blog. Here I used sour cream because I accidentally bought too much and had to use it. But you could use yogurt if that’s what you prefer. And the topping is granola! It works great on top of the cake and makes it a little more breakfasty.

One more thing, my cake took 1 hour and 20 minutes to thoroughly bake! Not sure why it took that long, it may have been the loaf pan I used, it’s cast-iron and really not the best for baking cakes like this, but I think it looks cute for the photos, lol, so I would recommend testing the center of the cake 50-60 minutes and take it from there. It might need to go longer. Enjoy!

blueberry_granola_loaf_cake-1.jpg

Blueberry Granola Loaf Cake 

  • 1 1/2 Cups all-purpose flour

  • 2 teaspoons baking powder

  • 1/2 teaspoon kosher salt

  • 1 cup sour cream

  • 1 cup sugar

  • 3 large eggs

  • 2 teaspoons lemon zest (about 2 lemons)

  • 1/2 teaspoon vanilla extract

  • 1/2 cup canola oil

  • 1 cup blueberries

  • 1 cup granola

Preheat oven to 350°. Grease loaf pan, line the bottom and longer sides with parchment paper and grease the paper with butter.

Whisk the flour, baking powder and salt in a medium bowl.

In a large bowl whisk the yogurt, sugar eggs, lemon zest and vanilla until well combined. 

Mix the flour mixture into the liquid mixture.

Fold in the oil with a rubber spatula until thoroughly mixed then fold in the blueberries.

Pour the batter in the the pan, top with granola and bake for 1 hour, checking at the 50 minute mark until toothpick comes out clean in center.

Remove from oven to baking rack and cool for about 10 minutes leaving it in the pan, remove cake from pan with the parchment handles and let cool another 10 minutes or so until just warm.

Cranberry Orange Pecan Loaf Cake

cranberry_orange_pecan_loaf_cake-1.jpg

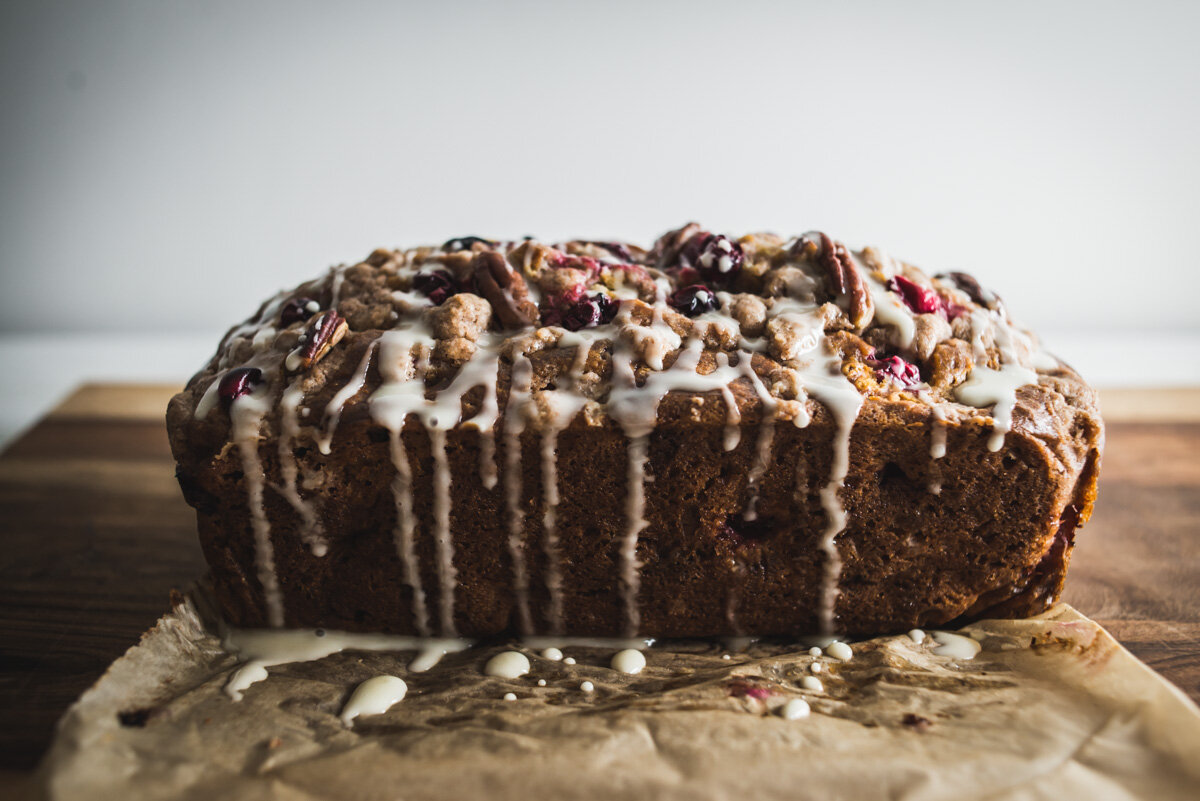
Cranberry Orange Pecan Loaf Cake. I had some fresh cranberries leftover from Thanksgiving and wanted to make some type of cake with them, I made a Cranberry Cobbler years ago but wanted something different, so here we are. This is such a great cake! I adapted the recipe from Sally’s Baking Addiction and made a few changes. For one, I melted the butter for the streusel, a lot of recipes say to use cold butter and crumble it into the flour and sugar, but sometimes I end up with flour that’s not quite mixed in with the butter after it’s done, I find it’s easier and more reliable to just add the sugar, spice and flour to melted butter. Also instead of buttermilk I used a mixture of greek yogurt and milk, and I added some Pecans to the recipe.

My baking time was a lot different than the 45 minutes to an hour suggested in the original recipe, it may have been due to the pan I used, a cast iron loaf pan, but in any case the total bake time for me was 1 hour and 20 minutes! It didn’t seem quite done after an hour so I took the temperature and let it go longer until it reached 200°. That worked! It’s a great cake, enjoy!

Oh and be careful out there friends, Covid-19 cases are going through the roof! We’re so close to getting a vaccine, it’s not that much longer, do your best to stay safe for you, your family, your neighbors, friends, we’re all in this together! 

cranberry_orange_pecan_loaf_cake-2.jpg
cranberry_orange_pecan_loaf_cake-3.jpg
cranberry_orange_pecan_loaf_cake-4.jpg
cranberry_orange_pecan_loaf_cake-5.jpg
cranberry_orange_pecan_loaf_cake-6.jpg
cranberry_orange_pecan_loaf_cake-7.jpg
cranberry_orange_pecan_loaf_cake-8.jpg

Cranberry Orange Pecan Loaf Cake

Streusel

  • 1/4 cup all-purpose flour

  • 2 Tablespoons granulated sugar

  • 1/2 teaspoon ground cinnamon

  • 3 Tablespoons salted butter, melted

Cake

  • 2 cups all-purpose flour

  • 1 teaspoon baking soda

  • 1/2 teaspoon salt

  • 1 large egg

  • 1/2 cup dark brown sugar

  • 1/2 cup granulated sugar

  • 2/3 cup milk

  • 1/3 cup greek yogurt

  • 1/3 cup vegetable oil 

  • 1 teaspoon pure vanilla extract

  • 2 teaspoons orange zest (about 1 orange zested)

  • 1 cup fresh cranberries (more for topping)

  • 1/2 cup crushed pecans (more for topping)


Glaze

  • 1/2 cup powdered sugar

  • 1 Tablespoon orange juice

Preheat oven to 350°F. Grease a 9×5 inch loaf pan with butter, line with parchment paper and butter that as well.

Make the streusel: Whisk the flour, sugar, and cinnamon together in a medium bowl. Add the melted butter and stir with a fork until combined. Set aside.

Make the cake: Whisk the flour, baking soda, and salt together in a large bowl. 

In a medium bowl, whisk the egg, brown sugar, and granulated sugar together until combined. Whisk in the milk, yogurt, oil, vanilla, and orange zest. 

Pour the wet ingredients into the dry ingredients, then fold with a rubber spatula to completely combine. Fold in the cranberries and Pecans.

Pour the batter into prepared loaf pan. Scatter the streusel on top, add a few cranberries and crushed pecans. Cover the baking dish with foil and bake for 35 minutes. Then remove foil and bake for an additional 25-45 minutes. Cake is done when cake tester or toothpick comes out clean (or at 200° temp, I started using a thermometer because sometimes it comes out clean and it’s not bake all the way through!)

Cool bread completely in the pan set on a wire rack. Then remove using your “parchment handles” onto serving plate or board.

The glaze! In a small bowl, whisk the powdered sugar and orange juice together. Drizzle over cooled bread.

Slice and serve. Cover and store leftover bread at room temperature for 1 day or in the refrigerator for up to 1 week.

Adapted from Sally’s Baking Addiction

Raspberry Pistachio Oat Scones

raspberry_pistacio_oat_scones-1.jpg

I haven’t made scones in a long long time. There are a couple recipes here in the archives but I haven’t made them like this before. Last week I saw Teresa posted this recipe on Instagram and it sounded really good. Plus I still have raspberries in the freezer from last summer’s harvest! I had to rinse and defrost them so they basically mushed into the batter, but not a big deal as they really tasted great. Two things I like about this recipe. 1. there is no added sugar other than maple syrup, and 2. I really like the texture of the oats in the scones. This recipe was also different in that you have sort of a shaggy loose dough, so you form it in a circle on your baking sheet, then pre-cut the slices (but not separating them), bake, then slice them apart afterward. The recipe was super easy and like I said I think it tastes great, these are not the dried out scones of yesteryear. You know what I mean? Like the ones Larry David prefers? Have you been watching the most recent Curb Your Enthusiasm? I’m trying to find a link to the scone scene, but all I can find is this part where he wants to open a spite store next door to Mocha Joe’s after being banned from there, and he thinks he knows what is the BEST scone to serve at his new spite cafe. Anyway it’s pretty funny because his scones are dry as the Sahara and nobody likes them. I promise these are not dry scones. Also, there’s an optional glaze I’ve included below in the recipe, I didn’t use it and kinda like this barely-sweet scone. However if you’re wanting something sweeter be sure to top them with the glaze. Enjoy!

raspberry_pistacio_oat_scones-3.jpg
raspberry_pistacio_oat_scones-2.jpg
raspberry_pistacio_oat_scones-4.jpg

Raspberry Pistachio Oat Scones

  • 1 cup all-purpose flour

  • 1 cup oats

  • 1 tablespoon baking powder

  • 1/2 teaspoon salt

  • 4 tablespoons butter, softened almost melted

  • 1/4 cup pure maple syrup

  • 1 tablespoon vanilla extract

  • 1 large egg

  • 1/4 cup whole milk greek yogurt

  • 1 cup raspberries

  • 1/2 cup chopped pistachios

Preheat oven to 400°F. Line a baking sheet with parchment paper and set aside. 

In a large bowl whisk together flour, oats, baking powder and salt in a bowl. Set aside.

In a separate bowl whisk together the butter, maple syrup, vanilla extract, egg, and whole milk yogurt.

Add the wet ingredients to dry ingredients and stir to combine with a wooden spoon. Gently fold in raspberries and pistachios. They will get a bit smushed. (mine did a lot!)

Place batter on top and round it into a disk shape. Batter will be sticky. Cut into 6-8 pieces (depending on the size of scone you want, I did 6) so when they come out of the oven you can run the knife through again to fully separate. 

Bake for 20-25 minutes, rotating the sheet half-way through to ensure even cooking. When done, they should be slightly firm. Finish cutting and enjoy! (They can keep on the counter, covered, for one day, but I recommend refrigerating any more than that because of the fresh fruit)

Glaze (optional)

  • 1 cup powdered sugar

  • 4-5 tablespoons milk

  • 1/2 teaspoon vanilla extract

Whisk together all the ingredients until smooth and drizzle over cooled scones.

Adapted from @aloveafare

Summer Cheese Board

summer_cheese_board-1.jpg

I know, I know, it’s September, but it is technically still summer. I’ve been wanting to do a summer cheese board for some time and also show the grapes we grew! We were so excited to see them grow this year since we only planted them two years ago. It’s a pretty productive vine and I have no idea what to do with so many green grapes other than cheese boards and snacks. They were a challenge to photograph, mostly hiding behind the leaves, and being on the northern fence, it was almost always bad lighting. When light did reach the grapes, it was like a giant spotlight, and when it didn’t, it was all so dark. And green. But hey, here they are. After 6+ years creating on this blog, this is the first blog post without a recipe! I’ll post a list of what I have here for fruit and cheese because the Humbolt Fog with peach on a slice of baguette is amazing! I had fun arranging the cheese board with the end of summer fruits. I know strawberries don’t produce much into the summer in some areas, but in my backyard they just keep going and going, it’s one of those every-bearing varieties. The plums and peaches are truly reaching the end of the season here, when I was buying them the clerk said get them while you can because this is it. So this is it. End of summer folks, Autumn begins September 23rd. Soups are on the horizon!

summer_cheese_board-1-2.jpg
summer_cheese_board-2-2.jpg
summer_cheese_board-4.jpg
summer_cheese_board-2.jpg
summer_cheese_board-3.jpg
summer_cheese_board-5.jpg
summer_cheese_board-6.jpg

Summer Cheese Board

Panzanella

panzanella-1.jpg

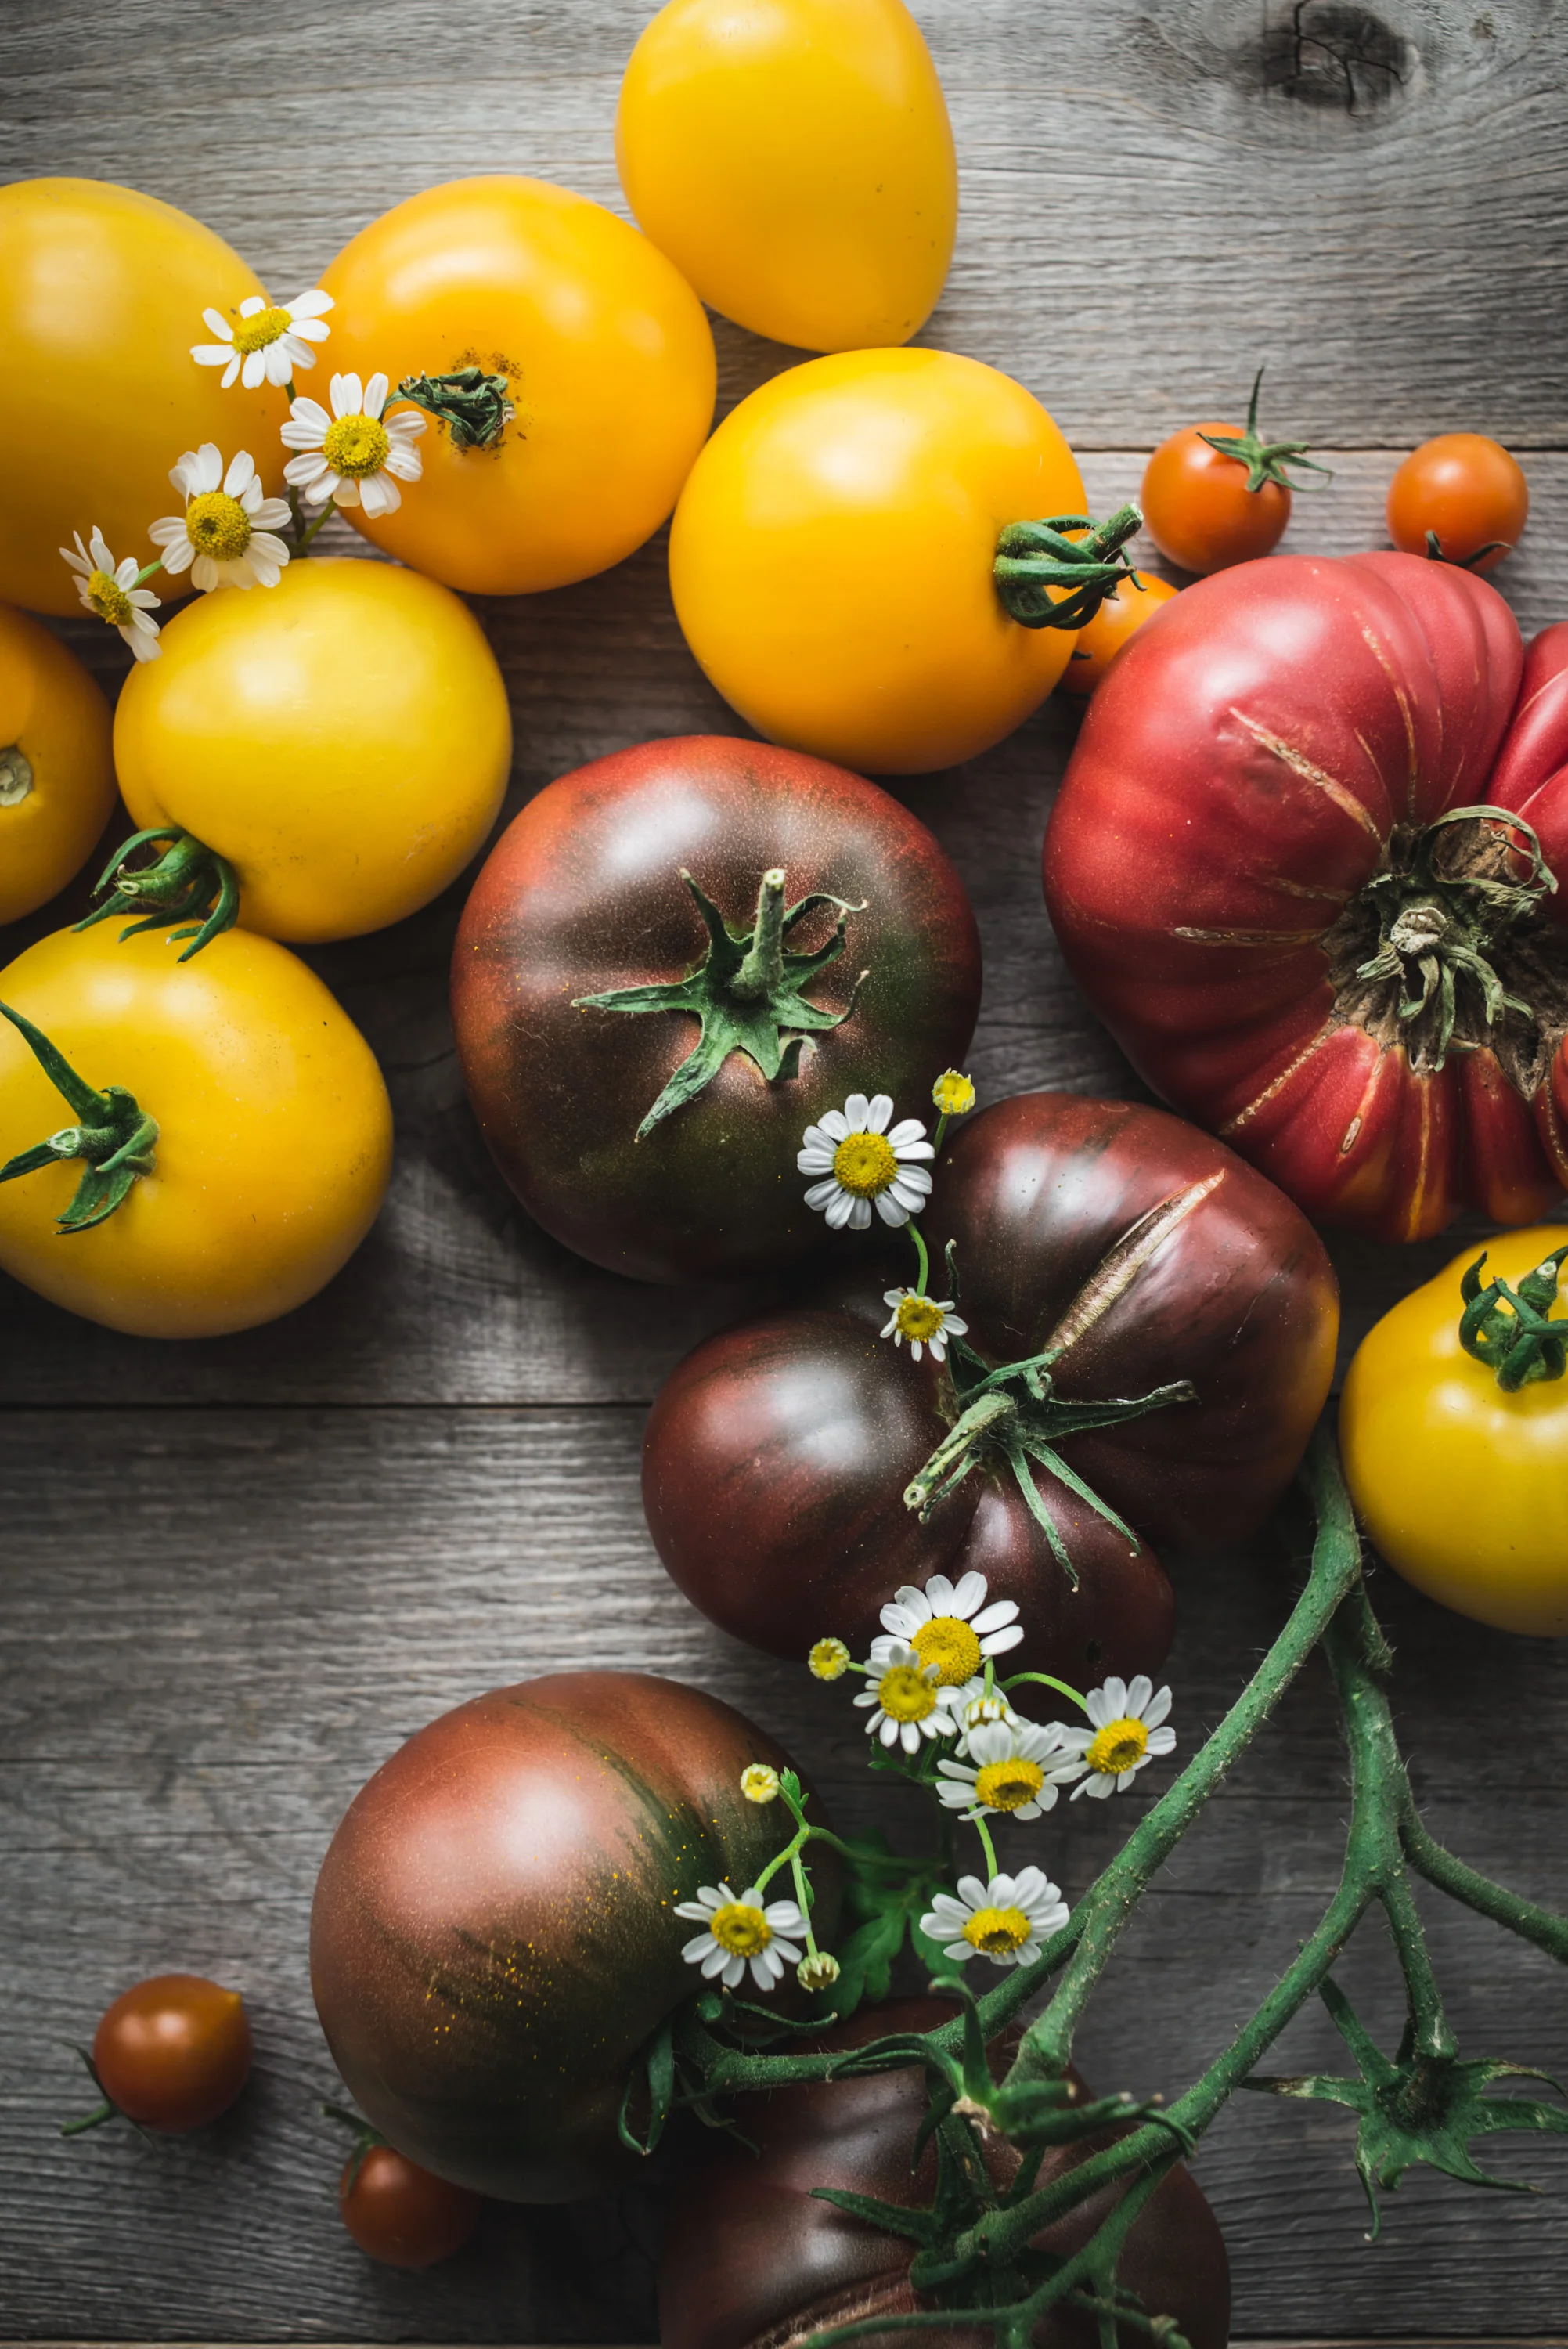
Hello tomatoes! Wow it’s been such a cool summer that it has taken a bit longer for them to ripen in the garden, but last week all four plants decided it was time. The yellow Taxi tomatoes along with the Sungold cherry tomatoes were the first on the scene, followed by Black Krim, and lastly the Brandywine. I’ve been wanting to make this Panzanella for a while, and since I had made a loaf of No-Knead bread a couple days prior it worked out great. Most recipes say to put the bread cubes in the oven, but I opted for the skillet which went pretty quick and ya know, fried bread? So good. You could serve this as a side dish or appetizer, or it makes a great vegetarian meal when you want something light. 

And speaking of serving, I received sample dishes from Carthage.co Stoneware which you see here and they are just beautiful! The large white plate is the Dadasi Dinner plate in chalk and the dark bowl is the Zaghwan Soup Bowl in Old Silver. I think they both look great but especially love the Zaghwan bowl with these bright colored tomatoes. And the prices are quite reasonable for high-end ceramic dishes. You can read more about these hand-crafted ceramics here. They have a nice weight to them and they’re a pleasure to photograph. I’ll be back with more tomato and/or zucchini dishes this month. Until then I recommend this Panzanella, enjoy!

panzanella-2.jpg
panzanella-3.jpg
panzanella-4.jpg
panzanella-5.jpg
panzanella-6.jpg
panzanella-7.jpg
panzanella-8.jpg
panzanella-9.jpg
panzanella-11.jpg
panzanella-10.jpg
panzanella-13.jpg
panzanella-12.jpg

Panzanella

  • 3 cups baguette or rustic bread, preferably stale, cut into 1-inch cubes

  • 6 tablespoons extra-virgin olive oil, more to taste

  • 3/4 teaspoon kosher sea salt, more to taste

  • 2 pounds very ripe tomatoes, preferably a mix of varieties and colors

  • 6 ounces small fresh mozzarella balls (or shredded chunks of fresh mozzarella)

  • 1/2 cup torn basil leaves

  • Salt and pepper to taste

  • 1/2 teaspoon Dijon mustard

  • 2 tablespoons Champagne vinegar (or white balsamic vinegar)

  • 1/4 cup Olive Oil

  • Salt and Pepper

In a large bowl mix together the bread cubes with olive oil and salt. Add a bit of olive oil to a  large cast iron skillet and heat on medium, when warm place the cubes in a single layer, tossing as needed until crisp on all sides. When done place the bread cubes on a plate and allow to cool a bit. 

To make the dressing, in a small bowl whisk together the Dijon and vinegar, then whisk in the olive oil.

Cut the tomatoes into chunks and then add them to a large bowl, add the mozzarella, bread cubes and the basil leaves (but leave a few to top the dish), add some salt and pepper and stir gently. Let sit for at least 30 minutes. Top with remaining basil leaves. Serve at room temp.

Zucchini + Herb Ricotta Tarts

zucchini_ricotta_tart-1.jpg

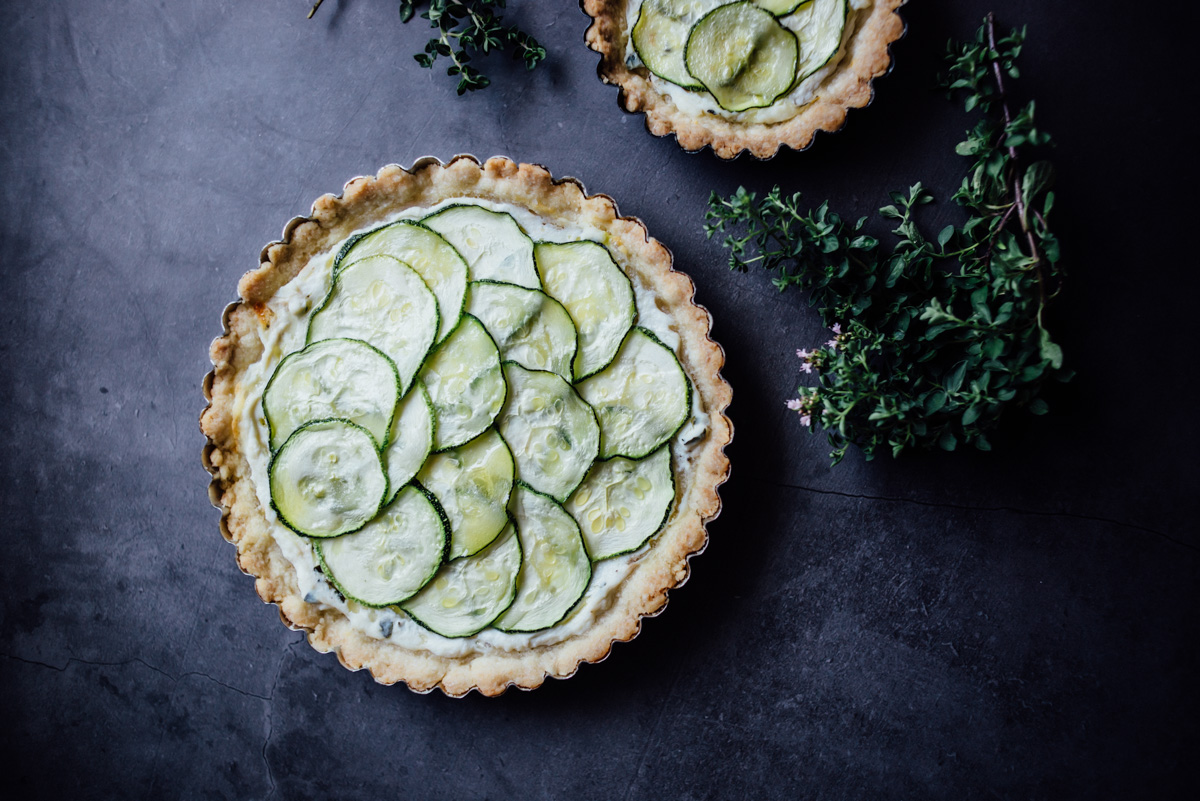
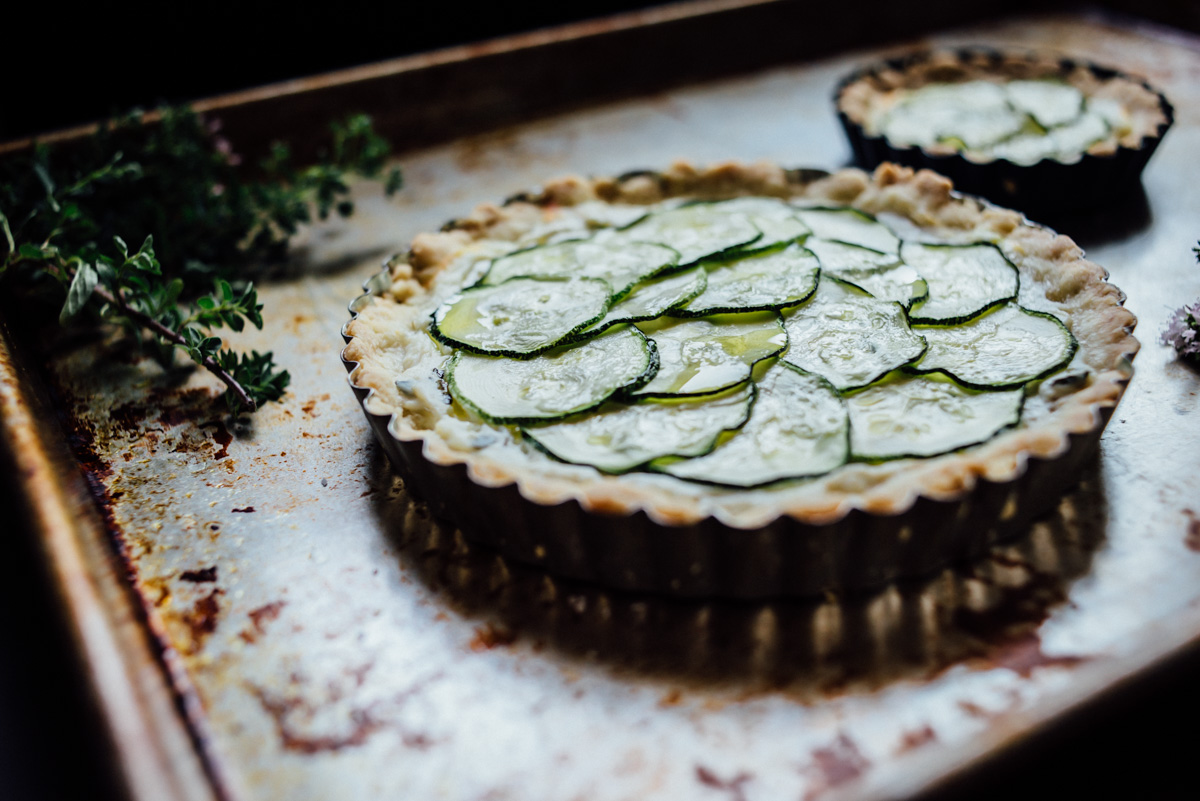
Zucchini and Herb Ricotta Tarts. I’m looking for all ways to eat zucchini lately. This is the first time we’ve grown zucchini and wow! it grows quickly, seems every 3 days or so there are a couple more to pick. It’s easy enough just to grill but I want to try some new ways to prepare it. I pickled some last week and they came out great. I’d like to get that recipe in a post soon, but you might start calling me The Zucchini Lady, ha ha. This tart dough is different than other doughs I’ve made, you make it with melted butter which is the opposite of 99% pie doughs out there as they use cold butter, but I thought I’d give it a try because with this dough you don’t have to roll it out, you simply press it in the pan. It was much easier and faster to make. You just mix it in a bowl by hand in one minute. Done. I was surprised by how much I liked it! Really nice texture, almost like a cookie type texture. I would make this again no doubt, but for savory tarts I would cut back on the sugar and add more salt, other than that it’s a winner. This Zucchini + Herb Ricotta Tart is super delicious, we had it with a side of Radicchio salad, it’s good for a lunch or light dinner. Oh and pan size, you can make one 9” tart or make a few smaller ones, I used a 6” tart pan and two 4” tart pans, the math doesn’t quite work out on that but it worked for me! ¯\_(ツ)_/¯ Enjoy :)

zucchini_ricotta_tart-2.jpg
zucchini_ricotta_tart-3.jpg
zucchini_ricotta_tart-4.jpg
zucchini_ricotta_tart-5.jpg
zucchini_ricotta_tart-6.jpg

Zucchini + Herb Ricotta Tarts

  • 1/2-1 whole zucchini sliced 1/8” thick

  • 1 cup ricotta

  • 1/4 cup shredded mozzarella

  • 1 teaspoon fresh thyme

  • 1 teaspoon fresh oregano 

  • Olive oil

  • Salt & Pepper

  • Tart dough (recipe below)

In a bowl combine the cheeses and fresh herbs with some salt and pepper. Spread a layer of the cheese mixture into the prepared tart pans, then arrange the zucchini slices on top. Drizzle with some olive oil to cover all the vegetable. Lightly salt. Bake at 400°F for 25-35 minutes until just browned.

Tart Dough

  • 1 stick (1/2 cup) melted butter

  • 3 tablespoons sugar (or 1 1/2 tablespoons for less sweet)

  • 1/4 teaspoon salt

  • 1 1/4 cups flour

Preheat oven to 350°F. In a large bowl combine butter, sugar and salt, then add flour and mix with wood spoon until just combined. 

Distribute the dough on the bottom of your tart pan(s) and press the dough evenly over bottom and sides. You can use a floured cup to press it if necessary (i just used my fingers). Cover the tart shell with plastic wrap and refrigerate for 30 minutes to 1 hour. Once chilled, with a fork prick the shell all over and bake for 10 minutes. Remove from oven to cool. Then add filling and bake as directed.

Tart dough adapted from Chowhound

The 7-Minute Egg

7_minute_egg-3.jpg

When it comes to boiling eggs, minutes really matter. I only recently discovered this. My whole life I’ve been starting them in cold water, bring to a boil, cook for an unknown amount of time, which resulted in a hard-boiled egg that was sometimes ok. But then I was watching Salt Fat Acid Heat recently and Samin mentioned the 7-minute egg, and it looked really good, not as runny as soft boiled but not hard boiled either. You start the eggs in boiling water. This makes an enormous difference. Not only the quality of the yolk, but the texture of the white, it’s fully cooked and kinda velvety, not rubbery which I thought all boiled eggs were just like that. And after 7 minutes you put them in an ice bath for a few minutes. Since I’ve been using this method the shell comes off the egg perfectly, no more moon craters of the past. The cooking times range from 6-12 minutes, with 12 minutes being hard boiled, everyone finds their favorite somewhere in-between, but I’m sold on 7-minutes. And, I made another video! If you like you can follow my Youtube channel here and Vimeo here

7_minute_egg-1.jpg
7_minute_egg-2.jpg

Sous Vide Egg Bites

sous_vide_egg_bites-1.jpg

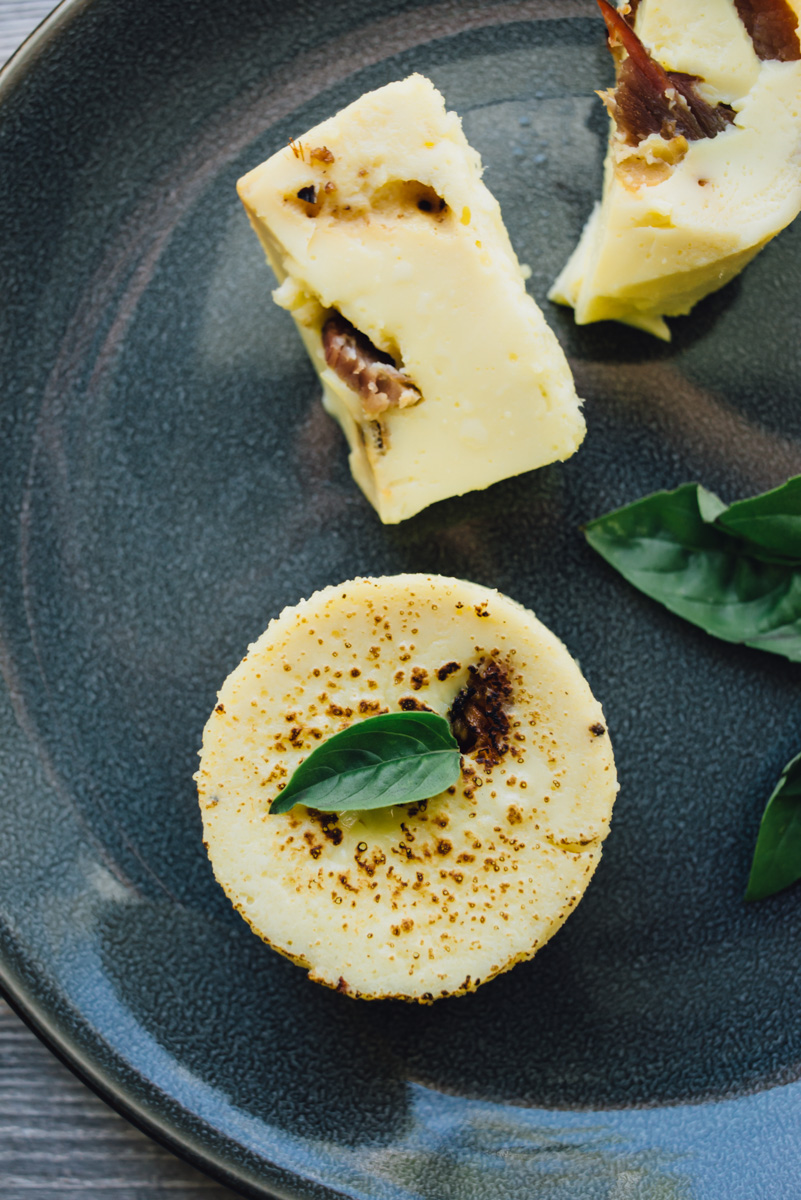
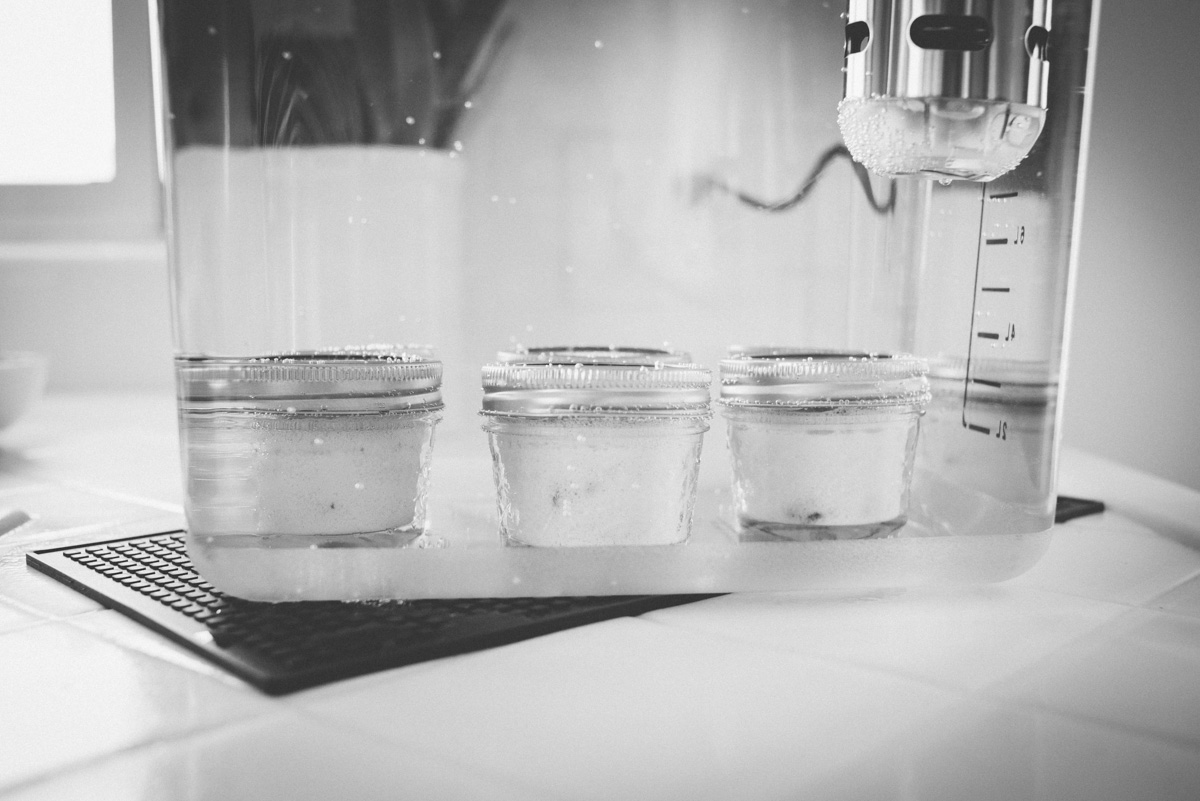
“Oh no! Not another kitchen gadget!” That was my response when Jeff suggested we get a Sous Vide. But the more I read about it the more I wanted it. The Egg Bites were fun and easy to make, but where the Sous Vide really excels is for cooking chicken breasts. Because of the precise temperature control the meat will cook remarkably consistent. And it’s also good for cooking steak followed by a quick sear. When I was researching what to make with the Sous Vide I came across this recipe for Egg Bites, apparently made popular by Starbucks. This recipe is for 6 servings, so you can make ahead, refrigerate and reheat them. It looks a bit like a science-lab, and with food sealed you can’t smell anything cooking so it tends to not feel like cooking at all. But the results are impressive and it’s been a good addition to our kitchen. One note on the jars, you want to make sure they are loosely secured so a little air can release (or they will explode!), when you tighten the lid, loosen it then tighten lightly with two fingers. If the jars float and will not stay on the bottom you will have to fix the lids, once they are sealed properly you will see some air bubbles rising and they will stay on the bottom of your container. The final result is a perfectly creamy cooked egg dish, similar to baked eggs, but not one part of it is overcooked. 
Oh and I just came across this article about Sous Vide which is pretty silly about men trying to impress women with their mad cooking skills, more interesting comments on David Lebovitz Facebook post here, it’s not for everyone or for every type of cooking, but it really is amazing for certain things like meat. And Egg Bites too!

sous_vide_egg_bites-2.jpg
sous_vide_egg_bites-3.jpg
sous_vide_egg_bites-4.jpg
sous_vide_egg_bites-5.jpg
sous_vide_egg_bites-6.jpg

Sous Vide Egg Bites

  • 6 eggs
  • 1/4 cup cream
  • 1/2 cup shredded cheese
  • 2 strips of bacon cooked, chopped
  • 1/4 cup Oven-dried tomatoes
  • Fresh basil (or any herb you like)
  • 6 four-ounce mason jars

Preheat water to 172°F

Butter mason jars and set aside. In a blender mix eggs and cream until combined. Use any variation of ingredients you like, I made three using cheese, oven dried tomatoes, basil, and three with Gruyere and bacon.

Place bacon, herbs, cheese in bottom of jars, pour egg mixture in each jar, top with a bit more cheese, loosely secure lids on jars, submerge in water (if the jars float the lids are on too tight, adjust and they should remain on bottom of container releasing air bubbles), cook for 90 minutes, remove from jars and serve or place in refrigerator for up to 1 week. 

Adapted from Anova

sous_vide_egg_bites-7.jpg