Crunchy Veggie Lentil Salad

crunchy_veggie_lentil_salad-1.jpg

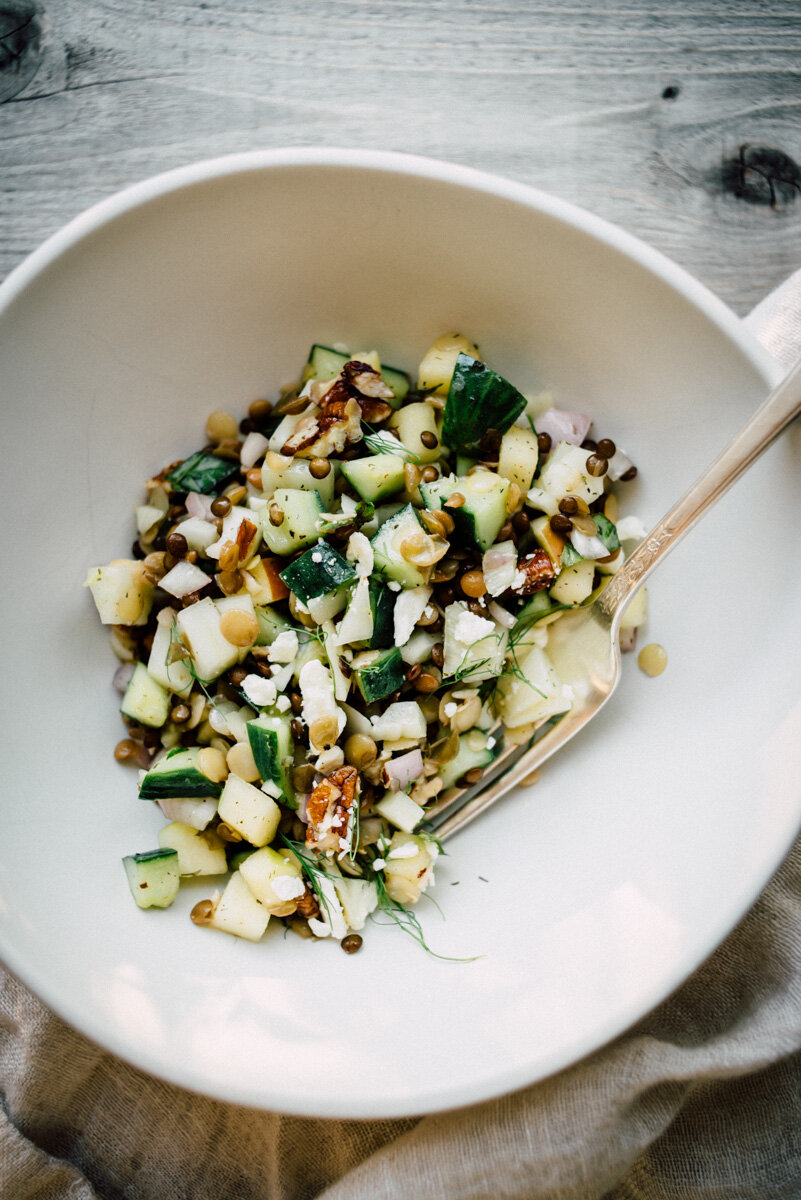
Crunchy Veggie Lentil Salad. I haven’t had lentil salad in a long time. And this was one of the recipes that came up on Sprouted Kitchen Cooking Club this week. Sarah called it “Crunchy Lunchy Lentils.” This is the type of salad you make ahead. It can last for days in the fridge and generally (always) tastes better after it’s had time to sit for a day or so. I’ve made a few adjustments to the recipe but didn’t deviate all that much. I used a trio of green, brown and black sprouted lentils that cooked in 6 minutes versus French lentils that take about 20 minutes. I think my ratios of veggie to lentils were off a bit, I think there should have been more lentils, but it still worked out to a great salad regardless. 

This month has been pretty crazy. A few weeks ago there were a series of fires that erupted here in Oregon, then came a wind storm that blew all the smoke over here in Portland. We had to literally seal all the openings in the house because the air quality outside was hazardous, it was coming in from the fireplaces, any opening in the house, and remained like that for nearly 10 days. When that started I had already begun my project to paint the kitchen cabinets and countertop, the kitchen was in complete disarray but I had to move forward and get it done. We had air purifiers and fans running 24/7. It was pretty horrible happening on top of a pandemic, we couldn’t spend time outside at all. A lot of businesses and restaurants (that are already hurting) had to close, and there were some days where I couldn’t get grocery delivery or take-out, which was kind of big deal because we couldn’t use the kitchen much, everything was covered in drop cloths, so not much cooking other than microwaving something or eating sandwiches. I had prepared a couple of dishes in advance and was planning on grilling outside while the kitchen was unusable, but that didn’t work out. It was just one disaster layered on top of another. Many people lost their homes due to the fires, so we were lucky that we didn’t have to go through anything like that. I finished my kitchen project, the outside air cleared up and it rained and rained. And now we’re having a beautiful week of sunshine, with windows open and fresh air everywhere. But I feel a little PTSD from the smoke episode, all this sunshine and dry weather is dangerous this time of year, even with a burn ban people still do stupid stuff and light camp fires or whatever. I’m so afraid of new fires and that smoke coming back. It was just too much. I think I should just have a cocktail and enjoy a few rays of sunshine for now. And really, we had so much rain last week I think things are ok and I shouldn’t worry so much.

Anyways, if you’re still reading, I hope you enjoy this salad, it’s vegetarian and could be vegan if you skip the feta cheese, but I just love cheese in this salad. Enjoy!

crunchy_veggie_lentil_salad-2.jpg
crunchy_veggie_lentil_salad-3.jpg
crunchy_veggie_lentil_salad-4.jpg
crunchy_veggie_lentil_salad-5.jpg

Crunchy Veggie Lentil Salad

  • 3/4-1 cup of French / De Puy lentils

  • 2 Persian cucumbers (or a 1/3 of an English Cucumber) - seeded

  • 1 apple

  • 1 medium fennel bulb - fronds reserved

  • 1 small shallot or 1/2 large shallot

  • 1/2 cup of pecans (or walnuts) chopped

  • 1/3 cup feta or parmesan cheese (+ more for serving)

  • 1/2 cup of fresh mint leaves

  • 1/4 cup of fresh basil leaves

For the vinaigrette

  • 1 clove of garlic, minced

  • 1 lemon - juiced

  • 2 Tbsp. of apple cider vinegar

  • 1 Tbsp. of maple syrup

  • 3 Tbsp. of extra virgin olive oil

  • 1/2 tsp. of dried dill

  • 1/2 tsp. of coriander

  • flaky sea salt

  • fresh ground pepper

Rinse your lentils. Put them in a pot with 1 ½ cups of salted water or broth. Bring the liquid up to a simmer, put the cover on ajar and cook for 20 minutes until tender. (if using different Lentils, cook per package instructions) Fluff the lentils, and set them aside to cool completely.

While the lentils cook, fine dice the cucumbers. Core and finely dice both the apple and fennel and mince the shallot. Chop the herbs.

In the bottom of your mixing bowl, combine all the vinaigrette ingredients and whisk to combine. Add the cooled lentils, all your chopped vegetables, walnuts, cheese and herbs. Toss to coat. Chill in the fridge for at least an hour, the longer it sits the better it tastes! It will keep a few days in the fridge, so this is a great side dish or lunch throughout the week. Top with fennel fronds when serving.
French Onion Soup

french_onion_soup-1.jpg

Hi folks! This is my first attempt at making French Onion Soup. There were a lot of recipes to choose from, all pretty similar, but the one I adapted here (from Food52) had a generous amount of red wine so I went with that, because red wine + beef broth = amazing flavor. But first I had to buy some individual oven-safe soup bowls. I found these at Crate and Barrel (on sale! yay!) and got the little platters to go with them. I think they’re really cute and will work great for future soup and sandwich situations. So as far as the soup goes, the biggest challenge will be cutting all those onions without burning your eyes, as I mention below in the recipe, I recommend using a food processor to slice them, be advised when you’re done and open the lid you will experience all that cut onion at once! I had to put the lid back on until I was ready to put them in the pan. Alternatively you can put the onions in the refrigerator a day in advance, or even the freezer if you don’t have that much time, this greatly reduces the burn factor. The cheese: I made the individual crocks twice, the first time I didn’t put enough soup in the bowl so I didn’t get the draped cheese effect. The second time I made it, which is what you see here, I added enough soup and really piled on the bread and cheese, but still, I only got a little drape. But seriously I can’t complain it tasted so good!

Another thing worth mentioning is that if you cook the soup and then refrigerate it overnight, it will taste even better the next day. It’s just a fact. Recipe below, enjoy!

french_onion_soup-3.jpg
french_onion_soup-2.jpg

French Onion Soup

  • 2 1/2 - 3 pounds onions

  • 3 tablespoons butter

  • 2 tablespoons olive oil

  • 3 cloves of garlic, smashed

  • 1 generous pinch of salt

  • Fresh ground black pepper, a few twists

  • 4 sprigs fresh thyme

  • 1 bay leaf

  • 6 cups beef stock

  • 2 cups red wine

  • 1 baguette or other crusty bread

  • 4-6 slices of swiss cheese, one for each serving

  • Grated gruyere cheese, a handful for each serving

Halve and slice the onions. I highly recommend a food processor to slice the onions. Slicing this many onions can be torture, if you don’t have a food processor place the onions in the refrigerator a day before and they won’t burn your eyes (as much if at all).

Melt together the butter and olive oil in a large dutch oven, add the garlic until it’s caramelized. Add the onions, season with salt and pepper, and stir around just until the onions are all coated in the olive oil/butter. Add in the fresh thyme and the bay leaf and let the onions caramelize, about 20-30 minutes. They will be golden to brown in color.

Once the onions are caramelized and have cooked down, pour in the stock and wine. Simmer uncovered for at least an hour and as much as three hours, add salt and pepper to adjust the flavors.

Meanwhile, slice the bread and toast in a 400° oven until lightly golden brown. You'll want 2 pieces of bread per person - one for the bottom of the bowl, and one for on top.

Grate your cheese. Alternatively, you can drape a deli-cut slice of cheese (swiss or gruyere) over the top of the bowls. I used both, grated cheese on the soup, then a slice of swiss over the toast slice.

Preheat your broiler. Remove the thyme sprigs and bay leaf from the soup. Arrange your oven-safe individual serving bowls on a baking sheet.

To prepare, place a toast slice in the bottom of each bowl. Ladle in the soup (close to the top of the bowl) top with some grated cheese, a slice of toast, then a slice of cheese or more grated cheese. Be generous! You want the cheese to seal in the soup and drape over the edge of the bowl. Which mine sort of did and didn’t, I swear I put so much cheese but it still melted down into the soup, so as you’re stacking your cheese and bread make sure to pile it high!

Makes about 4-6 servings.

Adapted from Food52

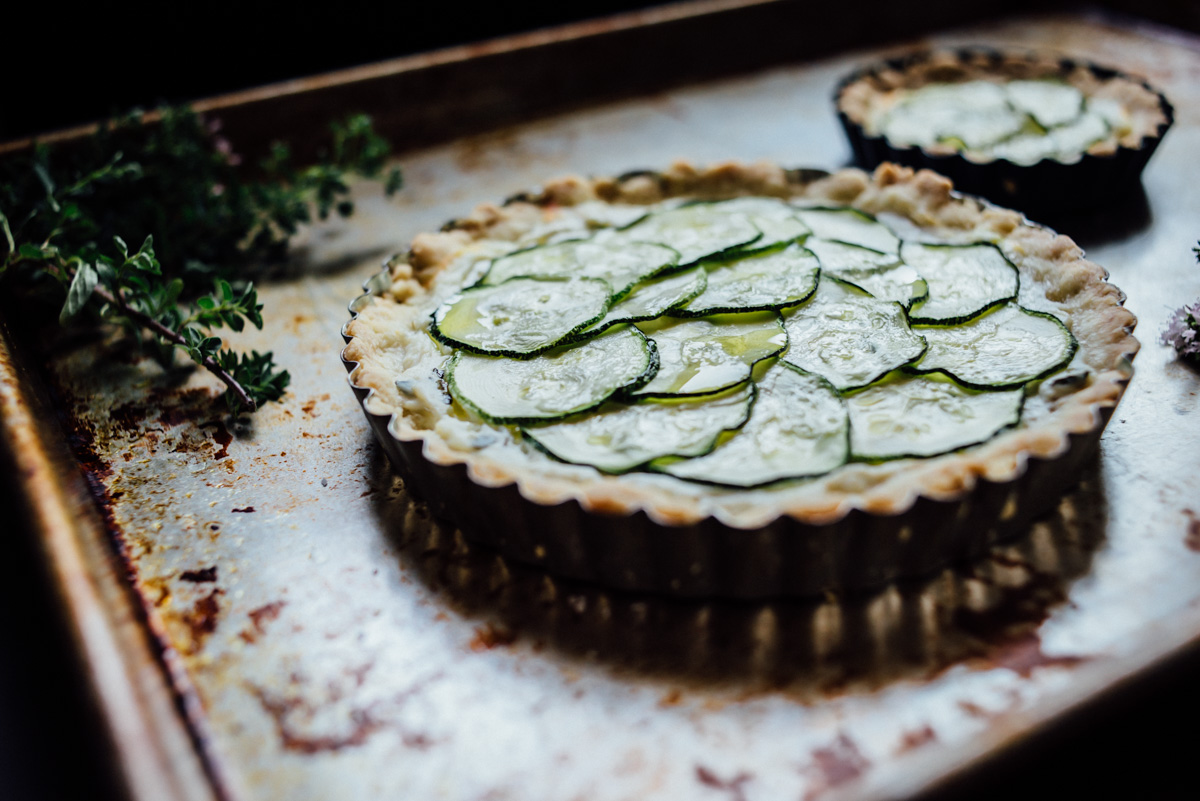
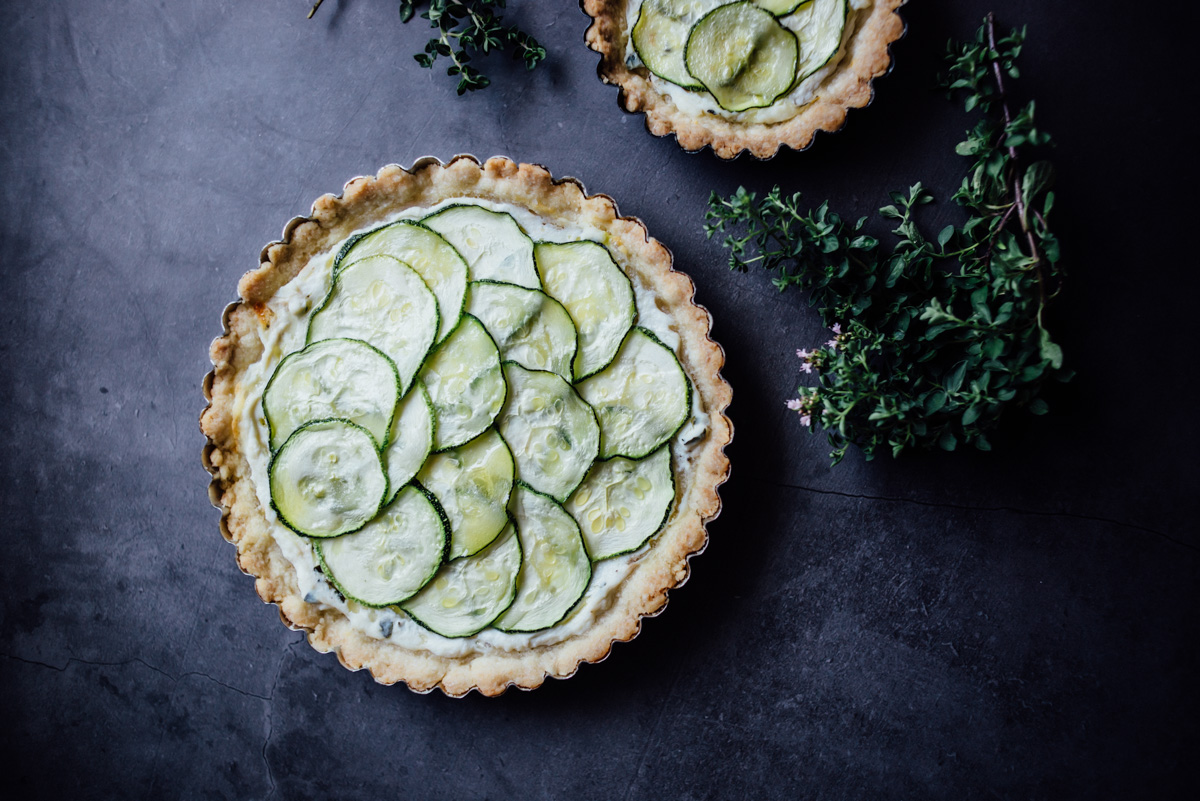
Zucchini + Herb Ricotta Tarts

zucchini_ricotta_tart-1.jpg

Zucchini and Herb Ricotta Tarts. I’m looking for all ways to eat zucchini lately. This is the first time we’ve grown zucchini and wow! it grows quickly, seems every 3 days or so there are a couple more to pick. It’s easy enough just to grill but I want to try some new ways to prepare it. I pickled some last week and they came out great. I’d like to get that recipe in a post soon, but you might start calling me The Zucchini Lady, ha ha. This tart dough is different than other doughs I’ve made, you make it with melted butter which is the opposite of 99% pie doughs out there as they use cold butter, but I thought I’d give it a try because with this dough you don’t have to roll it out, you simply press it in the pan. It was much easier and faster to make. You just mix it in a bowl by hand in one minute. Done. I was surprised by how much I liked it! Really nice texture, almost like a cookie type texture. I would make this again no doubt, but for savory tarts I would cut back on the sugar and add more salt, other than that it’s a winner. This Zucchini + Herb Ricotta Tart is super delicious, we had it with a side of Radicchio salad, it’s good for a lunch or light dinner. Oh and pan size, you can make one 9” tart or make a few smaller ones, I used a 6” tart pan and two 4” tart pans, the math doesn’t quite work out on that but it worked for me! ¯\_(ツ)_/¯ Enjoy :)

zucchini_ricotta_tart-2.jpg
zucchini_ricotta_tart-3.jpg
zucchini_ricotta_tart-4.jpg
zucchini_ricotta_tart-5.jpg
zucchini_ricotta_tart-6.jpg

Zucchini + Herb Ricotta Tarts

  • 1/2-1 whole zucchini sliced 1/8” thick

  • 1 cup ricotta

  • 1/4 cup shredded mozzarella

  • 1 teaspoon fresh thyme

  • 1 teaspoon fresh oregano 

  • Olive oil

  • Salt & Pepper

  • Tart dough (recipe below)

In a bowl combine the cheeses and fresh herbs with some salt and pepper. Spread a layer of the cheese mixture into the prepared tart pans, then arrange the zucchini slices on top. Drizzle with some olive oil to cover all the vegetable. Lightly salt. Bake at 400°F for 25-35 minutes until just browned.

Tart Dough

  • 1 stick (1/2 cup) melted butter

  • 3 tablespoons sugar (or 1 1/2 tablespoons for less sweet)

  • 1/4 teaspoon salt

  • 1 1/4 cups flour

Preheat oven to 350°F. In a large bowl combine butter, sugar and salt, then add flour and mix with wood spoon until just combined. 

Distribute the dough on the bottom of your tart pan(s) and press the dough evenly over bottom and sides. You can use a floured cup to press it if necessary (i just used my fingers). Cover the tart shell with plastic wrap and refrigerate for 30 minutes to 1 hour. Once chilled, with a fork prick the shell all over and bake for 10 minutes. Remove from oven to cool. Then add filling and bake as directed.

Tart dough adapted from Chowhound

Endive Salad with Blue Cheese + Dijon Vinaigrette

Endive Salad with Blue Cheese + Dijon Vinaigrette

This recipe is so easy it seems hardly worth a blog post, but deserves it still. It goes way back for me. When I was in college in New York City (a million years ago!) I waited tables at a french restaurant called Les Tournebroches.

Read More

Pan Fried Chicken Sandwich With Avocado Mash + Bacon

Pan Fried Chicken Sandwich With Avocado Mash + Bacon

And yet another recipe from Five Points Brunch book that I've been going crazy over. There is one more recipe from the book coming soon and I think I may move on to some other meals, but then again, brunch lover that I am, I might just continue with all 100 brunch recipes. 

Read More