The Better Cheesecake

Welcome 2022! I’ve seen a lot of complaining and griping about 2021, but honestly for me it’s been one of the best years of my life. My granola business seems to be a good fit for me in so many ways. I’ve learned so much in the past 8 months about bringing a product to market, and I’ve met so many wonderful people. It’s been an incredibly positive experience. Not that I wasn’t complaining, last fall when the Delta variant hit Oregon hard we had to wear masks outside at the markets! That was a bit much! But we got through it. So…cheesecake!

The Better Cheesecake. I named it as such because it is remarkably better than my other cheesecake recipe. I made this for the new year and we were absolutely blown away by the flavor and texture. I think it’s the added heavy cream. And the way it’s baked. The recipe below is adapted from an adapted version of a Dorie Greenspan recipe on NYTimes Cooking

I changed a few things but not much. I used salted butter (and added more for the graham cracker crust) I think it tastes much better. Also I used a combination of sour cream and heavy cream, rather than just sour cream, and lastly I kept the pan of water separate in oven rather than placing cheesecake in pan of water. This was a tip that was in the comments section. The original recipe has you double foiling the pan and then placing it in boiling hot water while it’s baking. But it’s so much easier to just put a pan of hot water in the base of the oven. I think the hot water helps with the cracking problem. Because this time I had only one not-so-big crack on the top of the cheesecake. My other one cracked all over the place! 

I still had blueberries and cherries in the freezer from last summer’s yard harvest. They held up well and tasted great. I still have more blueberries to cook with so maybe there’s a pie coming up next week.

I hope your new year is off to a good start! And you can’t go wrong with this cheesecake, it’s so good!

The Better Cheesecake

For the crust:

  • 1 3/4 cups graham cracker crumbs

  • 3 tablespoons sugar

  • Pinch of salt

  • 1 stick (8 tablespoons) salted butter, melted

For the cheesecake:

  • 2 pounds (four 8-ounce boxes) cream cheese, at room temperature

  • 1 1/3 cups sugar

  • 1/2 teaspoon salt

  • 2 teaspoons pure vanilla extract

  • 4 large eggs, at room temperature

  • 3/4 cup sour cream

  • 3/4 cup heavy cream

For the berry sauce:

  • 2 cups fresh or frozen blueberries and/or cherries

  • 1/2 cup water

  • 1 tablespoon sugar

Make the crust: Butter a 9-inch springform pan — choose one that has sides that are 2 3/4 inches high (if the sides are lower, you will have cheesecake batter left over.)

Melt the butter. Stir the crumbs, sugar and salt together in a medium bowl. Pour over the melted butter and stir until all of the dry ingredients are uniformly moist. (You can do this with your fingers.) Turn the ingredients into the springform pan and use your fingers to pat an even layer of crumbs along the bottom of the pan and about halfway up the sides. Don’t worry if the sides are not perfectly even or if the crumbs reach above or below the midway point on the sides. Put the pan in the freezer while you heat the oven. 

Center a rack in the oven, and have a rack on the bottom for a pan of water. Heat the oven to 350° F and place the springform on a baking sheet. Bake the crust for 10 minutes. Set aside to cool. Reduce the oven temperature to 325° F.

To make the cheesecake: Put a kettle of water on to boil. Working with a stand mixer, preferably fitted with the paddle attachment, or with a hand mixer in a large bowl, beat the cream cheese at medium speed until it is soft and creamy, about 4 minutes. With the mixer running, add the sugar and salt and continue to beat for another 4 minutes or so, until the cream cheese is light. Beat in the vanilla. Add the eggs, one by one, beating for 1 full minute after each addition — you want a well-aerated batter. Scrape down the sides of the mixing bowl as needed. Reduce the mixer speed to low and stir in the sour cream and heavy cream.

Give the batter a few stirs with a rubber spatula, just to make sure that nothing has been left unmixed at the bottom of the bowl, and scrape the batter into the springform pan. The batter will reach the rim of the pan. (If you have a pan with lower sides and have leftover batter, you can bake the batter in a buttered ramekin or small soufflé mold.) Fill a roasting pan with hot water and place in the bottom rack of the oven.

Place the cheesecake on a sheet pan and place on the middle rack and bake the cheesecake for 1 hour 30 minutes, at which point the top will be browned (and perhaps cracked) and may have risen just a little above the rim of the pan. Turn off the oven’s heat and prop the oven door open with a wooden spoon. Allow the cheesecake to cool down for another hour.

After 1 hour remove from oven and let the cheesecake come to room temperature on a cooling rack.

When the cake is cool, cover the top lightly and refrigerate for at least 4 hours, although overnight is better. At serving time, remove the sides of the springform pan.

Make the berry sauce: In a small saucepan add the berries, water and sugar. Bring to a boil then reduce heat to a simmer, cook for about 5 minutes. Remove from heat and allow to cool a bit before serving.


Gingerbread Granola on Vanilla Bean Ice Cream

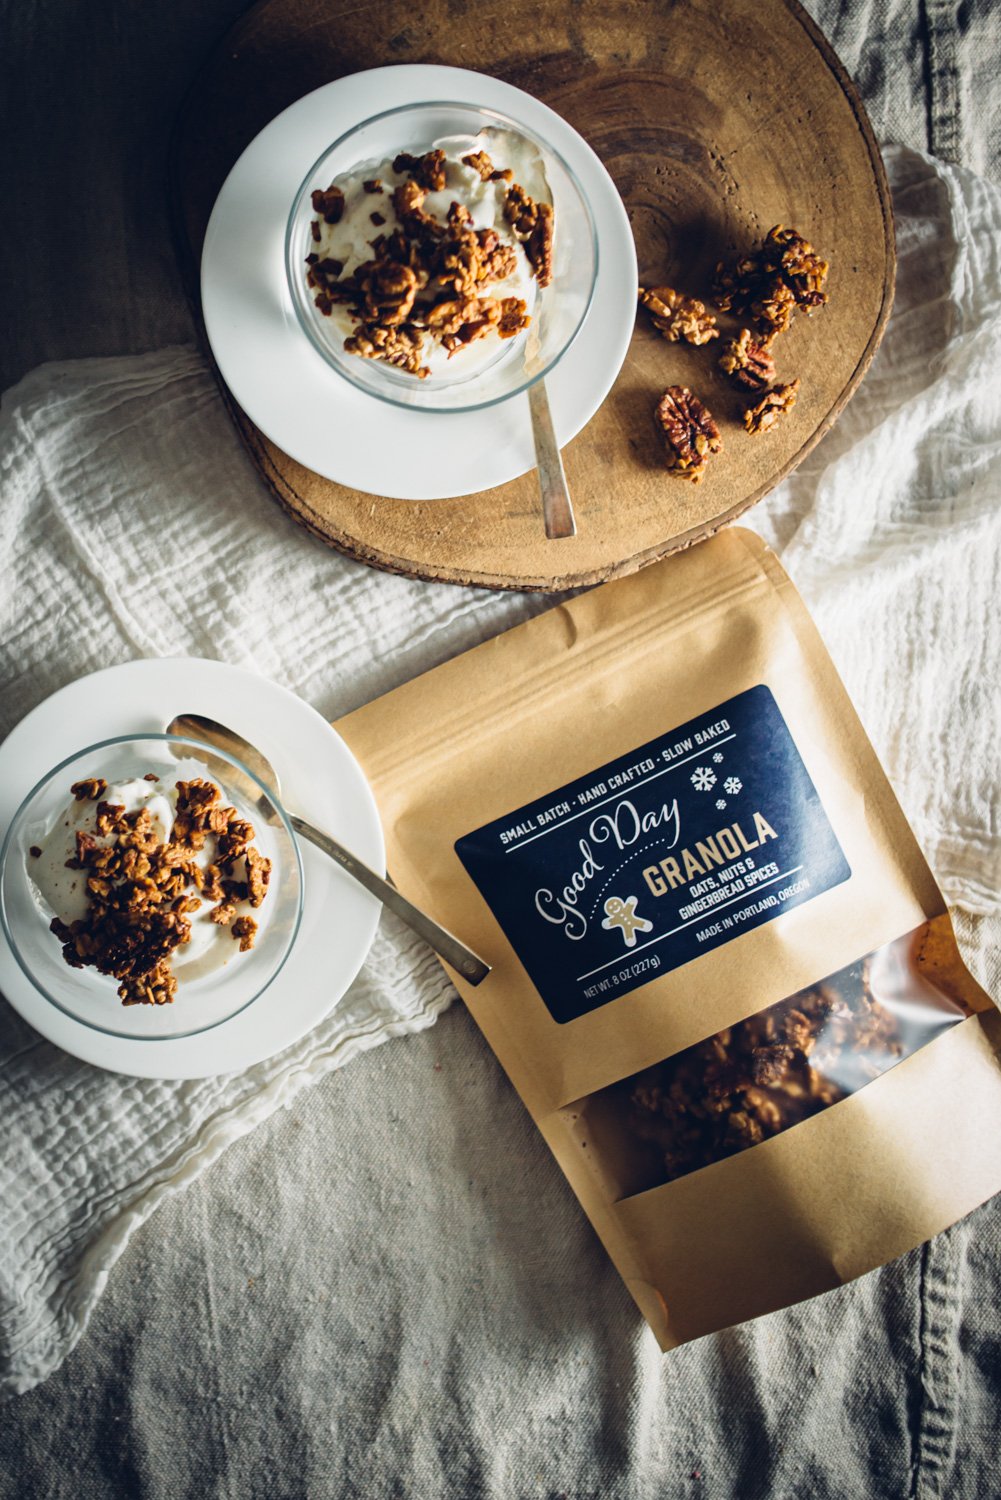
Hello! Wow, it’s been so long since I’ve done a blog post. I’ve been busy working on my granola business! Last spring I started baking the granola in my kitchen under the Cottage Food law, which has a lot of limitations on where and how you can sell your baked goods, can’t sell online, can’t accept credit cards, etc. I had been searching for a commercial kitchen all summer long and wasn’t finding one that was right, but then this fall I found one that’s a perfect fit for me. It’s not too far away, it’s not too expensive and it’s a plant-based kitchen. I’m not vegetarian but I don’t expect to be making anything other than the granola. I got my food processing license from ODA (Oregon Dept of Agriculture) and started baking there in November. There were some challenges at first but got it all worked out and I can bake so much more now at one time. My small batches baked at home really should have been called Micro-Batch Granola! This past fall I started seasonal flavors, September through November was Bourbon, Pecan, Pumpkin Pie Spice granola. Now through the end of February I’m making Gingerbread Granola. It’s so good! I especially like it on vanilla ice cream, but I think it would be good on Salted Caramel as well. This is a quick and easy dessert that tastes amazing.

I tried out a few gingerbread spice recipes before I got to the final flavor. I first tried it with Pfeffernusse cookie spices, I thought it would be really good but the flavors didn’t translate well to the granola. I’m happy with the final product and received a lot of positive feedback from customers.

It’s been quite a year, with challenges at every turn, but I’m loving the whole process and bringing this granola to everyone’s door. I got the website up only 3 weeks ago!

I’m running a promo now through the end of the year with 10% off all orders, promo code is SAVE10, if you’d like to try some tasty granola and support my small business. 

Oh and If you live in NE Portland I can deliver the granola for a $2 fee.

I hope to be vending in some new markets next month, there aren’t a whole lot during the winter months but they’re out there. I’ll post where I’ll be here.

Wishing you a great holiday and thanks for stopping by!

Tastes Like Sangria

tastes_like_sangria-1.jpg

Tastes like sangria. That’s what I said to Jeff when I first made this. I bought some Aperol a while back, maybe it was for a David Leibovitz cocktail, 🤔 not sure, but I’ve been making this refreshing cocktail that tastes like sangria! I really like Aperol, it’s similar to Campari but not as bitter. It’s super simple and you can easily adjust with a splash of this or that, I have some suggestions in the recipe below. It’s nice when you don’t want to make a big batch of Sangria and just want a glass or two. We’re in for some more hot weather this week and it’s a perfect way to end a 105°F day. 

I’ve been busy making and selling granola the past couple months. I’ll be introducing a new hazelnut flavor later this week! I partnered with a local hazelnut grower Baird Family Orchard and wow! It tastes so good! I’m working on a website for the granola but for now all updates will be here.

Hope you’re staying cool this summer, this cocktail should help. Enjoy.

tastes_like_sangria-2.jpg
tastes_like_sangria-3.jpg
tastes_like_sangria-4.jpg
tastes_like_sangria-5.jpg
tastes_like_sangria-7.jpg

Tastes Like Sangria

  • White or red wine

  • Aperol

  • Apple Brandy

  • Lime seltzer

  • Fresh fruit to garnish

  • Ice

Fill wine or rocks glass with ice. Add wine half way up. Add .75oz Aperol (about half a shot glass), a splash of apple brandy and top off with a bit of lime seltzer. Garnish with whatever fruit you have on hand. Here I used some home grown grapes, peach, apple and lime wedges.

Creamy Mushroom Pasta

One of the great things about going to the farmers market every weekend has been the unexpected food finds. Last weekend was my second time as a vendor at Woodlawn farmers market. I was located next to a mushroom vendor, Harvest Moon Mushrooms, who grows mushrooms right here in Portland! Jeff went over to buy a few that we could have in an omelette the next day. He asked what they recommended and he came back with these beauties! All their mushrooms are beautiful. And wow, they are delicious. We still had a few left and it looked like enough for a pasta dish so that’s what I made. This is sort of a no-recipe recipe that’s easy enough to put together without exact measurements, but I’ll put a recipe below regardless. 

The mushrooms here are Chestnut, Morels and Black Pearl (going clockwise). The mushroom guy made a point to eat all of the Black Pearl, don’t throw away the stem, it’s really tasty! The recipe below is one-pot cooking at its best. I made this in the morning since it was going to be a very hot day and it was easy to reheat for dinner. 

Speaking of the heat, this weekend is going to be a scorcher, my weather app has been showing anywhere from 104°-108° on Saturday. So I’m not sure if the market will be open or will have to change the hours, but I have a feeling it might not be happening, I’ll post to my Instagram stories and update the webpage if anything changes. 

One more thing, I added some fresh thyme and oregano on top of the pasta for the photos, but I added too much! The oregano was strong and overtook the rich umami flavors of the mushrooms, I wouldn’t add anything more than a bit of parmesan cheese.

Enjoy!

Creamy Mushroom Pasta

  • 1/2 lb pasta shells

  • 2 cups mushrooms roughly chopped (Morels, Black Pearl and Chestnut mushrooms)

  • 3 tablespoons olive oil

  • 2 tablespoons salted butter

  • 1/4 white wine or dry vermouth 

  • Salt to taste

  • 12 oz Alfredo sauce

If you don’t have a jar of Alfredo sauce:

  • 8 oz creme fraiche

  • 1/2 cup grated parmesan

In a large dutch oven bring water to boil and cook pasta as directed. Drain in colander and stir in a bit of olive oil to keep it from sticking, set aside. 

In the same pot heat the olive oil and butter until melted on a medium heat, add the chopped mushrooms and a pinch of salt, stir as needed for about 5-10 minutes, when mushrooms look about half way done, add the white wine, give a stir and let cook for another 5-10 minutes on a lower heat. Your mushrooms should be soft and tender at this point, if not let it cook a few more minutes.

If you’re using a ready made Alfredo sauce you can add it at this point, heat another 5 minutes or so. If not add the creme fraiche and parmesan cheese, stir to combine, add the pasta and heat a few more minutes.

Serve with a pinch or two of parmesan. 

Blueberry Granola Loaf Cake

blueberry_granola_loaf_cake-2.jpg

Hi there. I’m excited to share some news with you! I’ve been making granola on repeat all through the pandemic. It tastes really good so I had an idea a few months back to package and sell it (locally, at least for now). I set up a page here on Pixels + Crumbs with more info on Good Day Granola. I’m looking to be a vendor at some of Portland farmer’s markets over the next few months and I’ll be updating that page as things progress. I was at a Maker’s market last weekend and I managed to sell quite a few bags of granola. I had a lot of fun and I’ve enjoyed the whole process from recipe development, branding and packaging to being a vendor. It was also great to be around people. I’m fully vaccinated at this point and it feels so liberating! I know it’s not 100% guarantee but it gives me peace of mind. Once I can bake in a commercial kitchen I’ll be able to sell online and I’ll be sure to let you know.

So moving on to this Blueberry Granola Loaf Cake. It’s similar to the Blueberry Lemon Yogurt Cake I made way back in the beginning of this blog. Here I used sour cream because I accidentally bought too much and had to use it. But you could use yogurt if that’s what you prefer. And the topping is granola! It works great on top of the cake and makes it a little more breakfasty.

One more thing, my cake took 1 hour and 20 minutes to thoroughly bake! Not sure why it took that long, it may have been the loaf pan I used, it’s cast-iron and really not the best for baking cakes like this, but I think it looks cute for the photos, lol, so I would recommend testing the center of the cake 50-60 minutes and take it from there. It might need to go longer. Enjoy!

blueberry_granola_loaf_cake-1.jpg

Blueberry Granola Loaf Cake 

  • 1 1/2 Cups all-purpose flour

  • 2 teaspoons baking powder

  • 1/2 teaspoon kosher salt

  • 1 cup sour cream

  • 1 cup sugar

  • 3 large eggs

  • 2 teaspoons lemon zest (about 2 lemons)

  • 1/2 teaspoon vanilla extract

  • 1/2 cup canola oil

  • 1 cup blueberries

  • 1 cup granola

Preheat oven to 350°. Grease loaf pan, line the bottom and longer sides with parchment paper and grease the paper with butter.

Whisk the flour, baking powder and salt in a medium bowl.

In a large bowl whisk the yogurt, sugar eggs, lemon zest and vanilla until well combined. 

Mix the flour mixture into the liquid mixture.

Fold in the oil with a rubber spatula until thoroughly mixed then fold in the blueberries.

Pour the batter in the the pan, top with granola and bake for 1 hour, checking at the 50 minute mark until toothpick comes out clean in center.

Remove from oven to baking rack and cool for about 10 minutes leaving it in the pan, remove cake from pan with the parchment handles and let cool another 10 minutes or so until just warm.

Green Harissa

green_harissa-1.jpg

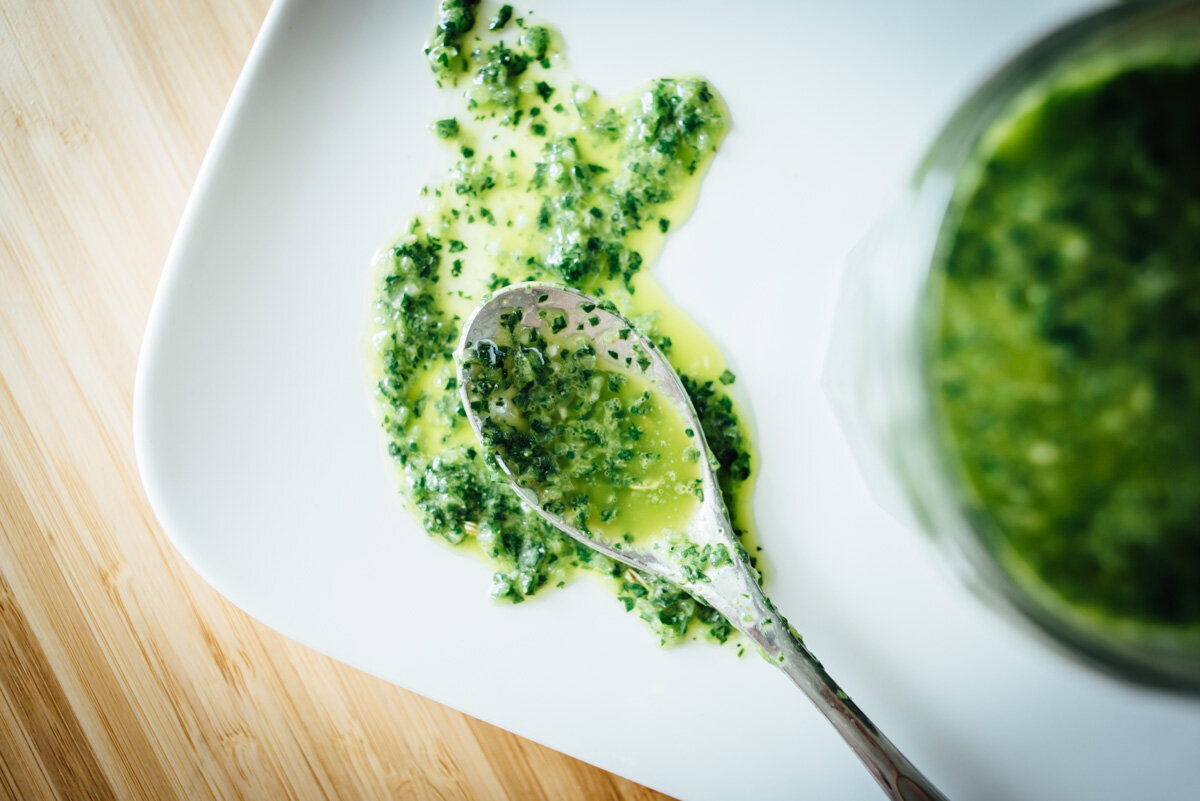
Green Harissa. I love this sauce. I’ve been making it quite a bit lately because it goes with everything! We put it on fish, chicken, potatoes, rice, roasted vegetables, you name it, it works. The recipe is from Sprouted Kitchen Cooking Club, Sarah has a lot of great sauces but this one not only works with so many dishes, it lasts up to two weeks in the fridge. So it’s a good-to-have-on-hand sauce. If you don’t have mint you can just add more cilantro, the herbs you can mix up a bit but stay heavy on the cilantro.

Things are good here, I’m working on my ‘Granola Project” which I hope to be sharing with you in the next couple weeks or so. I’m pretty excited about it and having fun with it. The garden beds are prepped with compost and at this point I’m just waiting for the temps to get high enough to plant. I started some tomatoes and vegetables from seed this year. I’m worried I started too late! It’s been almost 5 weeks and they still look so young. I hope they’re not duds. Worse case I’ll have to buy starters but I think some of them are going to pull through. This is all new to me and I haven’t blogged about it because I don’t know what I’m doing (yet). Ha ha. Maybe next year I can offer some tips. But the berry bushes are blooming in the yard so everything is looking good there.

I get my second (Moderna) vaccine in a couple weeks. The first one was fine, no side effects at all, just a sore arm for a few days. I’m so looking forward to eating at a restaurant outside! I know people have done this pre-vaccine, but I just haven’t felt comfortable with that. This past year, as soon as things are looking good, Covid cases are low, places open up more and then cases rise, and I’m like, fuck! I missed that small window where Covid-19 wasn’t spreading like crazy. But maybe I didn’t get it because I didn’t go out then. Who knows. It’s all a crapshoot. All I know is when restaurants start opening their doors for indoor dining, everything goes bad. Dining outside is the best option at this point. And I can’t wait! Until then, enjoy this sauce on anything and everything.

green_harissa-2.jpg
green_harissa-3.jpg
green_harissa-4.jpg
green_harissa-5.jpg
green_harissa-6.jpg

Green Harissa

  • 1 clove of garlic - peeled

  • 1 jalapeño - stemmed and seeded, chopped rough

  • 1 cup of cilantro

  • 1/2 cup of mint (you can add more cilantro instead)

  • 1/2 cup of parsley

  • 1 lemon - juiced

  • 1 Tablespoon white vinegar

  • 1/2 teaspoon of cumin

  • 1/2 teaspoon of coriander

  • 1/2 teaspoon of fennel seeds

  • 1/2 teaspoon of kosher salt

  • 1/2 cup of extra virgin olive oil

Put everything in a food processor, with herbs on top, and blend for 10 seconds then pause, scrape down the sides if needed and process another 10 seconds until it’s almost blended with bits of herbs still left intact. Keep refrigerated in sealed container up to two weeks. Allow to come to room temp before serving.

Potato and Broccoli Cakes + Charred Scallion Yogurt Sauce

potato_broccoli_cakes-1.jpg

Potato and Broccoli Cakes with Charred Scallion Yogurt Sauce. I’ve made these about three times now, they are so good! The recipe is from Sprouted Kitchen Cooking Club which I joined about a year and a half ago. And the sauce I’ve made a few times now as well. They make a great side dish for dinner, but even better is having one or two with an egg on top for breakfast or lunch the next day. I made a couple changes to the recipe, I found the patties hold together better with a half cup of breadcrumbs added, the mixture was too wet and some of them were falling apart. And I used Panko breadcrumbs rather than seasoned breadcrumbs, you can use what you have or prefer, but I like the crunch of Panko breadcrumbs. 

The Charred Scallion Yogurt Sauce is super tasty, you can add some fresh or charred jalapeño to it as well. The recipe makes about 12 ounces of sauce, and this is great to use leftover on sandwiches or roasted vegetables, it will stay fresh in the fridge for up to 2 weeks. 

I hope you try this recipe, it’s so good I had to share it with you. Enjoy!

potato_broccoli_cakes-2.jpg
potato_broccoli_cakes-3.jpg
potato_broccoli_cakes-4.jpg
potato_broccoli_cakes-5.jpg

Potato and Broccoli Cakes

  • 1 lb. of Yukon gold potatoes

  • 2 Tbsp. of butter

  • 1/3 cup of cream (or milk)

  • 1 tsp. of sea salt

  • fresh ground pepper

  • 2 eggs

  • 1/2 cup of grated parmesan, divided

  • 6-8 oz. of steamed broccoli (about 1 cup finely chopped)

  • 1 1/2 cup of Panko breadcrumbs, divided

  • avocado or olive oil for cooking

Peel the potatoes and boil until tender, about 10 minutes. Drain and remove to a mixing bowl, along with the butter, cream, salt and pepper. Let them cool down slightly. Mash everything until smooth. Whisk in the eggs and 1/4 cup of the parmesan. Make sure the broccoli is super, super well chopped, stir that into the potato mixture.  Add 1/2 cup of the breadcrumbs. It should look like meatball dough - damp but holds form.

Mix the breadcrumbs and remaining parmesan cheese in a shallow bowl.

Heat a generous slick of oil in a non-stick skillet over medium heat. Form small, 3 x 1” thick patties out of the potato mixture, dredge it in the parm breadcrumbs to get a little coat, then pan fry them for 2-3 minutes per side until golden brown. Set aside to cool. Repeat with the remaining potato mixture, adding a fresh slick of oil to the pan between batches. Makes 8 cakes.

Serve warm or room temperature with yogurt sauce


Charred Scallion Yogurt Sauce

  • 1 bundle of scallions (green onions) - ends trimmed

  • 1 tsp. of extra virgin olive oil

  • pinch of sea salt

  • 1 tsp. of sea salt

  • pinch of fresh ground pepper

  • 1 1/2 cups of plain, whole milk, Greek yogurt

  • 2 Tbsp. of extra virgin olive oil

  • 1 cup of chopped, flat leaf parsley

  • 1/4 cup of chopped fresh dill (or 1 tsp. dried dill)

  • 1 lemon - juiced (about 3-4 Tbsp.)

  • 1 Tbsp. of white wine vinegar

  • Dash of hot sauce or pinch of red pepper flakes

  • 2 Tbsp. of water (as needed for consistency)

Preheat your oven to 425°, or grill on high heat. Trim the scallions and rub them with a bit of oil and salt. Place them on foil or parchment and pop them in the oven to roast for 15-20 minutes in oven (10-15 minutes on grill) until browned and tender. Set aside to cool.

Into a blender or food processor, pulse the scallions and salt and pepper. Add the yogurt, parsley, dill, lemon juice, vinegar, hot sauce, water and pulse until flecked and smooth-ish. If it still seems too thick, add another splash of water.

Store in an airtight jar in the fridge for 1-2 weeks.

Peanut Butter Chocolate Chip Cookies

peanut_butter_chocolate_cookies-1.jpg

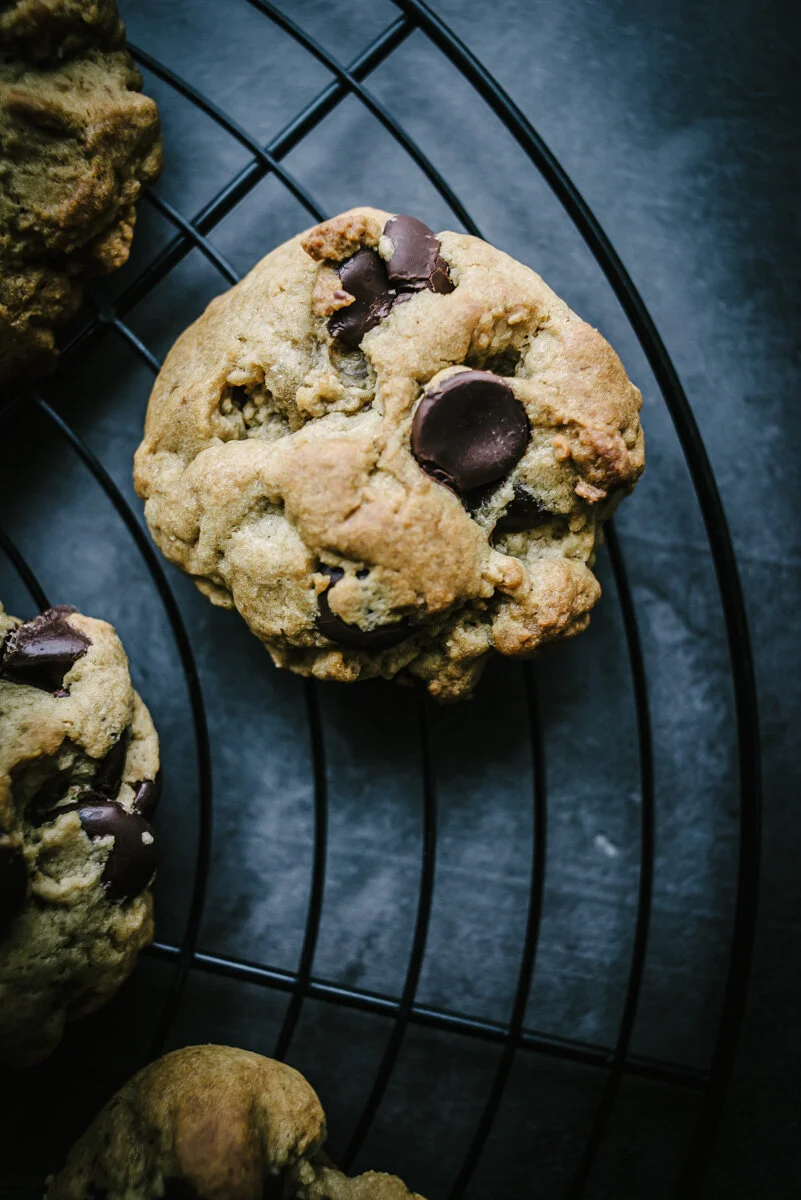
Here’s another treat to get you through the winter months. Peanut Butter Chocolate Chip Cookies! We had a big snow fall last week, 8-10 inches of snow (with a layer of ice sandwiched in-between) which is a big deal around here. The city practically shut down. Businesses closed. They don’t plow most streets because it’s… sort of rare, but not that rare! And they don’t use salt on the roads because it’s bad for the roads and the environment and will end up costing more money in the end with repair work. So you have to drive with chains on your tires or plan to walk to places, hunker down and light a fire. And maybe make some cookies if you have power. And we did! I couldn’t believe it. Huge snow/ice storm and we didn’t lose power. 

I was almost going to make the Peanut butter and Chocolate Blondies again, but they are so rich. Amazing as they are I really just wanted something a tad lighter. And these are just that. A little less butter, and a little less peanut butter. And also cookies, so rather than baked all at once in one pan, you can do as I did and bake small batches at a time. The dough stays fine in the fridge for a week and you can have fresh baked cookies in just a matter of minutes. Bake 6-12 cookies at a time. Whatever you want. Easy. You can freeze the dough as well if you want to take a break from cookie baking/eating. Since it’s just the two of us I find it makes more sense to do these small batch desserts. Some things freeze well post-baked and taste good defrosted, like cakes, but cookies? I think fresh baked is best.

The original recipe was named “Chewy” Peanut Butter Chocolate Chip Cookies, which mine were not, maybe because I used honey rather than corn syrup? I’m not sure. The only thing I changed here was that I used honey instead of Corn Syrup. But I don’t have corn syrup and didn’t have any plans to use it so I replaced it with honey. No complaints! These cookies were awesome! I would definitely make them again. Enjoy! And stay warm!

peanut_butter_chocolate_cookies-2.jpg
peanut_butter_chocolate_cookies-3.jpg
peanut_butter_chocolate_cookies-4.jpg
peanut_butter_chocolate_cookies-5.jpg
peanut_butter_chocolate_cookies-6.jpg

Peanut Butter Chocolate Chip Cookies

  • 1/2 cup butter, softened 

  • 1/2 cup peanut butter 

  • 1 cup packed brown sugar 

  • 1/2 cup white sugar 

  • 2 eggs 

  • 2 tablespoons honey

  • 2 tablespoons water 

  • 2 teaspoons vanilla extract 

  • 2 1/2 cups all-purpose flour 

  • 1 teaspoon baking soda 

  • 1/2 teaspoon salt 

  • 2 cups chopped semisweet chocolate 10 oz bag

Preheat oven to 375F° (190C°). Line a baking sheet with parchment paper.

In a large bowl cream together the butter, peanut butter, brown sugar, and white sugar until smooth. Beat in the eggs one at a time, then stir in the honey, water, and vanilla. In a separate bowl whisk together the flour, baking soda, and salt. Then stir the flour mixture into the peanut butter mixture. Fold in chocolate chunks. Drop by 1/4 cupfuls 3 inches apart onto the parchment-lined baking sheet.

Bake for 12 to 15 minutes in preheated oven, or until edges are golden. Allow cookies to cool for a few minutes on the cookie sheet before removing to wire racks to cool completely. Makes about 36 cookies.

Spaghetti + Meatballs

spaghetti_and_meatballs-1.jpg

How is your new year going? Mine started out energetic with some new ideas for a project I’m working on, which I hope to announce sometime in February. The insurrection on the Capitol was um, horrifying. It felt like 9/11 but actually worse. Biden will be sworn in on Wednesday which is a huge relief and I’m very excited about that, so I guess you could say this year has already had its share of ups and downs. 

So, Spaghetti and Meatballs! I had a craving for spaghetti and meatballs the other day. And coincidently Jeff told me he had a craving for a meatball sandwich, and it’s not like we just read about meatballs or anything like that, we just had meatball cravings! Ha! The recipe below is a double batch of meatballs, we had our spaghetti dinner and I’m going to freeze the rest of the meatballs for a Meatball Sub Sandwich next week. I adapted the recipe from NYTimes Cooking, which I finally gave in and subscribed. It’s only $5/month but it just irks me that it doesn’t come with the NYTimes subscription we already have. Oh well. I actually really like it with the recipe box and it has a very nice interface. The recipe doubled here makes 18 large meatballs. I changed a couple things, using Panko bread crumbs and Italian seasoning, but feel free to use regular bread crumbs and whatever seasoning you prefer. I also bake them in the oven before putting them in the sauce, which is convenient because you can make your sauce while they bake and everything comes together a bit quicker.

Enjoy!

spaghetti_and_meatballs-3.jpg
spaghetti_and_meatballs-2.jpg

Spaghetti + Meatballs

Meatballs

  • 1 lb ground pork

  • 1 lb ground beef

  • 2  large eggs, lightly beaten

  • 1/3 cup freshly grated Parmesan cheese

  • 2 garlic cloves, minced

  • 2 teaspoons Italian seasoning

  • 1/2 cup Panko bread crumbs

  • 1 tablespoon tomato paste

  • 2  teaspoon salt

  •  Freshly ground black pepper

Sauce

  • 2  garlic cloves, minced

  • 1  teaspoon dried oregano

  • 1  tablespoon unsalted butter

  • 1  tablespoon olive oil

  • 24 oz jar of tomato sauce

  • 14.5 oz can of diced tomatoes

  • 1 tablespoon tomato paste

  • 1 teaspoon Italian seasoning (or more to taste)

  • 8 oz chopped baby bella mushrooms

  •  Salt and freshly ground black pepper

  • 1  pound spaghetti, tagliatelle or linguine, cooked to taste

Or you could make your tomato sauce from scratch, recipe here

Preheat oven to 400°.

To prepare meatballs, combine pork, beef, egg, parmesan, garlic, spices, bread crumbs, tomato paste, salt and pepper in a large bowl. Mix thoroughly with your hands until well combined.

Line a baking sheet with parchment paper. Shape the meat mixture into 2 inch balls, and place on baking sheet. You should have about 18 meatballs. Brush the meatballs with a little olive oil. Place in oven and bake for 20-25 minutes until internal temp reads 165°.

To prepare the sauce, in a large sauce pan or dutch oven sauté garlic for a few minutes, then add the tomato sauce, diced tomatoes, tomato paste and spices, allow to simmer for about 10 minutes over a medium low heat.  Add the mushrooms and continue to simmer another 10-15 minutes. Adjust seasonings to taste.

When the meatballs are done, remove from oven and place some in the sauce, or on a platter. You can freeze leftover meatballs to make meatball sandwiches for another time. Place hot pasta in a large serving bowl. Pour most of sauce (reserving meatballs) on pasta, and toss to combine. Top pasta with meatballs, and serve.

Cranberry Orange Pecan Loaf Cake

cranberry_orange_pecan_loaf_cake-1.jpg

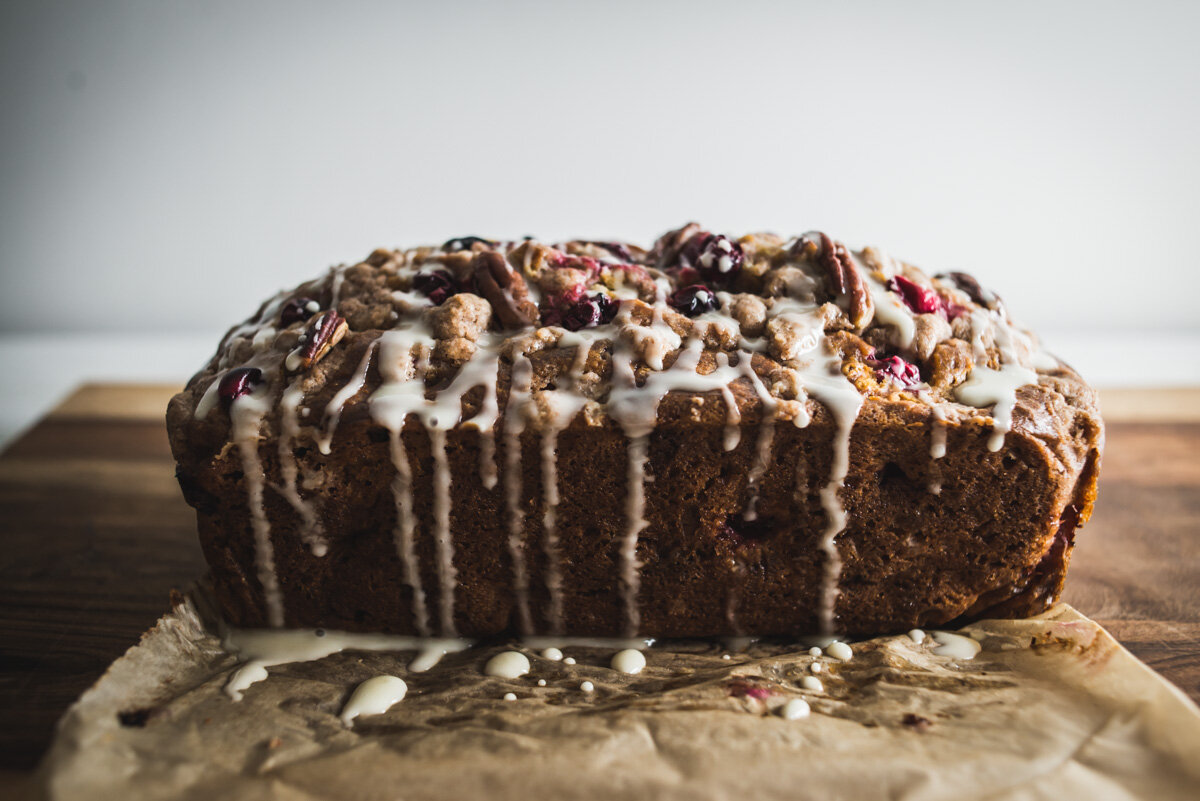
Cranberry Orange Pecan Loaf Cake. I had some fresh cranberries leftover from Thanksgiving and wanted to make some type of cake with them, I made a Cranberry Cobbler years ago but wanted something different, so here we are. This is such a great cake! I adapted the recipe from Sally’s Baking Addiction and made a few changes. For one, I melted the butter for the streusel, a lot of recipes say to use cold butter and crumble it into the flour and sugar, but sometimes I end up with flour that’s not quite mixed in with the butter after it’s done, I find it’s easier and more reliable to just add the sugar, spice and flour to melted butter. Also instead of buttermilk I used a mixture of greek yogurt and milk, and I added some Pecans to the recipe.

My baking time was a lot different than the 45 minutes to an hour suggested in the original recipe, it may have been due to the pan I used, a cast iron loaf pan, but in any case the total bake time for me was 1 hour and 20 minutes! It didn’t seem quite done after an hour so I took the temperature and let it go longer until it reached 200°. That worked! It’s a great cake, enjoy!

Oh and be careful out there friends, Covid-19 cases are going through the roof! We’re so close to getting a vaccine, it’s not that much longer, do your best to stay safe for you, your family, your neighbors, friends, we’re all in this together! 

cranberry_orange_pecan_loaf_cake-2.jpg
cranberry_orange_pecan_loaf_cake-3.jpg
cranberry_orange_pecan_loaf_cake-4.jpg
cranberry_orange_pecan_loaf_cake-5.jpg
cranberry_orange_pecan_loaf_cake-6.jpg
cranberry_orange_pecan_loaf_cake-7.jpg
cranberry_orange_pecan_loaf_cake-8.jpg

Cranberry Orange Pecan Loaf Cake

Streusel

  • 1/4 cup all-purpose flour

  • 2 Tablespoons granulated sugar

  • 1/2 teaspoon ground cinnamon

  • 3 Tablespoons salted butter, melted

Cake

  • 2 cups all-purpose flour

  • 1 teaspoon baking soda

  • 1/2 teaspoon salt

  • 1 large egg

  • 1/2 cup dark brown sugar

  • 1/2 cup granulated sugar

  • 2/3 cup milk

  • 1/3 cup greek yogurt

  • 1/3 cup vegetable oil 

  • 1 teaspoon pure vanilla extract

  • 2 teaspoons orange zest (about 1 orange zested)

  • 1 cup fresh cranberries (more for topping)

  • 1/2 cup crushed pecans (more for topping)


Glaze

  • 1/2 cup powdered sugar

  • 1 Tablespoon orange juice

Preheat oven to 350°F. Grease a 9×5 inch loaf pan with butter, line with parchment paper and butter that as well.

Make the streusel: Whisk the flour, sugar, and cinnamon together in a medium bowl. Add the melted butter and stir with a fork until combined. Set aside.

Make the cake: Whisk the flour, baking soda, and salt together in a large bowl. 

In a medium bowl, whisk the egg, brown sugar, and granulated sugar together until combined. Whisk in the milk, yogurt, oil, vanilla, and orange zest. 

Pour the wet ingredients into the dry ingredients, then fold with a rubber spatula to completely combine. Fold in the cranberries and Pecans.

Pour the batter into prepared loaf pan. Scatter the streusel on top, add a few cranberries and crushed pecans. Cover the baking dish with foil and bake for 35 minutes. Then remove foil and bake for an additional 25-45 minutes. Cake is done when cake tester or toothpick comes out clean (or at 200° temp, I started using a thermometer because sometimes it comes out clean and it’s not bake all the way through!)

Cool bread completely in the pan set on a wire rack. Then remove using your “parchment handles” onto serving plate or board.

The glaze! In a small bowl, whisk the powdered sugar and orange juice together. Drizzle over cooled bread.

Slice and serve. Cover and store leftover bread at room temperature for 1 day or in the refrigerator for up to 1 week.

Adapted from Sally’s Baking Addiction