Blueberry Granola Loaf Cake

blueberry_granola_loaf_cake-2.jpg

Hi there. I’m excited to share some news with you! I’ve been making granola on repeat all through the pandemic. It tastes really good so I had an idea a few months back to package and sell it (locally, at least for now). I set up a page here on Pixels + Crumbs with more info on Good Day Granola. I’m looking to be a vendor at some of Portland farmer’s markets over the next few months and I’ll be updating that page as things progress. I was at a Maker’s market last weekend and I managed to sell quite a few bags of granola. I had a lot of fun and I’ve enjoyed the whole process from recipe development, branding and packaging to being a vendor. It was also great to be around people. I’m fully vaccinated at this point and it feels so liberating! I know it’s not 100% guarantee but it gives me peace of mind. Once I can bake in a commercial kitchen I’ll be able to sell online and I’ll be sure to let you know.

So moving on to this Blueberry Granola Loaf Cake. It’s similar to the Blueberry Lemon Yogurt Cake I made way back in the beginning of this blog. Here I used sour cream because I accidentally bought too much and had to use it. But you could use yogurt if that’s what you prefer. And the topping is granola! It works great on top of the cake and makes it a little more breakfasty.

One more thing, my cake took 1 hour and 20 minutes to thoroughly bake! Not sure why it took that long, it may have been the loaf pan I used, it’s cast-iron and really not the best for baking cakes like this, but I think it looks cute for the photos, lol, so I would recommend testing the center of the cake 50-60 minutes and take it from there. It might need to go longer. Enjoy!

blueberry_granola_loaf_cake-1.jpg

Blueberry Granola Loaf Cake 

  • 1 1/2 Cups all-purpose flour

  • 2 teaspoons baking powder

  • 1/2 teaspoon kosher salt

  • 1 cup sour cream

  • 1 cup sugar

  • 3 large eggs

  • 2 teaspoons lemon zest (about 2 lemons)

  • 1/2 teaspoon vanilla extract

  • 1/2 cup canola oil

  • 1 cup blueberries

  • 1 cup granola

Preheat oven to 350°. Grease loaf pan, line the bottom and longer sides with parchment paper and grease the paper with butter.

Whisk the flour, baking powder and salt in a medium bowl.

In a large bowl whisk the yogurt, sugar eggs, lemon zest and vanilla until well combined. 

Mix the flour mixture into the liquid mixture.

Fold in the oil with a rubber spatula until thoroughly mixed then fold in the blueberries.

Pour the batter in the the pan, top with granola and bake for 1 hour, checking at the 50 minute mark until toothpick comes out clean in center.

Remove from oven to baking rack and cool for about 10 minutes leaving it in the pan, remove cake from pan with the parchment handles and let cool another 10 minutes or so until just warm.

Cranberry Orange Pecan Loaf Cake

cranberry_orange_pecan_loaf_cake-1.jpg

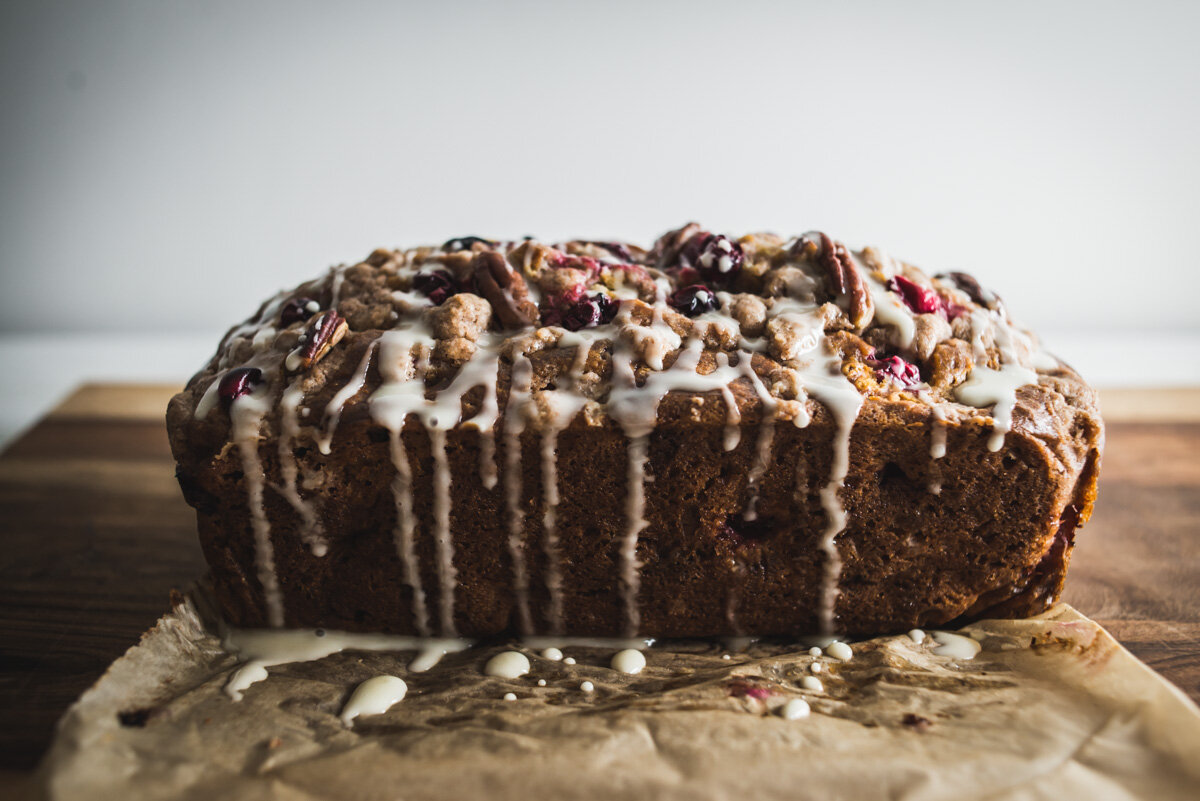
Cranberry Orange Pecan Loaf Cake. I had some fresh cranberries leftover from Thanksgiving and wanted to make some type of cake with them, I made a Cranberry Cobbler years ago but wanted something different, so here we are. This is such a great cake! I adapted the recipe from Sally’s Baking Addiction and made a few changes. For one, I melted the butter for the streusel, a lot of recipes say to use cold butter and crumble it into the flour and sugar, but sometimes I end up with flour that’s not quite mixed in with the butter after it’s done, I find it’s easier and more reliable to just add the sugar, spice and flour to melted butter. Also instead of buttermilk I used a mixture of greek yogurt and milk, and I added some Pecans to the recipe.

My baking time was a lot different than the 45 minutes to an hour suggested in the original recipe, it may have been due to the pan I used, a cast iron loaf pan, but in any case the total bake time for me was 1 hour and 20 minutes! It didn’t seem quite done after an hour so I took the temperature and let it go longer until it reached 200°. That worked! It’s a great cake, enjoy!

Oh and be careful out there friends, Covid-19 cases are going through the roof! We’re so close to getting a vaccine, it’s not that much longer, do your best to stay safe for you, your family, your neighbors, friends, we’re all in this together! 

cranberry_orange_pecan_loaf_cake-2.jpg
cranberry_orange_pecan_loaf_cake-3.jpg
cranberry_orange_pecan_loaf_cake-4.jpg
cranberry_orange_pecan_loaf_cake-5.jpg
cranberry_orange_pecan_loaf_cake-6.jpg
cranberry_orange_pecan_loaf_cake-7.jpg
cranberry_orange_pecan_loaf_cake-8.jpg

Cranberry Orange Pecan Loaf Cake

Streusel

  • 1/4 cup all-purpose flour

  • 2 Tablespoons granulated sugar

  • 1/2 teaspoon ground cinnamon

  • 3 Tablespoons salted butter, melted

Cake

  • 2 cups all-purpose flour

  • 1 teaspoon baking soda

  • 1/2 teaspoon salt

  • 1 large egg

  • 1/2 cup dark brown sugar

  • 1/2 cup granulated sugar

  • 2/3 cup milk

  • 1/3 cup greek yogurt

  • 1/3 cup vegetable oil 

  • 1 teaspoon pure vanilla extract

  • 2 teaspoons orange zest (about 1 orange zested)

  • 1 cup fresh cranberries (more for topping)

  • 1/2 cup crushed pecans (more for topping)


Glaze

  • 1/2 cup powdered sugar

  • 1 Tablespoon orange juice

Preheat oven to 350°F. Grease a 9×5 inch loaf pan with butter, line with parchment paper and butter that as well.

Make the streusel: Whisk the flour, sugar, and cinnamon together in a medium bowl. Add the melted butter and stir with a fork until combined. Set aside.

Make the cake: Whisk the flour, baking soda, and salt together in a large bowl. 

In a medium bowl, whisk the egg, brown sugar, and granulated sugar together until combined. Whisk in the milk, yogurt, oil, vanilla, and orange zest. 

Pour the wet ingredients into the dry ingredients, then fold with a rubber spatula to completely combine. Fold in the cranberries and Pecans.

Pour the batter into prepared loaf pan. Scatter the streusel on top, add a few cranberries and crushed pecans. Cover the baking dish with foil and bake for 35 minutes. Then remove foil and bake for an additional 25-45 minutes. Cake is done when cake tester or toothpick comes out clean (or at 200° temp, I started using a thermometer because sometimes it comes out clean and it’s not bake all the way through!)

Cool bread completely in the pan set on a wire rack. Then remove using your “parchment handles” onto serving plate or board.

The glaze! In a small bowl, whisk the powdered sugar and orange juice together. Drizzle over cooled bread.

Slice and serve. Cover and store leftover bread at room temperature for 1 day or in the refrigerator for up to 1 week.

Adapted from Sally’s Baking Addiction

Buttermilk Pull-Apart Dinner Rolls

Buttermilk_Pull-Apart_Dinner_Rolls-1.jpg

Buttermilk Pull-Apart Dinner Rolls. Ok, so rarely on this blog do I insist “You have to make these!” but I am now. I made these Buttermilk Pull-Apart Dinner Rolls last week for Thanksgiving and they tasted so incredibly good! But on my second try here they are even better! Last week I made the original recipe, halved, 12 rolls (rather than 24) and they didn’t really fill out the 9” square pan, although they were really good, I didn’t get the pull-apart effect I was expecting and they were on the small side. So this recipe I made slightly larger rolls in a smaller 8” round pan and they came out great! The recipe is adapted from Alexandra’s Kitchen, she has a great blog and I recommend watching her videos, they’re awesome! 

If you saw my Instagram stories you remember I made a buttermilk-brind chicken for Thanksgiving, and also made the Dried Cherries and Sausage Stuffing. Along with that we had mashed potatoes with roasted garlic, Rainbow Chard, Cranberry relish, and a Butternut Squash Kaddu which I really should blog about. I made this apple pie but decided on a crumble topping instead, which I really liked, I like a pie that has three different flavor experiences - pie crust, fruit, crumble (and/or cream). 

Getting back to the dinner rolls, they are soft and airy and still have a bit of chew on the outside, they are just so good. 

I thought these were called Parker House Rolls, but the wiki page on them describes something quite different, something moon shaped! Going back to the 19th century with angry pastry cooks throwing unfinished rolls into the oven? Anyways you won’t be throwing these around and only into your mouth.

Good stuff! Enjoy and I hope to get you some more recipes before the xmas holiday.

Also, these tastes great with butter and jam for a snack. :)

Buttermilk_Pull-Apart_Dinner_Rolls-2.jpg
Buttermilk_Pull-Apart_Dinner_Rolls-3.jpg
Buttermilk_Pull-Apart_Dinner_Rolls-4.jpg
Buttermilk_Pull-Apart_Dinner_Rolls-6.jpg
Buttermilk_Pull-Apart_Dinner_Rolls-5.jpg
Buttermilk_Pull-Apart_Dinner_Rolls-7.jpg
Buttermilk_Pull-Apart_Dinner_Rolls-8.jpg

Buttermilk Pull-Apart Dinner Rolls 

  • 2 cups all-purpose flour, plus more for shaping

  • 1 teaspoon kosher salt

  • 1 tablespoon sugar 

  • 1 teaspoon instant yeast

  • 1/2 cup boiling water 

  • 1/2 cup buttermilk*

  • 2 tablespoons melted butter

  • 1 tablespoon melted butter and flaky sea salt for topping

*You can make buttermilk by adding 1 tablespoon vinegar or lemon juice to a 1/2 cup of whole milk and let it sit for 5-10 minutes.

In a large bowl, whisk together the flour salt, sugar, and instant yeast.

In a 1-cup liquid measuring cup pour the boiling water over the buttermilk and let stand for 10 minutes, the buttermilk will look curdled then give it a stir.

Pour the buttermilk mixture and the 2 tablespoons of melted butter over the flour mixture. Stir until a sticky ball of dough forms. Cover the bowl with plastic wrap and set aside in a warm place to rise for 2 hours or until doubled in bulk.

Grease an 8×8-inch baking dish or 8” round cake pan. Flour a work surface and sprinkle flour lightly over the dough and around the edges. Gently fold the dough out of the bowl onto the floured work surface and shape into a rough ball, if it’s sticky add more flour. Use a bench scraper to divide the ball into 3 equal portions. Shape each portion roughly into a ball, then use a bench scraper to divide each ball into 3 roughly even portions to create 9 small round pieces total. If the sizes look odd just tear off the big ones to get the smaller ones up to size, the dough is very forgiving and won’t ruin the rolls!

Place the dough balls into the prepared pan, spacing them evenly apart.

Preheat the oven to 375°.

At this point, you can cover the pan and refrigerate overnight. Otherwise let the dough rise covered with plastic wrap for 25 to 35 minutes, or until the dough pieces have puffed to almost fill the pan. (Note: If you refrigerate overnight, remove the pan 30 to 45 minutes prior to baking.) 

Place the baking pan in the oven and bake for 20-25 minutes, or until golden brown. Remove pan from the oven and immediately brush the surface of the rolls with one tablespoon of melted butter, then sprinkle flaky salt over top. Let the rolls cool in the pan for a 10 minutes or so, then turn the pan out onto a cooling rack and invert onto a plate or serving platter. Serve warm with more butter on the side. 

Homemade Greek Yogurt

homemade_greek_yogurt-1.jpg

I’ve been wanting to get this Homemade Greek Yogurt up on the blog for a while now as I’ve been making it on repeat for the past few months, along with this granola and focaccia, all three are so good, and so much better than store bought. They’re all made with basic ingredients that you would have on hand. This yogurt is very easy to make with an Instant Pot, it just takes time. Your hands-on time is maybe 30 minutes total, but beginning to end it takes about 12 hours.

As for milk, I’ve been buying organic whole milk. I get organic because it lasts much longer in the refrigerator. The days of running out to the store for a half-gallon of milk are over for now, so I always try to have an extra tucked in the back of the refrigerator. 

The first time you make this you’ll have to keep an eye on the cool down part until you know how fast your yogurt is cooling. I use an ice bath and it takes 15 minutes. If you don’t use an ice bath it can take an hour or longer to cool down, and you will have to keep checking the temperature over and over again. So for me it’s easier to do an ice bath and set a timer and be done with it.

I generally start this in the evening so that it can incubate overnight. It’s nice to wake up in the morning and have something done! I do that with the Focaccia as well, I let it rise overnight and bake it in the morning.

The only thing that makes “Greek yogurt” different from regular yogurt is that it’s strained (notes in recipe). It’s richer and creamier. It takes a little more time, but it’s worth it. 

homemade_greek_yogurt-2.jpg
homemade_greek_yogurt-3.jpg
homemade_greek_yogurt-4.jpg
homemade_greek_yogurt-5.jpg

Homemade Greek Yogurt

  • 1/2 gallon of whole milk (8 cups)

  • 2 tablespoons yogurt 

Essential Equipment

Boil

Pour the milk into the Instant Pot, cover the pot (the float valve position won’t matter) and set to yogurt, then press adjust (boil should appear in the digital display), it will take about 20-25 minutes to finish. When it’s done remove the pot and turn off the Instant pot. 

Cool down

You want to cool it down to 115°F. An ice bath helps speed up the process, without an ice bath it may take an hour or so, but what I do is put the instant pot in a 9x13 glass pyrex baking pan, load it up with ice, and it cools down in about 15 minutes. You’re aiming for a temp between 110°-115°.

Once it reaches that temp remove it from the ice bath immediately and place it on a towel, drying the bottom of the pot. 

Skim

Skim off the top skin and discard it.

Add Yogurt

Whisk in 2 tablespoons yogurt into the milk so it’s well combined.

9 hour incubation

Place the pot back into the Instant Pot, place your cover on and set to Yogurt. This defaults to 8 hours, I’ve found better results after 9 hours but it can be done in as little as 8 hours. Use the + button to increase the time (you can even go longer if you want, up to 12 hours).

Ready to strain

When the timer goes off, remove the pot. At this point you can refrigerate it and eat it as regular yogurt. But I highly recommend taking the next step and straining it, The texture is so much better!

Set out a large bowl or pot with a strainer over it (set it so there is space between the bottoms and it can strain properly), then put a large piece of cheese cloth over the strainer. Scoop out the yogurt into the cheesecloth. Fold the ends of the cheesecloth over the yogurt to cover. Place in the refrigerator for an hour or two. The longer you strain the thicker the yogurt will be. I really like the texture after an hour or a bit longer. I’ve let it strain for two hours and it was almost too thick, but you might like it that way! I would experiment with different strain times to see what you like best. Once it’s strained scoop out the yogurt into a container, whisk it until smooth and refrigerate, it will last a good 2+ weeks in the refrigerator. You can discard the whey (the liquid strained out) or you can keep in the refrigerator and use this to make more yogurt. I haven’t tried that but I read that it works just as well.

The 7-Minute Egg

7_minute_egg-3.jpg

When it comes to boiling eggs, minutes really matter. I only recently discovered this. My whole life I’ve been starting them in cold water, bring to a boil, cook for an unknown amount of time, which resulted in a hard-boiled egg that was sometimes ok. But then I was watching Salt Fat Acid Heat recently and Samin mentioned the 7-minute egg, and it looked really good, not as runny as soft boiled but not hard boiled either. You start the eggs in boiling water. This makes an enormous difference. Not only the quality of the yolk, but the texture of the white, it’s fully cooked and kinda velvety, not rubbery which I thought all boiled eggs were just like that. And after 7 minutes you put them in an ice bath for a few minutes. Since I’ve been using this method the shell comes off the egg perfectly, no more moon craters of the past. The cooking times range from 6-12 minutes, with 12 minutes being hard boiled, everyone finds their favorite somewhere in-between, but I’m sold on 7-minutes. And, I made another video! If you like you can follow my Youtube channel here and Vimeo here

7_minute_egg-1.jpg
7_minute_egg-2.jpg

Sous Vide Egg Bites

sous_vide_egg_bites-1.jpg

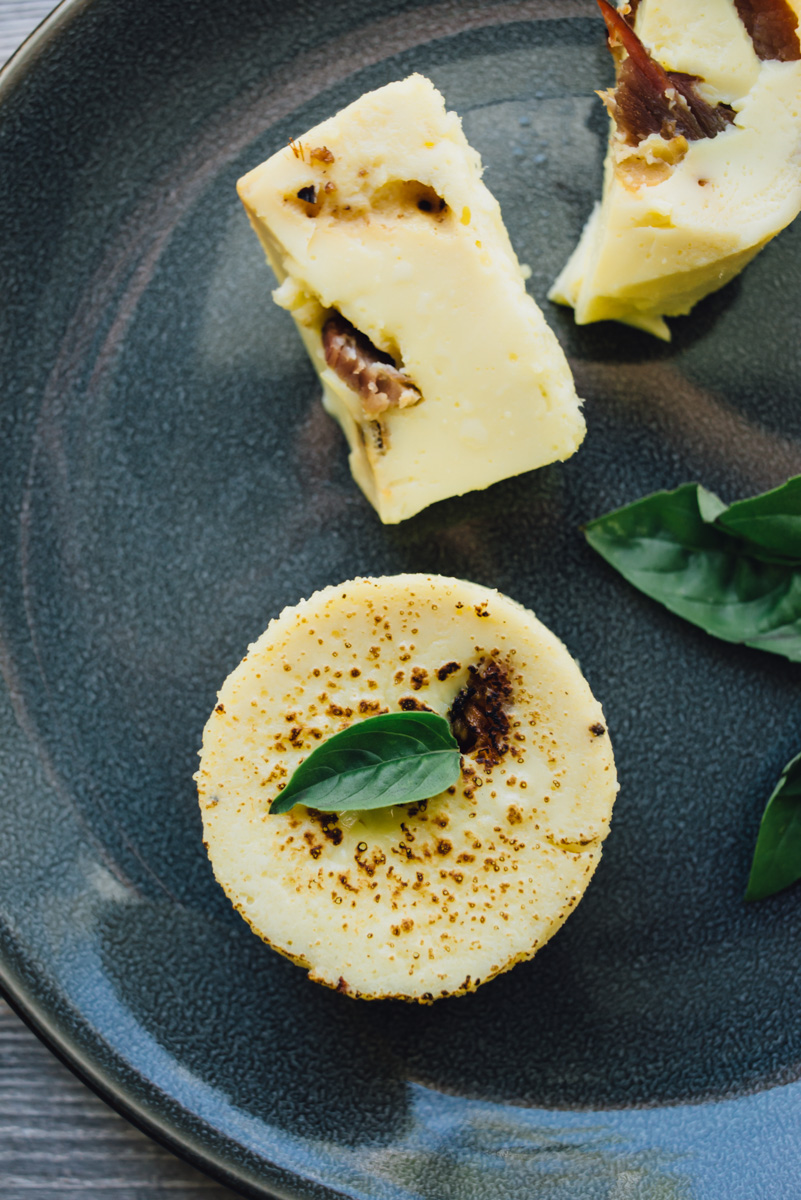
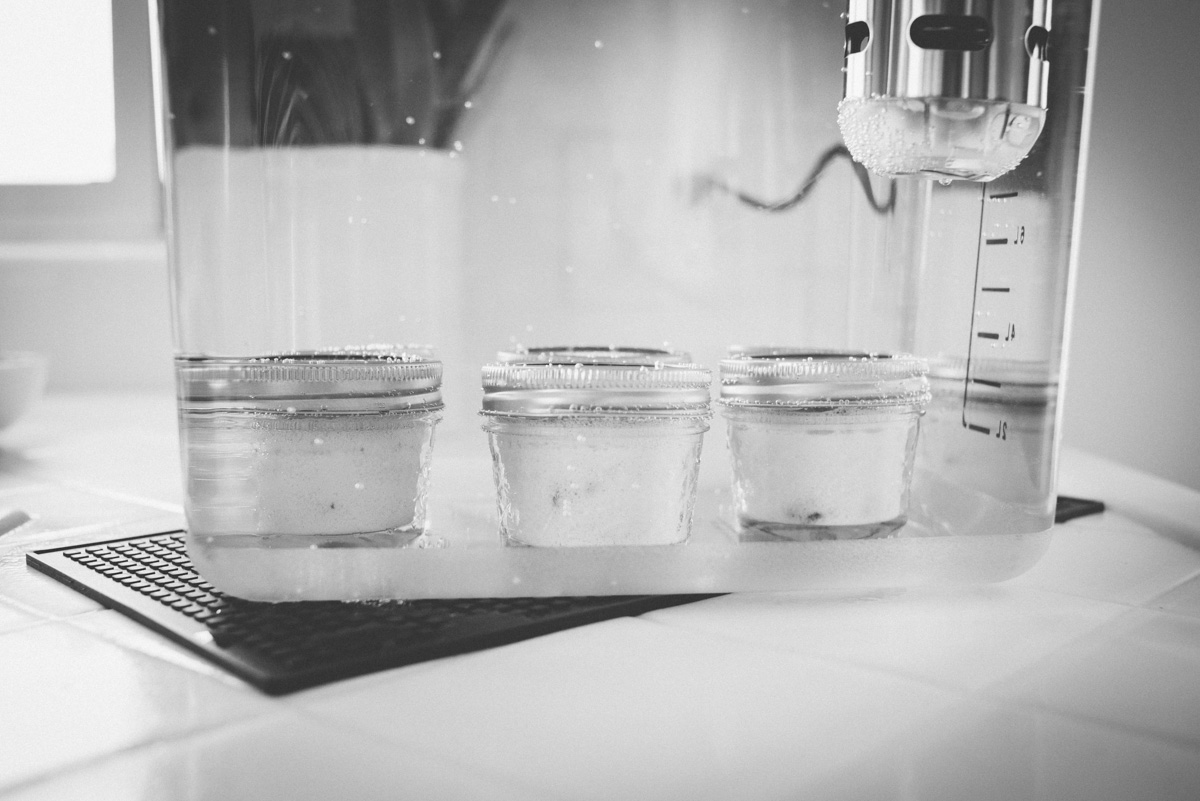
“Oh no! Not another kitchen gadget!” That was my response when Jeff suggested we get a Sous Vide. But the more I read about it the more I wanted it. The Egg Bites were fun and easy to make, but where the Sous Vide really excels is for cooking chicken breasts. Because of the precise temperature control the meat will cook remarkably consistent. And it’s also good for cooking steak followed by a quick sear. When I was researching what to make with the Sous Vide I came across this recipe for Egg Bites, apparently made popular by Starbucks. This recipe is for 6 servings, so you can make ahead, refrigerate and reheat them. It looks a bit like a science-lab, and with food sealed you can’t smell anything cooking so it tends to not feel like cooking at all. But the results are impressive and it’s been a good addition to our kitchen. One note on the jars, you want to make sure they are loosely secured so a little air can release (or they will explode!), when you tighten the lid, loosen it then tighten lightly with two fingers. If the jars float and will not stay on the bottom you will have to fix the lids, once they are sealed properly you will see some air bubbles rising and they will stay on the bottom of your container. The final result is a perfectly creamy cooked egg dish, similar to baked eggs, but not one part of it is overcooked. 

Oh and I just came across this article about Sous Vide which is pretty silly about men trying to impress women with their mad cooking skills, more interesting comments on David Lebovitz Facebook post here, it’s not for everyone or for every type of cooking, but it really is amazing for certain things like meat. And Egg Bites too!

sous_vide_egg_bites-2.jpg
sous_vide_egg_bites-3.jpg
sous_vide_egg_bites-4.jpg
sous_vide_egg_bites-5.jpg
sous_vide_egg_bites-6.jpg

Sous Vide Egg Bites

  • 6 eggs
  • 1/4 cup cream
  • 1/2 cup shredded cheese
  • 2 strips of bacon cooked, chopped
  • 1/4 cup Oven-dried tomatoes
  • Fresh basil (or any herb you like)
  • 6 four-ounce mason jars

Preheat water to 172°F

Butter mason jars and set aside. In a blender mix eggs and cream until combined. Use any variation of ingredients you like, I made three using cheese, oven dried tomatoes, basil, and three with Gruyere and bacon.

Place bacon, herbs, cheese in bottom of jars, pour egg mixture in each jar, top with a bit more cheese, loosely secure lids on jars, submerge in water (if the jars float the lids are on too tight, adjust and they should remain on bottom of container releasing air bubbles), cook for 90 minutes, remove from jars and serve or place in refrigerator for up to 1 week. 

Adapted from Anova

sous_vide_egg_bites-7.jpg

Bacon Making 101

A few weeks ago Jeff and I took a Bacon Making 101 class at Old Salt Marketplace, it’s a restaurant in our neighborhood that also serves as a butcher shop and deli. We go there for brunch quite often so we were already familiar with their delicious “Ben’s Bacon”. When I saw a class listed for bacon making by Ben himself, we signed up right away! It was a really fun class and bacon is not that hard to make, it just takes time. There was a lot of discussion on food safety, for example you will see that most people smoke their bacon to an internal temperature of 150-155°F, but Ben smokes his bacon slow to a 145°F temp. The reason people go a bit higher is that your thermometer might be off a bit so 150°F acts as a safeguard, but an accurate 145°F temp is fine with no risks. We were each given a full size pork belly which weighs around 10 lbs or so. Ben helped out with trimming the fat off each one. That looks a bit challenging and you will need a really long sharp knife. Then we cut our slabs in half so that they were easier to work with. Ben prepped the spice mix and the cure mix in large containers. I don’t think I’ve ever seen that much brown sugar and salt (enough for 12 pork bellies!). Each of us working with our own large bins, covered the slabs in the spice mix, followed by the sugar and salt cure mix. Then we placed our half slabs in large ziplock bags with the cure mixture to be taken home and that was it. We sampled some of the bacon they make at the restaurant and chatted about best ways to cook bacon (I prefer the oven method).

Pork bellies with the spice rub

Pork bellies with the spice rub

We carried home our 20 pounds of pork belly and put it in the refrigerator where it had to cure for at least 7 days. It can go up to 3 weeks in the fridge before smoking it. The curing process will create a lot of liquid, so even though they are in ziplock bags you might want to put them in a plastic tub or use additional bags so that it doesn’t accidentally leak in the fridge. During this curing time you flip the bellies over to redistribute the liquid.

After a week or so you remove the pork bellies from the fridge and rinse them well, then pat them dry and put them individually on a drying rack. We used a cooling rack over a sheet pan which worked really well and actually fit in the refrigerator. Note: two pork bellies will take up a lot of refrigerator space! Then you let them sit uncovered in the fridge for 24 hours to dry out. Before you smoke them you can rub them with pepper, herbs, maple syrup or molasses. We tried four different flavors: Black pepper, maple syrup, black pepper and thyme, molasses. Our favorite was maple syrup, but that is also the one that smoked properly and didn’t cook. Which brings me to the smoking process.

After they dried for 24 hours we rubbed molasses on one and black pepper + thyme on another

After they dried for 24 hours we rubbed molasses on one and black pepper + thyme on another

The biggest challenge was getting our smoker to hold a low temperature. The smoker is brand new to us so we learned a whole lot about smoking meat. We’ve been wanting to get a charcoal smoker grill and the bacon class sort of forced us to do it sooner rather than later. Ben said you can smoke over a fire pit or even in your fireplace, but it would be challenging to keep the temp low and not cook the bacon. We ended up getting the Vision Kamado grill. Our first go with one slab ended up cooked, then our second one, which was early evening at that point, came out perfect!

The next day we felt confident in what we were doing, so we put the remaining two slabs on when we had a steady 225°F temp, checked the internal temp in a little over an hour and, gasp!, they were cooked already, we didn’t know how this happened, the internal temp registered at around 170-180°F. What we do know is that our grill was in direct sunlight, and even though people will say weather doesn’t affect the ceramic grill, it most certainly does. So I would recommend smoking on a cooler day, or wait until evening. The following days brought us a heat wave, and wouldn’t you know, that grill that had cooled down was registering 150°+ with nothing burning. So it would be very difficult to keep a low temp under those conditions. 

Even though we ended up cooking the bacon in the smoker we sliced it up and tested it out and it tastes delicious. Some parts are a bit tougher than it should be, I guess due to the smoking issues, but overall we’re really happy with it. And I will totally do this again once we finish up the bacon we have. Which by the way yielded about 12 lbs of bacon total, from the two slabs. So if you get one slab of pork belly it should yield around 6 lbs. of bacon. That’s a lot of bacon! But you just slice it, then wrap it up in portion sizes and freeze it. Below is the recipe for “Ben’s Bacon”, and there are plenty of websites that are devoted to smoking meats with a Kamado grill, but really everyone is going to have a different experience depending on the weather, how much charcoal you’re using, what kind of smoker you use, but it’s really fun and it all tastes good, even when it’s not perfect. Makes for some great BLTs pictured below with our homemade bacon!

Bacon Making 101

Ingredients

1 Pork Belly

Spice Rub:

  • 1 part cayenne pepper
  • 1 park chile flake
  • 2 parts paprika

Bacon cure for one belly:

  • 3 lbs brown sugar
  • 2 cups kosher salt

Equipment

  • Ziplock bag (large enough for half a pork belly)
  • Kitchen scale
  • Mixing bowls
  • Racking pan (cookie cooling rack will work)
  • Smoker or smokehouse

The process

Skin and trim the fat to desired fat content. Cut the belly in half so that it’s easier to work with and store. Place the two pieces in a large container. Mix the spice blend together and rub liberally to all sides of the belly. Mix the salt and brown sugar together until completely blended. Generously apply the cure rub to all sides. Place each piece in large ziplock storage and refrigerate, you may want to put these inside another plastic bag or container to prevent leakage, the curing will create a lot of liquid over time. After 3 days flip them, then turn every couple days or so to redistribute liquid. After 7 days remove from refrigerator and rinse well and pat dry. Place them on a drying rack (cookie cooling rack on top of sheet pan works well) and place in the refrigerator uncovered for 24 hours. When ready to smoke the bellies, cover them with your choice of ground black pepper, maple syrup, molasses or whatever spices you might like to try. 

Start your smoker slowly, add applewood chips to coals. 

Smoke the bacon at around 170°F to an internal temperature of 145°F, which would take about 5 hours. Or smoke them at 200-225°F for about 2 1/2-3 hours. Most people smoke until internal temperature reaches 155°F to be on the safe side (if thermometer was off) but it is safe to eat at 145°F.

Remove the bacon and allow to cool. Place in refrigerator for several hours before slicing as this makes it easier to cut. Slice the bacon in desired thickness. Then freeze the slices in portion sizes. Wrap portions in plastic wrap and then put them all in freezer bags.