Peanut Butter and Chocolate Blondies

peanutbutter_chocolate_blondies-1.jpg

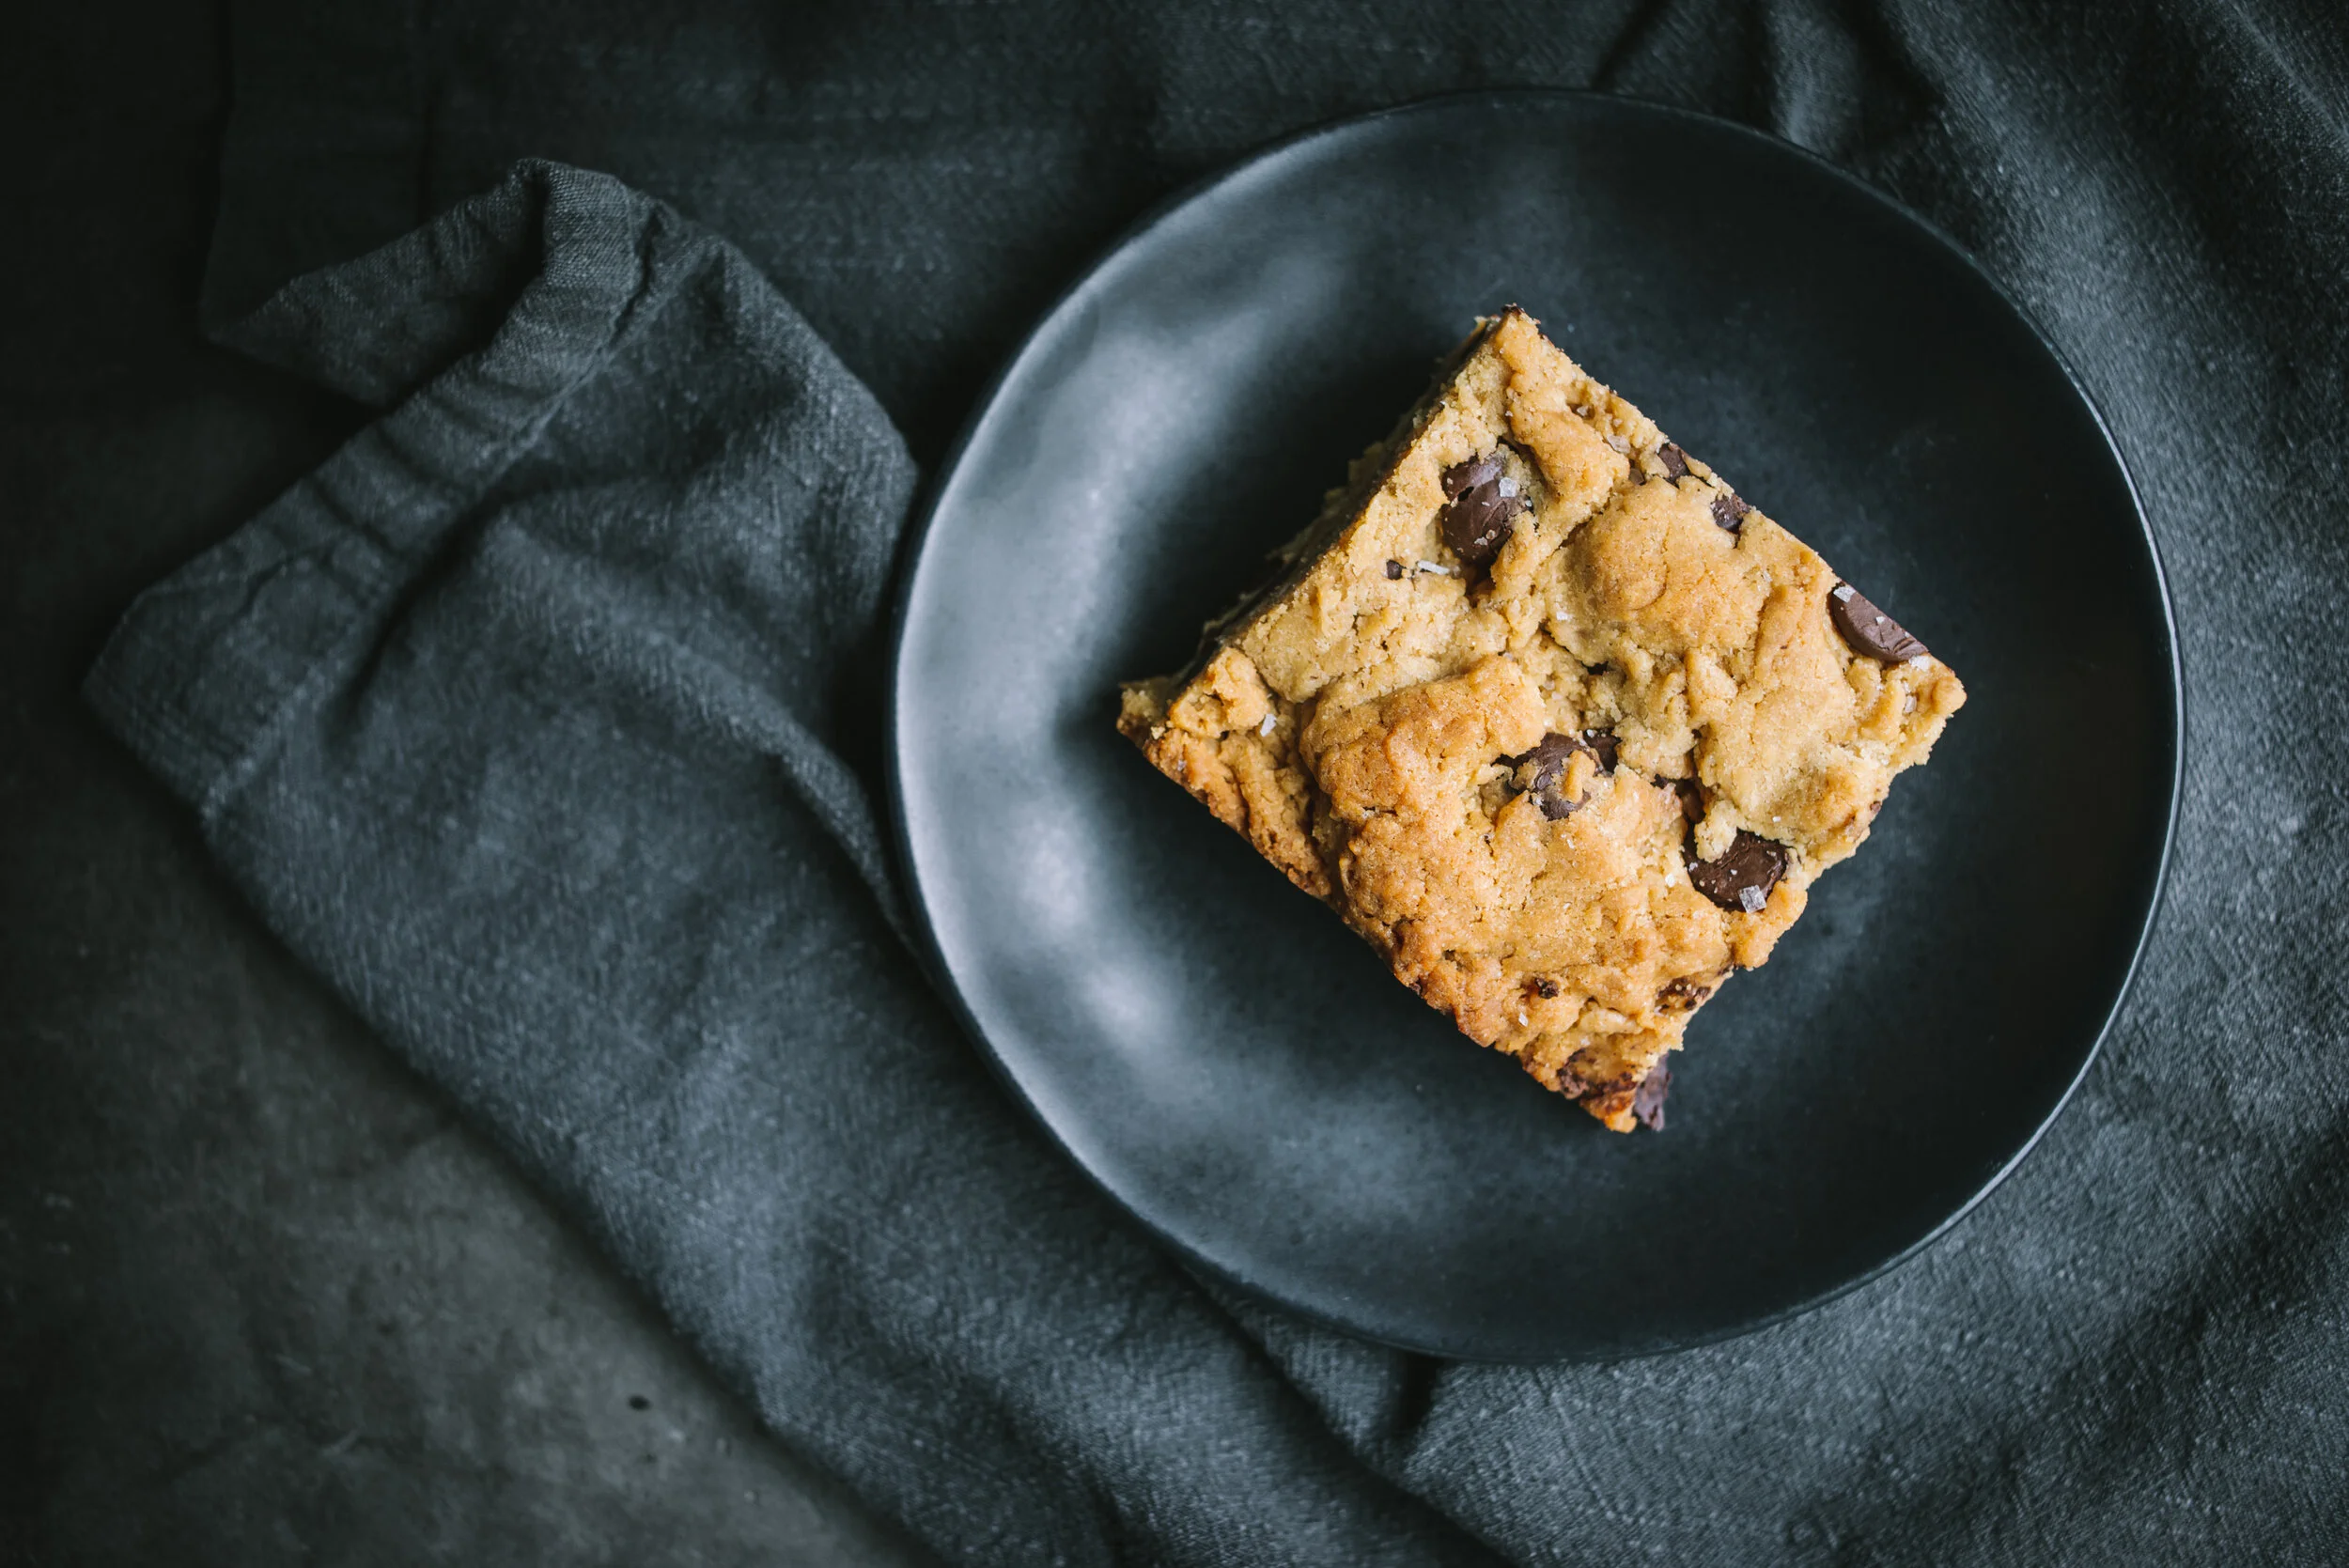
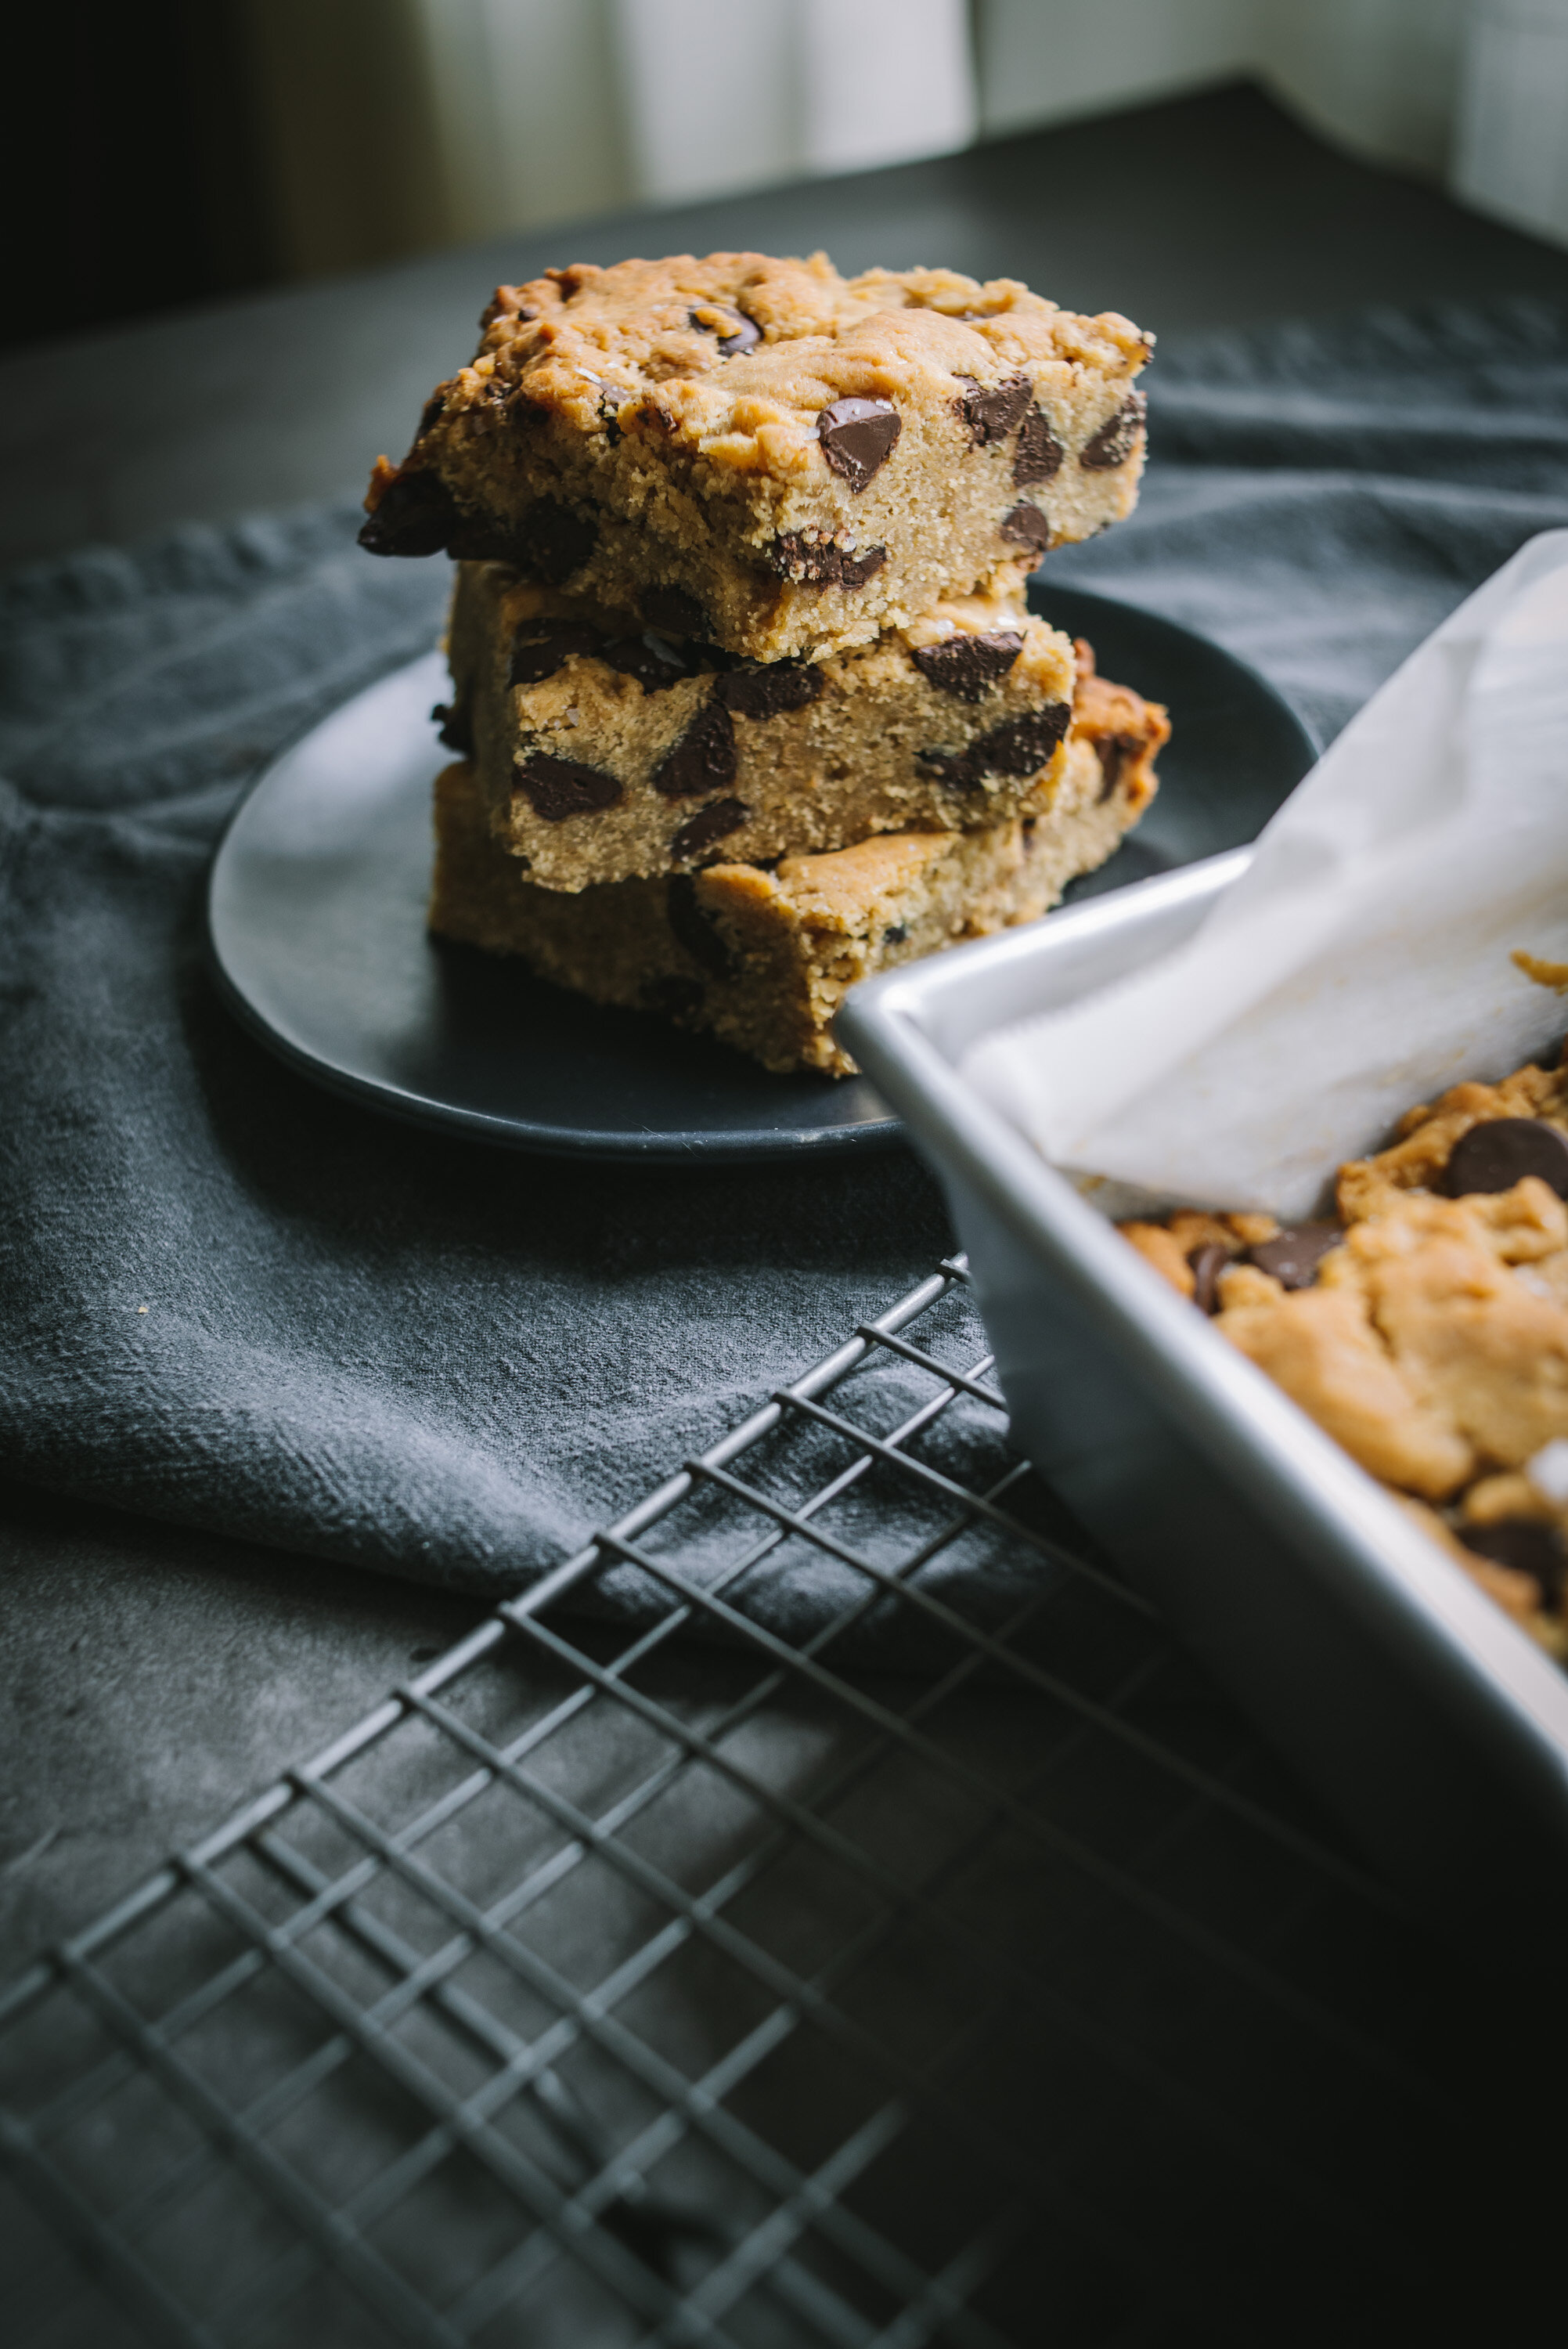
Peanut Butter and Chocolate Blondies. These are so good! I made them about a week ago and they’re all gone now. Jeff and I finished the last one today. The serving size I show here can be a bit much (or not!), so I ended up cutting the nine squares in half for 18 pieces total. It’s a nice snack size. I had been craving peanut butter and chocolate for like two weeks and I finally made this recipe. The original recipe was more of a thin bar, baked in a 9”x13” pan for 20 minutes, but I wanted something at least an inch thick so I baked them in a 9”x9” pan for about 40-45 minutes and they came out great. What I like about this recipe is that there is an extra layer of peanut butter inside, not a lot but enough to make it really good! 

I hope you are all getting along well, we’re fine here and I’ve been working on the garden a bit more, I’ve started some herbs and vegetables from seed, which I might blog about if it all works out, I’m learning all the time over here. But so far so good. It has been a bitch trying to buy seeds online, either no stock or way overpriced on Amazon, but my local nursery was well stocked with curbside pickup, and my neighbor gave me some seeds for Parsley, Dill and Cilantro. I used to buy starters for herbs, but some tend to bolt sooner than you want, so it’s better to just grow by seed and stagger the planting (seeding) so you always have a fresh harvest. 

This recipe is pretty easy and straight forward, like I said I used a smaller baking pan for a longer oven time and was really happy with the results. But you could try the 9”x13” dish for 20 minutes.

If you love chocolate and peanut butter you will love this! I do!

peanutbutter_chocolate_blondies-2.jpg
peanutbutter_chocolate_blondies-3.jpg
peanutbutter_chocolate_blondies-4.jpg
peanutbutter_chocolate_blondies-5.jpg

Peanut Butter and Chocolate Blondies

  • 1 1/2 sticks (3/4 cup) salted butter

  • 3/4 cup creamy peanut butter, divided into 1/2 cup and 1/4 cup

  • 1 cup light brown sugar

  • 1/2 cup granulated sugar

  • 2 eggs

  • 1 tablespoon vanilla extract

  • 2 cups all-purpose flour

  • 1 teaspoon baking powder

  • 1 cup semi-sweet chocolate chips

  • flaky sea salt

Preheat the oven to 350 degrees F. Grease a 9x9 inch baking dish lined with parchment paper.

In a medium sized pot melt together the butter and 1/2 cup peanut butter over a medium heat on the stove, stirring frequently until melted. Stir in the brown sugar, sugar, and vanilla, transfer to a large bowl and then whisk in the eggs gradually to temper them so that they don’t cook. Stir in the flour and baking powder until well combined. Transfer the bowl to the freezer and chill 5 minutes or the refrigerator for 15 minutes, until the dough is no longer warm to the touch. Stir in the chocolate chips. 
Spread 1/2 the dough out in the prepared dish. Dollop and swirl the remaining 1/4 cup peanut butter over the dough. Add the remaining dough overtop, don't worry if it doesn’t fully cover the peanut butter. Transfer to oven and bake for 40-45 minutes, until set in the center. Remove from the oven and sprinkle with sea salt. Let cool and then cut into bars. Store for up to 5 days in an airtight container.

Adapted from Half Baked Harvest

Raspberry Pistachio Oat Scones

raspberry_pistacio_oat_scones-1.jpg

I haven’t made scones in a long long time. There are a couple recipes here in the archives but I haven’t made them like this before. Last week I saw Teresa posted this recipe on Instagram and it sounded really good. Plus I still have raspberries in the freezer from last summer’s harvest! I had to rinse and defrost them so they basically mushed into the batter, but not a big deal as they really tasted great. Two things I like about this recipe. 1. there is no added sugar other than maple syrup, and 2. I really like the texture of the oats in the scones. This recipe was also different in that you have sort of a shaggy loose dough, so you form it in a circle on your baking sheet, then pre-cut the slices (but not separating them), bake, then slice them apart afterward. The recipe was super easy and like I said I think it tastes great, these are not the dried out scones of yesteryear. You know what I mean? Like the ones Larry David prefers? Have you been watching the most recent Curb Your Enthusiasm? I’m trying to find a link to the scone scene, but all I can find is this part where he wants to open a spite store next door to Mocha Joe’s after being banned from there, and he thinks he knows what is the BEST scone to serve at his new spite cafe. Anyway it’s pretty funny because his scones are dry as the Sahara and nobody likes them. I promise these are not dry scones. Also, there’s an optional glaze I’ve included below in the recipe, I didn’t use it and kinda like this barely-sweet scone. However if you’re wanting something sweeter be sure to top them with the glaze. Enjoy!

raspberry_pistacio_oat_scones-3.jpg
raspberry_pistacio_oat_scones-2.jpg
raspberry_pistacio_oat_scones-4.jpg

Raspberry Pistachio Oat Scones

  • 1 cup all-purpose flour

  • 1 cup oats

  • 1 tablespoon baking powder

  • 1/2 teaspoon salt

  • 4 tablespoons butter, softened almost melted

  • 1/4 cup pure maple syrup

  • 1 tablespoon vanilla extract

  • 1 large egg

  • 1/4 cup whole milk greek yogurt

  • 1 cup raspberries

  • 1/2 cup chopped pistachios

Preheat oven to 400°F. Line a baking sheet with parchment paper and set aside. 

In a large bowl whisk together flour, oats, baking powder and salt in a bowl. Set aside.

In a separate bowl whisk together the butter, maple syrup, vanilla extract, egg, and whole milk yogurt.

Add the wet ingredients to dry ingredients and stir to combine with a wooden spoon. Gently fold in raspberries and pistachios. They will get a bit smushed. (mine did a lot!)

Place batter on top and round it into a disk shape. Batter will be sticky. Cut into 6-8 pieces (depending on the size of scone you want, I did 6) so when they come out of the oven you can run the knife through again to fully separate. 

Bake for 20-25 minutes, rotating the sheet half-way through to ensure even cooking. When done, they should be slightly firm. Finish cutting and enjoy! (They can keep on the counter, covered, for one day, but I recommend refrigerating any more than that because of the fresh fruit)

Glaze (optional)

  • 1 cup powdered sugar

  • 4-5 tablespoons milk

  • 1/2 teaspoon vanilla extract

Whisk together all the ingredients until smooth and drizzle over cooled scones.

Adapted from @aloveafare

Crispy Thin Chocolate Chip Cookies

crispy_thin_chocolate_chip_cookies-1.jpg

Crispy Thin Chocolate Chip Cookies. I’ll tell you right now, this recipe is a keeper! I’ve been eager to make these cookies ever since I saw David Lebovitz’s blog post recently. I’ve made chocolate chip cookies before, you might remember my 2-ways post back a few years ago with that giant cast-iron pan cookie! And while those are good, these are much much better. These are absolutely delicious. They’re similar to Tate’s Chocolate Chip Cookies. What makes them thinner and crisper? I compared the two recipes and while they’re quite similar in ingredients, this one here has less flour, less egg and the addition of water. Water? Maybe that’s the secret ingredient! 

In any case I made a couple changes, using dark brown sugar rather than light brown sugar, I think it works fine. And I chopped up 7 ounces of 72% Cacao dark chocolate bars rather than using chocolate chips, it’s up to you but I like the big chocolate pieces in the cookie. David has the dough balls scooped out around a 1/4 cup each, I think that might be too much, I used a heaping tablespoon of cookie dough, rounded it out into a ball and they were pretty large, you can see from my photo below that even spacing them out a lot they still ran into each other. You basically want a 1”-1 1/4” ball. I got out my big-ass baking sheet on the next round so they had plenty of room to spread. The following batches I went for more of a 1” size ball. And all of them were done more close to 15 minutes. Not only will the time depend on the size of the cookie, but if the cookie dough is left out of the fridge longer they might be done a minute or two sooner. So keep an eye on them towards the end.

It’s January which marks the 7th anniversary of this blog! I can’t believe I’m still doing this, lol. I’ve learned a lot and have become much more comfortable cooking and baking and of course photographing the whole business. Much thanks to those that stop by to see what I’m up to, I appreciate your comments and such. I know blogging is not so much a thing these days but personally appreciate everyone out there that’s sticking to it and sharing recipes, how-tos and all that. The internet has become so toxic over the years, sometimes it’s nice to just chill out and read about cookies. I have quite a few recipes I want to share with you over the next few weeks, some of my favorites that have been on repeat. I think you’ll enjoy them. Speaking of enjoy, please please make these cookies, you won’t be disappointed.  David’s recipe is adapted from Joanne Chang’s Pastry Love: A Baker’s Journal of Favorite Recipes.

crispy_thin_chocolate_chip_cookies-2.jpg
crispy_thin_chocolate_chip_cookies-3.jpg
crispy_thin_chocolate_chip_cookies-4.jpg
crispy_thin_chocolate_chip_cookies-5.jpg
crispy_thin_chocolate_chip_cookies-6.jpg
crispy_thin_chocolate_chip_cookies-7.jpg
crispy_thin_chocolate_chip_cookies-8.jpg
crispy_thin_chocolate_chip_cookies-9.jpg
crispy_thin_chocolate_chip_cookies-10.jpg

Crispy Thin Chocolate Chip Cookies

  • 8 ounces (225g) (2 sticks) unsalted butter, at room temperature

  • 1 cup (200g) superfine sugar (or put regular sugar in blender for a few seconds)

  • 1/2 cup (100g) firmly-packed dark brown sugar

  • 1 large egg, at room temperature

  • 3 tablespoons (45g) water

  • 2 teaspoons vanilla extract

  • 1 3/4 cups (245g) flour

  • 1 1/4 teaspoon flaky sea salt or kosher salt (if using Morton's kosher salt, use 3/4 teaspoon or 1 teaspoon for more profound saltiness)

  • 1 teaspoon baking soda

  • 1 1/2 cups (280g, 7-10 ounces) bittersweet or semisweet chocolate (chopped or chips)

In a stand mixer fitted with the paddle attachment beat the butter and sugars on medium speed until light and creamy, about 5 minutes. Or use a hand mixer, doing this by hand will wear you out and take much much longer.

Stop the mixer and scrape down the sides with a rubber spatula, add in the egg, water, and vanilla and mix until well combined.

In a medium bowl mix together the flour, salt, and baking soda. Add the chopped chocolate and toss in the flour mixture. With the mixer on low speed, stir in the flour and chocolate chunk mixture until thoroughly combined. Cover the bowl (or transfer to a container and cover) refrigerate the dough at least 3 to 4 hours, or overnight.

To bake the cookies, preheat the oven to 350ºF (180ºC). Line two large baking sheet with parchment paper. Arrange the dough, formed in 1-inch to 1 1/4-inch balls on the baking sheet, spaced at least 3-inches (8cm) apart. (They will spread, so expect to get 5 or 6 on a standard baking sheet.) Press the cookies down slightly with your hand and bake until the cookies have spread and just until there are no light patches across the center, rotating the baking sheet(s) midway during baking so they bake evenly. They'll take about 13-15 minutes, check the cookies a few minutes before the timer goes off and see if they need longer. The time will depend on the size of the cooker, larger will take a bit longer but only a minute or two more.

Remove the cookies from the oven and let cool for 5 minutes. Transfer the cookies to a wire rack and cool completely.

Storage: The dough can be refrigerated up to four days, or frozen for up to three months. The cookies will keep in an airtight container for up to three days but are best the day they are baked.

Adapted from David Lebovitz who adapted it from Joanne Chang

Zucchini Nut Bread

zucchini_nut_bread-8.jpg

Zucchini Nut Bread. I didn’t expect to make this so soon. Our zucchini plant is growing so quickly now and producing more than we anticipated. We’ve picked 4 zucchini in the past week and more are on the way. This is the first time we’ve grown it so I didn’t know what to expect. Last year I planted a yellow squash and that didn’t work out, all male blossoms and no squash. But we did some changes to our soil this year and it’s made a big difference. I’m not sure if I posted about this but we removed all our old soil in the garden beds (which was potting soil) and replaced it with a proper soil/compost mix and everything is growing great! The weather has been unusually mild so far this July, seriously rain in Portland in July? Almost unheard of. So it’s been more like a longer spring season. Which is ok with me, and the grass, but I think those tomatoes would appreciate a bit more heat. The weather forecast for this week is in the 70s!? Yep. Weird. 

The recipe is adapted from Sally’s Baking addiction and it’s good! It has lots of cinnamon which I love. I almost wish it had more zucchini in it. I’ll add more next time because I’m certain there will be a next time with all this zucchini, and I’ll update on this post. The original recipe added chocolate chips, but I didn’t really want that for this bread (cake!) so I added what nuts I had on hand, about 1/4 cup pistachios and 1/4 cup crushed hazelnuts. This Zucchini Bread is light in texture, and I kinda wish it were a bit more dense, I’ll experiment some more and let you know how it works out. 

It’s super delicious, easy to make and I’m sure you will enjoy this recipe.

zucchini_nut_bread-1.jpg
zucchini_nut_bread-2.jpg
zucchini_nut_bread-3.jpg
zucchini_nut_bread-4.jpg
zucchini_nut_bread-5.jpg
zucchini_nut_bread-6.jpg
zucchini_nut_bread-7.jpg
zucchini_nut_bread-9.jpg
zucchini_nut_bread-10.jpg

Zucchini Nut Bread

  • 1 and 1/2 cups all-purpose flour

  • 1/2 teaspoon baking powder

  • 1/2 teaspoon baking soda

  • 1/2 teaspoon salt

  • 2 teaspoons ground cinnamon

  • 1/4 teaspoon ground nutmeg

  • 1 cup chopped nuts 

  • 1/2 cup canola or vegetable oil

  • 1/2 cup packed light or dark brown sugar

  • 1/2 cup granulated sugar

  • 1 large egg, at room temperature

  • 2 teaspoons pure vanilla extract

  • 1 cup grated zucchini (about 1 medium)

Preheat the oven to 350°F (177°C). Grease a 9×5” loaf pan lined with parchment paper with butter.

In a large bowl whisk the flour, baking powder, baking soda, salt, cinnamon and nutmeg together then stir in the nuts. Set aside. In a medium bowl, whisk the oil, brown sugar, granulated sugar, egg, vanilla, and zucchini together until combined. Pour the wet ingredients into the dry ingredients. Gently combine with a wooden spoon; do not over mix. Spread the batter into prepared loaf pan. Bake for 45 – 55 minutes. The bread is done when a toothpick inserted in the center comes out clean. Remove the bread from the oven and set on a wire rack. Allow to cool completely before slicing.

Cover and store leftover bread at room temperature for up to 5 days (I’m not sure I would leave it out this long, and I’m not sure it wouldn’t get eaten in 5 days!)

Adapted from Sally’s Baking Addiction


Stone Fruit Galette

stone_fruit_galette-1-2.jpg

Stone Fruit Galette. This came out so good I wanted to share it with you here on the blog. With summer fruit in its prime right now there is no better time to make this. You can use any combination of fruit, but I highly recommend doing a mix of peaches, nectarines, plums, cherries and apricots. And I also recommend this pie crust that I made a couple months ago, it’s so flaky and soft, it’s more like a pastry and works so perfect with this fruit. The difference is cake flour!

On the home front here, our vegetable garden is just getting started with some green tomatoes here and there, squash and peppers are still too small to pick, but the raspberry bush has been a real bounty, I’ve been picking and flash freezing almost daily, they taste so good on their own but I’d like to make something, maybe a jam or a tart. If this doesn’t get eaten within a day (how is that possible? ha ha) you’ll need to refrigerate the galette. I hope you are having a great summer, or winter depending on where you are in the world (hello Australia!). Enjoy!

stone_fruit_galette-2.jpg
stone_fruit_galette-3.jpg
stone_fruit_galette-4.jpg
stone_fruit_galette-5.jpg
stone_fruit_galette-7.jpg
stone_fruit_galette-6.jpg

Stone Fruit Galette

  • 3 cups stone fruit (peaches, nectarines, plums, cherries, apricots) sliced

  • 1/3 cup sugar

  • 4 tablespoons cornstarch

  • 1/4 teaspoon cardamom

  • 1/2 teaspoon cinnamon 

  • 1 pie crust (recipe here)

Preheat oven to 400°F. Cut the fruit to about 1” pieces, save a few slices aside to arrange on the top. Place the cut fruit in a bowl along with the sugar, cornstarch and spices. Set aside. Roll out your dough to a 13” round.  Place the dough on a parchment lined baking sheet or in a cast-iron skillet. Spoon the filling onto the dough, leaving a 2-inch border around the edge. Fold the edges up and over the filling, forming loose pleats. Top with remaining fruit slices and cherry halves. Bake until the filling is bubbling and the pastry is golden brown, about 30-40 minutes. 

Coconut Cake

Coconut Cake

Wouldn’t you know. On Jeff’s Birthday I’m ready to make this cake and… the oven is broken. It won’t heat and it’s only three years old! Luckily I had only prepared the cake pans while attempting to preheat the oven, so it wasn’t a total loss.

Read More

Apple Pie

apple_pie-1.jpg

As simple as it can be to make Apple Pie, I still found myself searching for a recipe last week. You might remember I’ve made a French Apple Pie, but it’s actually been a very long time since I’ve made a traditional Apple Pie. So here it is! And the pie crust here is really my favorite, it’s easy to roll out and work with, when baked it keeps it form nicely without falling apart and at the same time doesn’t taste like cardboard. The apples? For this pie I used King David apples that we picked up at an apple festival last month. I’m never sure which apples are which these days with so many varieties, is it good for baking? eating? This was a good choice, they didn’t mush up and had a really nice texture, some bite to it, with a spicy flavor. So thumbs up on the King David Apples. 

We had a lovely Thanksgiving for two this year. I made a turkey roulade - a turkey breast rolled with dried cherry and sausage stuffing. It was the third time I’ve made this and it works out really great for a small feast. It’s deserving of a blog post so I’ll just have to make it again. I’m sure Jeff won’t mind.

apple_pie-2.jpg
apple_pie-3.jpg
apple_pie-4.jpg
apple_pie-5.jpg
apple_pie-6.jpg

Apple Pie

  • 6-8 apples (peeled, cored and sliced)
  • Lemon juice, 1/2 lemon squeezed
  • 1/2 teaspoon cinnamon 
  • 1/2 teaspoon nutmeg
  • 1/4 teaspoon cardamom
  • 1/4 clove
  • pinch of salt
  • 1/4 cup sugar
  • 1/4 cup brown sugar
  • 1/4 cup flour
  • 2 tablespoons butter
  • 1 egg for egg wash 
  • 1 tablespoon or so Muscovado sugar (or large granulated sugar)

Pie Dough

  • 2 1/2 cups all-purpose flour
  • 2 tablespoons sugar
  • 1 teaspoon salt
  • 2 sticks (16 tablespoons) cold unsalted butter, cut into 1/2-inch cubes
  • 6 to 8 tablespoons ice water

To make the dough in a food processor, pulse together the flour, sugar and salt until combined, about 5 pulses. Add the butter and process until the mixture resembles coarse meal, about 5-7 pulses (you don’t want to over work the dough too much or it will become tough.) Remove from processor and place dough in large bowl, add 6 tablespoons of the ice water, combine with wood spoon. The dough should hold together when squeezed with your fingers but should not be sticky. If it’s crumbly, add more water 1 tablespoon at a time. Turn the dough out onto a work surface, divide in half (I make one half slightly larger for the bottom crust) and shape each into a disk. Wrap separately with plastic wrap and refrigerate for at least 2 hours or overnight.


Filling and Assembly

Preheat oven to 375°F. 

In small bowl combine flour, sugars, salt and spices. In large bowl place sliced apples, squeeze lemon juice, then add flour mixture and toss until well combined. Set aside.

Roll out your bottom crust about 2-3” larger than diameter of pie dish, place in pie dish and trim around the edges. Add the apple mixture. Roll your top crust to fit, cut out any desired designs, place on top of pie, trim any excess and pinch the edges together with thumb and forefinger. Roll out any additional dough and use pie cutter to top with leaf or apple design. Adding a leaf pattern around the edges looks pretty. Whisk the egg in a small bowl and brush over top of pie, sprinkle some granulated sugar.

Bake for 45-50 minutes until brown. Allow to cool a bit before serving. It will slice better if you refrigerate and then bring to room temp. 

apple_pie-7.jpg

Also, I’m sorry to see these pie cutters are no longer available, I’m sure there are more out there but this was a nice selection of designs.